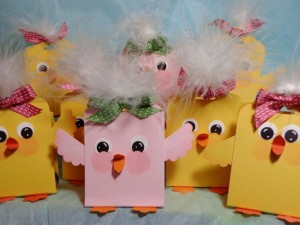
Easter Chicks, an adorable candy/treat holder!

Are you looking for a quick,simple treat to make for friends and your Easter guests? These Easter Chicks will be sure to be a huge hit cause they’re just too dang cute! These are so simple that they make a great project to do with your children too. Why not try creating them using assorted pastel colors? Just picture them as favors at your Easter meal table~ they will look like “Peeps” ! I know they will look simply adorable at each plate for your Easter meal.

Easter Chick Candy/Treat HoldersSupplies:

Ink: Pink Pirouette Classic Pad (126956)

Paper:

Daffodil Delight: (119683) 7” x 2” (score @ 3” & 4”), 1 ½” x 11” (wings)

Whisper White: (100730) ¾’”x 2” (eyes)

Basic Black: (121045) ¾” x 2” (eyes)

Pumpkin Pie: (105117) 1” x 2” (beak & feet)

Tools:      Simply Scored Scoring Tool (122334), Scalloped Edge Tag Punch (133324), Owl Builder Punch (118074), 1 ¼” Scallop Circle Punch (127811), Tombow Multi-Purpose Liquid Glue (110755), Glue Dots (103683), Paper Snips (103579), Sponge Dauber (102892 ), Primose Petals ¾” Stitched Satin Ribbon (126844 ), Signo White Gel Pen (105021 ), Easter Candy, Feather Boa (optional).

Here’s a video showing you how to create these little chick cuties.

Love this idea? Be sure to subscribe to my You Tube Channel and don’t miss any creative videos I share just for you!

We are making these in my stamp clubs this month, the first club just loved them and couldn’t believe how quick they are to make!

Til we meet again,

Click box for latest Digital Downloads April 8 Digital Downloads

Click here to view the  Celebrate the Everyday Catalog.

Click here to view the Annual Catalog

You may purchase any of your stamping, scrap booking and paper crafting products through my online store

Til we meet again,

buy Stampin Up! here!

How to cut an interactive “flip” card in seconds!

Imagine yourself sitting down to create one of those interactive cards that always wow you. Now that you’ve started you’re thinking,” Oh my gosh, what am I crazy?”  You never thought it would take you so long. All that measuring and cutting, measuring and then cut again. You just decided this is one of those cards you will never make again. Hold on~ I have the answer for you! In the time it would take you to just do the cutting of one card you can now cut 10! Nope. This is not a late April Fool’s Joke.

Our Thinlits Label & Circle Card Framelits Dies are the answer to your interactive “flip” card creating woes! These two products have been out for a while but as I have chatted with you lately, several of you have told me you never heard of them. I decided to share them here today & my Hostess Clubs will be using the Label Card Framelit to create a card this month. Here is a video showing you a few ideas on what these can do in just a crank of your Big Shot:

http://www.youtube.com/watch?feature=player_embedded&v=CwdGSYeIn44

Thinlits Circle Card #133479
Thinlits Label Card #133480


I know ~ you just have to get your hands on these baby’s so you can crank out moving cards in no time & wow your friends!With the number of dies you’re getting, plus the die that creates the card itself, the price is a great value-especially to create an interactive card!

Click box for latest Digital Downloads

Click here to view the  Celebrate the Everyday Catalog.

Click here to view the Sale-A-Bration Catalog

Click here to view the Annual Catalog

You may purchase any of your stamping, scrap booking and paper crafting products through my online store

Til we meet again,
buy Stampin Up! here!

Putting all the pieces together to make an Easter Treat Basket

This week I brought you videos sharing some tips and techniques and now it’s time to put all those pieces together to make an Easter Treat Basket. You will learn how to create the basket base and handle then use all your learned elements to embellish your treat basket.  I also share other Easter Treat Baskets I created.

Did you make sure you watched the video all the way to the end? I shared some individual shots of the extra baskets too!

Supplies:

Stamps: Eggstra Spectacular (w-133068,c-133071)

Inks: 2013-2015 In-Color Markers (131260 ), StazOn Jet Black pad (101406 )

Paper: Whisper White cardstock (100730 ), Wisteria Wonder cardstock (122922 ), Fresh Prints Designer Series Paper Stack (132996 )

Misc: Aqua Painter (103954 ), Uni-Ball Signo White Gel Pen (105021 ), Extra Large Oval Punch (119859 ), Multi-Purpose Liquid Glue (110755 ),2 13/8″ Scallop Circle Punch (118874 ), Bird Builder Punch (117191 ), Itty Bitty Shapes Punch Pack( 118309), Basic Pearl Jewels (119247 ),Dotted Scallop Ribbon Border Punch (119275)

When placing your order please use this Month’s Hostess Code: UYC4XWZQ.

Click box for latest Digital Downloads March 25 digital downloads

Click here to view the  Celebrate the Everyday Catalog.

Click here to view the Sale-A-Bration Catalog

Click here to view the Annual Catalog

You may purchase any of your stamping, scrap booking and paper crafting products through my online store

Til we meet again,

buy Stampin Up! here!

How to water color using the side-load technique

So many of you have asked how I do my water coloring on my projects and how did I learn. As my local friends know, I am self-taught in most of my rubber stamping so naturally, I just started with the side-load technique. I know you are thinking why do I say naturally? In the past as one of my many past times I did wood working and painting ( self taught again). One of the techniques I loved doing was called the side-load technique (I didn’t know it was called that) & did it before it became popular in the painting/crafting world. Before our Aqua Painters I would take one of my paint brushes and use my ink pad or re-inker to pick up color. I can tell you that all that have attended my local clubs and events say they wish they had learned this technique earlier because of the results. I hope you enjoy today’s video and give this water coloring technique a try!

Go grab some Whisper White cardstock, a stamp, ink & your Aqua Painter and start water coloring!

Supplies:

Stamps: Eggstra Spectacular (w-133068,c-133071)

Inks: 2013-2015 In-Color Markers (131260 ), StazOn Jet Black pad (101406 )

Paper: Whisper White cardstock (100730 )

Misc: Aqua Painter (103954 ), Uni-Ball Signo White Gel Pen (105021 ), Extra Large Oval Punch (119859 ), Multi-Purpose Liquid Glue (110755 )

This Month’s Hostess Code Is: UYC4XWZQ.

Click box for latest Digital Downloads March 25 digital downloads

Click here to view the  Celebrate the Everyday Catalog.

Click here to view the Sale-A-Bration Catalog

Click here to view the Annual Catalog

You may purchase any of your stamping, scrap booking and paper crafting products through my online store

Til we meet again,

buy Stampin Up! here!

PPS #3- Easter Treat Basket

This weeks Progressive Project Series (PPS) videos will be elements to create cute Easter Treat Boxes perfect for your Easter table. In today’s video you will be creating all the punched pieces and prepare your Paper Laced Tea Doily.

Supplies used:

Paper:

2013-2015 In-Color 8 1/2″x11″ assorted cardstock  (#131200)

Misc:

2 1/2″ Scallop Circle Punch (#118874)

Bird Builder Punch (#117191)

Itty Bitty Shapes Punch Pack (#118309)

Paper Snips (#103579)

Stampin’ Pierce Mat (#126199)

Pen

This Month’s Hostess Code Is: UYC4XWZQ.

Click box for latest Digital Downloads March 25 digital downloads

Click here to view the  Celebrate the Everyday Catalog.

Click here to view the Sale-A-Bration Catalog

Click here to view the Annual Catalog

You may purchase any of your stamping, scrap booking and paper crafting products through my online store

Til we meet again,

buy Stampin Up! here!

Kind & Cozy with Flower Shop card idea

Today is the reveal of this week’s Progressive Project using the Kind & Cozy and Flower Shop stamp sets. You will find that the assembly of all the elements is pretty quick and simple that ends with a project that will brighten anyone’s day.

Now all you need to do is decide who you will send this card to.

Supplies used in this Progressive Project:

Stamps: Kind & Cozy ( w-129123 ,c-129126 ), Flower Shop ( w-130939  c-130942  )

Inks: Daffodil Delight (126944 ) , Coastal Cabana (131164 ) , Melon Mambo (126948 )

Paper: Whisper White(100730), Melon Mambo ( 115320),Fresh Prints Designer Series Paper Stack(132966)

Misc: Big Shot (113439 ), On Film Framelits Dies (123969), Stampin’ Dimensionals (104430 ), Tea Lace Paper Doily(129399), Simply Pressed Clay (130685),Buttons & Blossoms Simply Pressed Clay Molds (131727)

Click here to view the  Celebrate the Everyday Catalog.

Click here to view the Sale-A-Bration Catalog

Click here to view the Annual Catalog

You may purchase any of your stamping, scrap booking and paper crafting products through my online store

Want to see a picture of this Progressive Project? Click here.

Til we meet again,

buy Stampin Up! here!


How to omit ink from your rubber stamp

In this mornings Progressive Project Video I will share how to omit ink from your rubber stamps when you only have a small portion that you want a different color. Did you notice I said this mornings video? I will be sharing 2 videos with you today, one this morning and one this afternoon.

Enjoy the following video. ( if you are viewing this in an email and don’t see the video you will need to go to : judistamps.com to view it.)

Don’t you just how easy it will be to add those little touches of color now that you have learned how to omit color from your rubber stamp quickly & easily! Are you ready to put your elements together for this week’s Progressive Project? To view the video click here.

Click here to view the  Celebrate the Everyday Catalog.

Click here to view the Sale-A-Bration Catalog

Click here to view the Annual Catalog

You may purchase any of your stamping, scrap booking and paper crafting products through my online store

Til we meet again,

buy Stampin Up! here!

Help, I need help getting my paper out of my framelit!

Does this sound familiar? You have run your cardstock & detailed framlit through the Big Shot and now you can’t get your paper out of the framelit. There is a simple solution as I have shared in this video with the final elements for this week’s Progressive Project.

Let me know if this helps you in getting your paper out of your framelits easier. To view the next video click here.

Yes, this weeks Progressive Project is a card! I share one of my favorite layouts and color combinations in this project. If you need any supplies to make this Progressive Project you can order them online through my online store. If you order them today you will be creating this project before next weekend! Don’t forget it’s Sale-A-Bration through March 31,2014.

Click here to view the  Celebrate the Everyday Catalog.

Click here to view the Sale-A-Bration Catalog

Click here to view the Annual Catalog

You may purchase any of your stamping, scrap booking and paper crafting products through my online store

Til we meet again,

buy Stampin Up! here!

Learn the secret to lining up Stampin” Up! flower stamps & coordinating punches

In today’s Progressive Project video you will learn the secret to lining up flowers & punches that co-ordinate. You see, sometimes it does matter which way you mount your flower or other images to make lining them up &  punching them  out a breeze.

If you don’t see the video below go to:  judistamps.com  to view.

This is a great tip for those images and punches that look like they are equally spaced but aren’t! View the next video here.

Supplies:

Flower Shop stamp set ( w-130939   , c-130942 )

Gorgeous Grunge stamp set ( w-130514 , c-130517 )

2 1/2″ Circle Punch (#120906)

Pansy Punch (# 130698)

Melon Mambo ink pad (# 126948)

Coastal Cabana ink pad (#131175 )

Click here to view the  Celebrate the Everyday Catalog.

Click here to view the Sale-A-Bration Catalog

Click here to view the Annual Catalog

You may purchase any of your stamping, scrap booking and paper crafting products through my online store

Til we meet again,

buy Stampin Up! here!


Creating Simply Pressed Clay Flowers

This week’s Progressive Project starts today with the first element which we will create Simply Pressed Clay Flowers. In this video you will learn how easy it is to create these wonderful, fun embellishments that you will want to include in all your paper crafting projects. Be sure to keep a stash of these cuties on hand so they are ready to use as needed!

Be sure to go to judistamps.com if you don’t see the video above.

I’ll bet these pressed clay flowers were quicker and easier than you thought they would be! View the next video & elements here. Here are the supplies I used :

Simply Pressed Clay (#130685)

Buttons & Blossoms Simply Pressed Clay Molds (#131272)

Daffodil Delight ink pad (#126944 )

Aqua Painter (#103954 )

Sponge  Dauber (#101610 )

Til we meet again,

buy Stampin Up! here!

Progressive Projects Series- project 1 the big reveal!

Today is the first big reveal of my Progressive Projects Series. Just couldn’t wait for today to come to see what we would be making with all of our elements that we created? Many of you have already placed your orders for the products you didn’t already have and mentioned that you just couldn’t wait to try the techniques and tips I taught during this first video. Kudos to you! You will be creating these wonderful shabby-chic tags soon!

Drum roll. . . . . . . . . .

Here’s your video reveal!

Here are a few close ups of the different gift tags
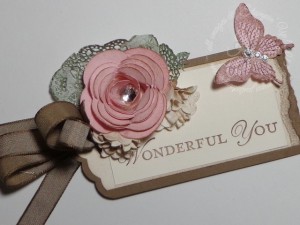
Shabby Chic gift tag 1


Pink Pirouette on Crumb Cake tag base


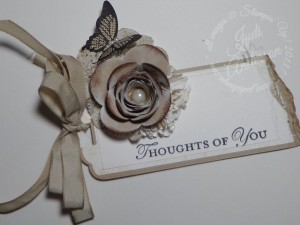
Shabby Chic gift tag 2


Crumb Cake with Soft Suede sponging on Crumb Cake tag base


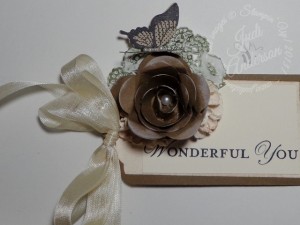
Shabby Chic gift tag 3


Soft Suede with Whisper White sponging on Soft Suede tag base


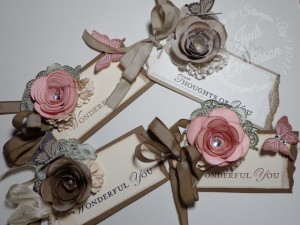
Shabby Chic gift tags


Four more assorted tags that I will be putting onto gifts and cards. That’s right! These will make a wonderful card embellishment for that special person/occasion.


I look forward to sharing my next Progressive Project Videos with you starting on March 12th.

Until then feel free to contact me with any questions you may have or techniques/projects you would like me to show in these videos.

All supplies in these videos may be purchased through My Online Store/ 24/7.

Til we meet again,

buy Stampin Up! here!

Progressive Project #1,day 3

I am so happy to hear that my Progressive Project Video from yesterday helped making the paper roses easier for several of you. Due to my coughing episode during today’s video I forgot to give you a technique tip. When tearing, if you tear the paper towards you, the rough edge will be on top. If you tear away from you, the rough edge will be on the bottom. Sometimes I tear both ways in one tear to get another unique look. Now for today’s elements:

I am sure you can’t wait to put all these elements together tomorrow!

Til we meet again,

buy Stampin Up! here!

Progressive Project Series project 1, day 2

I hope you enjoyed the first video of this series and plan on creating along with me. Have you been wanting to learn the tricks to creating roses with our Spiral Flower Originals BigZ Die? You’re in luck! One of the 2 elements you will be creating today is creating a rose with this new die.

Supplies used today:

Stamps: Polka Dot Pieces (w-#129705 , c-#129708 )

Paper: Pink Pirouette cs (# 111351)

Ink: Soft Suede Ink Pad (#126978 )

Misc.:  Elegant Butterfly punch (#127526 ), Spiral Flowers Original Die (#129379), Stampin’ Sponge (#101610 ), Silicone Craft Sheet (#127853 ), Rhinestone Basic Jewels (#119246 ), Bone Folder (#102300 ), Hot Glue

Take advantage of our Sale-A-Bration promotion. Details Here.

Til we meet again,

buy Stampin Up! here!

How do I create a flower from my scalloped circle punches?

In today’s video you will learn how to create flowers from your scalloped circle punches.

Are you ready for this?

A BRAND NEW,EXCLUSIVE SERIES FROM ME!

I’ve been receiving several requests to bring an interactive series here. As you know, I’ve been working on Google Hangouts On Air and am almost ready to do a test run. BUT you are wanting me to bring you videos showing you tips,tricks and techniques while creating a project. Here is what I came up with for YOU!

My Progressive Project Series

Are you intimidated or get confused when you watch some videos on paper crafting & stamping projects?

Would you like to learn some of the tips, tricks, & techniques to making your paper crafting & stamping projects easier?

Then I think you are going to love this series!

Here’s what I will be bringing you;

  • A project that you are able to easily follow without having to continually stopping the video.
  • I will teach you techniques on elements & turn them into a project at the end of the week
  • A step by step process that even the newest stamper will be able to follow ( for you veteran stampers too!)
  • I will bring you at least 1 element each day, every/other week
  • I will not reveal the project until the end of the week where I take you through step by step to complete the project
  • The types of projects will be : boxes,cards,tags,home decor & more
  • I will be bringing you these here every Wednesday through Saturday.

So, let’s begin!

Products used:
Paper: Very Vanilla cardstock #101650
Inks: Soft Suede ink pad #126978
Misc.: 1 1/4″ Scallop Circle Punch #127811 , Paper Snips #103579 , Stampin’ Sponge #101610 , Multi-Purpose Glue #110755 , Bone Folder #102300 , Tea Lace Paper Doilies #129399

Can be purchased at my Online Store and delivered right to your front door.

Til we meet again,

buy Stampin Up! here!


Hangout On Air Week #3

Many of you have enjoyed seeing our Hangout on Air series- “Don’t hesitate, just create!” . I have started this series by showing you projects from the Celebrate the Everyday & Sale-A-Bration Catalogs. I was asked, by several of you, if it was possible to share them here so you could see what they are all about. I am planning on continuing to bring different, exclusive, ideas through the Google Hangouts on a continuing basis, and having different guest stampers. I also plan on demonstrating projects and eventually offering interactive Hangouts with YOU!!  However, they will only be shared here for a short time.

Q- I am enjoying your Hangouts, how can I be sure not to miss any of  the Hangouts you do?

A- Just be  sure to have a Google+ account, add me to your circle of friends, and I will add you to mine. I will then invite you to

view all of our Hangouts. It’s that simple!

Here is our latest Google+ Hangout: ( I am still working out the kinks on the video quality)

Remember. If you already have a Google account, let me know and I will add you to my circle of friends & if you don’t, I urge you to join so you can receive even more projects , ideas & tips from me! I would like to thank you for watching this Google Hangout on Air and hope to include you in my circle of friends soon.

Til we meet again,

buy Stampin Up! here!