Perfect Pennants with Resist Embossing Technique

Doing a quick card with a quick technique is so much fun! My monthly Creative Destination members received a tutorial on  how to do Resist Embossing. Would you like to receive Exclusive projects, tips and more every month? Just subscribe to my Creative Destination (newsletter) on the left column to receive a monthly destination like no other!  Unlike other direct sales company reps I don’t solicit,now that does not mean I won’t share & keep you in the know on the latest current specials or news (heck you wouldn’t like me if I didn’t!). These are mostly found in links that you can click on if you want to find out more information.

As promised I created a card with the technique shared. I won’t be giving you the instructions here but if you would like them just subscribe and I will send them your way!
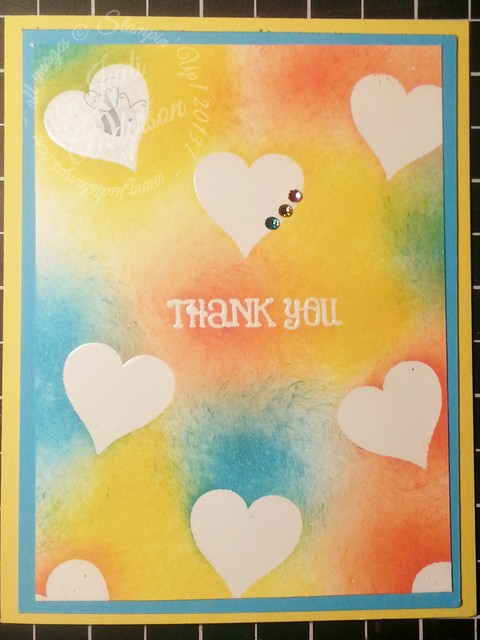
Emboss Resist technique

  Stamps:

  •  Lots of Thanks (w-#129687 c-#129690)
  • Perfect Pennants  (w-#133227 c-#133230)

Paper:

  • Whisper White #107730
  • Daffodil Delight #119683
  • Tempting Turquoise # 102067

Inks:

  • Daffodil Delight #126944
  • Tangerine Tango #126946
  • Tempting Turquoise #126952
  • Versamark #102283

Other:

  • Clear Embossing Powder #109130
  • Embossing Powder # 103083
  • Heat Tool# 129053
  • Stamping sponges #101610

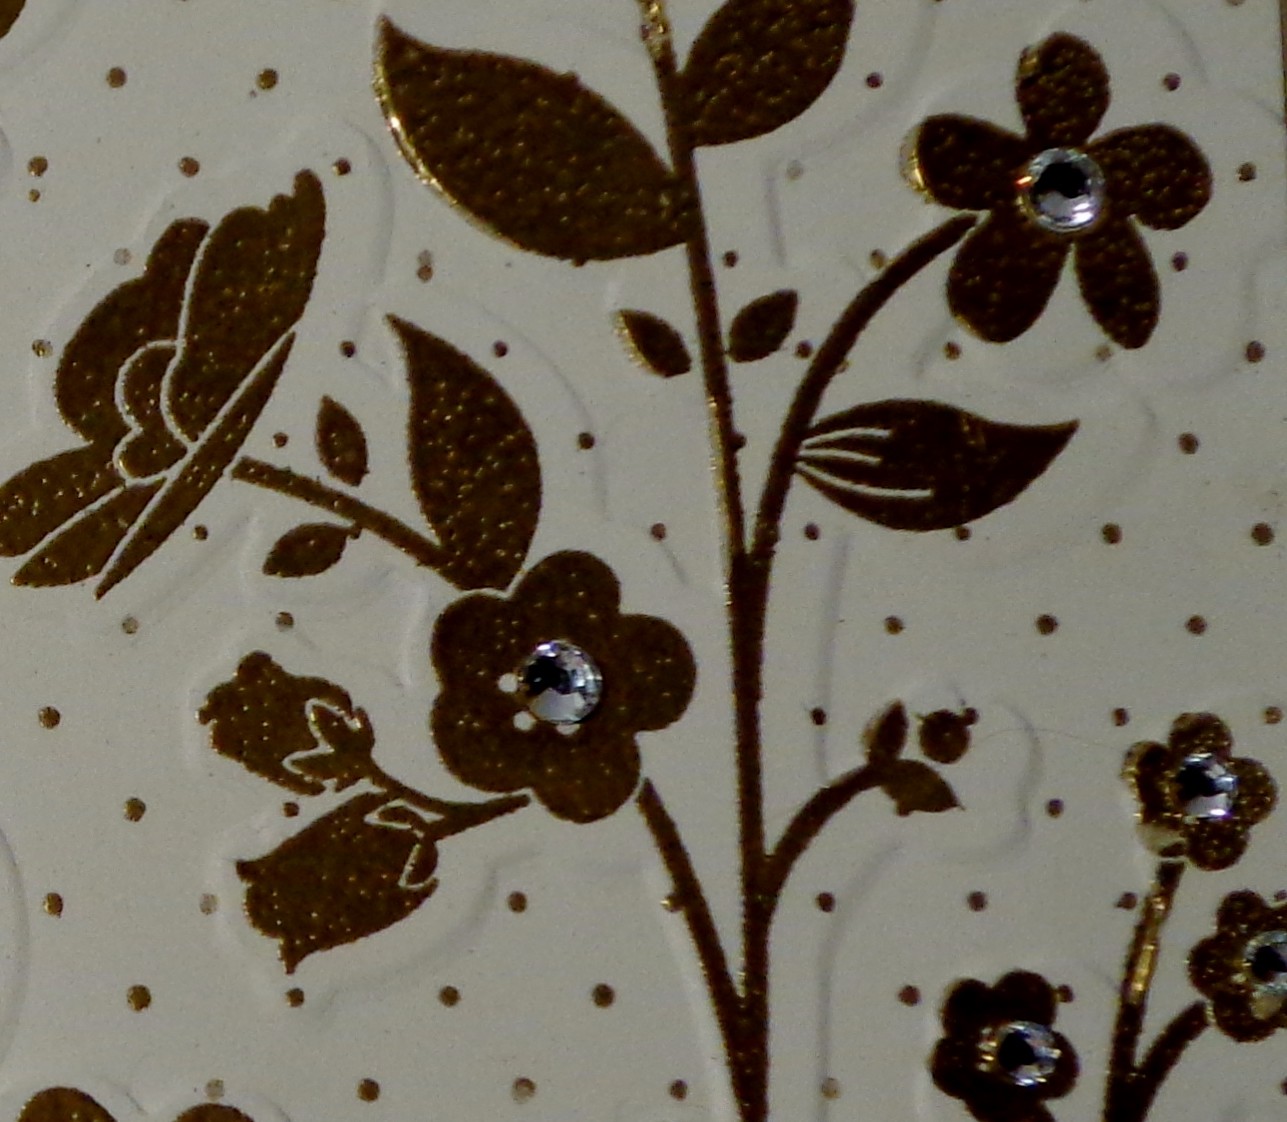
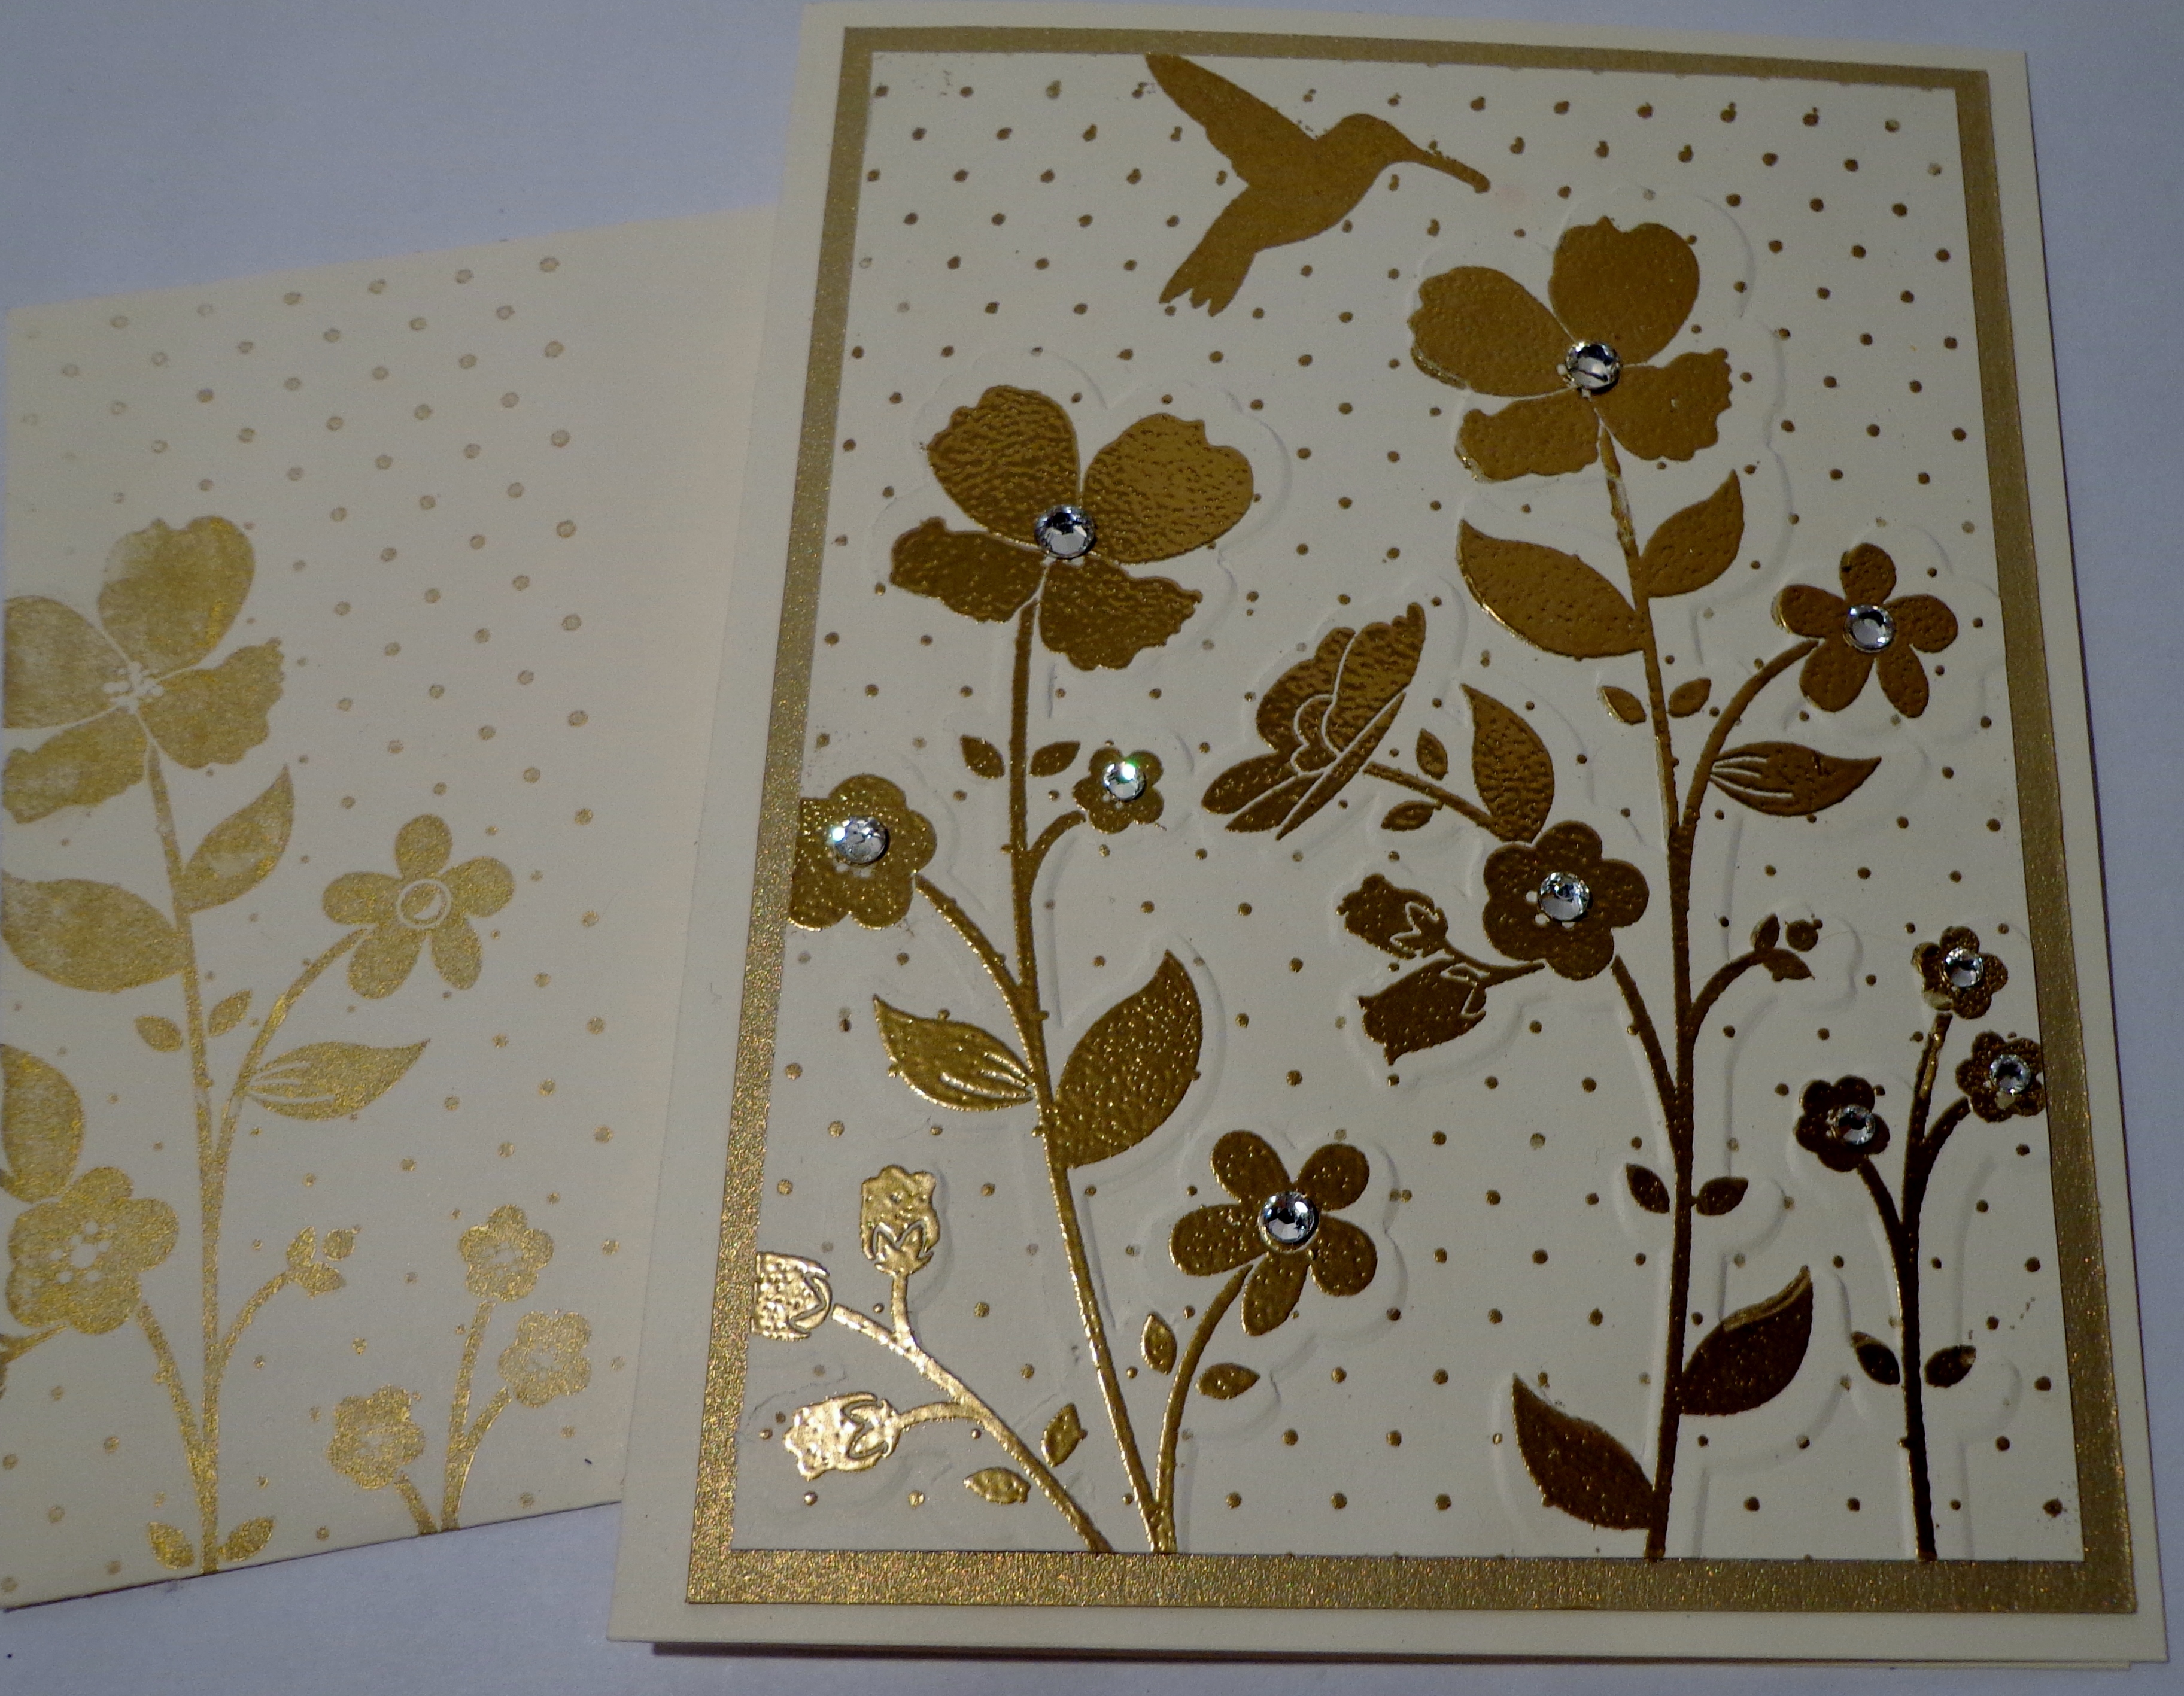
I am little bummed that you can’t see that I customized the rhinestones with my Stampin’ Blendabilities in this picture. Believe me they give this card that special bling!!

Be sure to become a monthly subscriber so you don’t miss out on any exclusive projects, tips, tricks or coupons!

Til we meet again,

buy Stampin Up! here!

A golden birthday

I was recently asked for a few birthday card ideas, one for a mother-in-law and the other for a soon to be 30 year old. The favorite colors are golds and silvers. These needed to be quick but WOW with techniques and bling. I was in a creating mood since I had just been baking cookies and other goodies for the upcoming holidays. My customer wanted to place an order the next morning so I needed to get these done and to her quickly. I decided to start with the card for her mother-in-law first but it could also be used for the second needed card.

a close up of dry embossing
a close up of embossing techniques


I first embossed the stamped image using gold embossing powder.

I then used the coordinating Wildflower embossing folder to raise the flowers.


I could have stopped at this point but decided to add 3 different sizes of Rhinestone Jewels to bring this card over the top. I also embossed the “Happy Birthday” in the inside of the card using the gold embossing powder.

I stamped the envelope with only a part of the stamp set using the Encore Gold stamp pad.

Here is the final result.

a golden birthday card & envelope

I layered the Very Vanilla onto our Brushed Gold cardstock which added richness to this elegant card. This was one of those cards I wasn’t surre I was going to like when I started but am in love with it! These pictures just don’t do this card any justice cause it is simply beautiful in person.

I will share the second card I created for her tomorrow.

Til we meet again,

buy Stampin Up! here!

Another Halloween Festive & Fun share

Festive & Fun is what this card is all about! I just love the contrast of the elegant flocked DSP I used from the Mocha Morning Specialty pack ( # 122366) and the "funness" ( is that such a word) of the Halloween image from the Festive & Fun stamp set. The flocking in this paper first reminded me of bats, I also see angel images~ how's that for contrast??

This card has alot of texture going on, not to mention the bling factor! You can't tell verry well from the scan but the strip with the stamping is covered entirely of Dazzling Diamonds Glitter and just sparkel, sparkle, sparkles.  Remember that garland I previously mentioned? Well that was my inspiration for this card. I haven't started the garland yet but will be soon!

This is how this card was put together:

stamps: Festive & Fun

inks: StazOn Jet Black, Basic Gray, Pumpkin Pie, Daffodile Delight, Old Olive, Versamark

Paper: Old Olive, Pumpkin Pie, Whisper White, Mocha Morning Specialty Designer Series Paper

Misc: Peach Parfait Stitched-Poly Ribbon, Heat & Stick Powder, Dazzling Diamonds Glitter, Cutter Kit ( # 106958) to distress the edges), heat gun

This is how I did the glitter: first stamp the image using the StazOn ink, color images as desired using aquapainter. Once dry, cover entire piece by pouncing the Versamark pad all over. Once thoroughly covered, sprinkle with Heat & Stick Powder, heat just til melted ( don't do too long or the glitter won't stick), sprinkle with Dazzling Diamonds Glitter and heat to set. Your glitter will not fall off! If you have any questions please leave a comment & I will get back to you.

Holly jolly


Be sure to click HERE to view more creative ideas, shop oline, or view my upcoming events.


HapBEE Stampin'!

Judi


Simply Scored- available today!

Just one more reason not to wait to purchase the new Simply Scored Scoring Tool!

I want mine NOW!

The Best Friends Forever stamp set was one I couldn't wait to order, until I found out it would be one we received FREE for attending convention! ( just one more perk of being a demonstrator)  I just love the elements found in this set and will be sharing many samples with you , I'm sure. The set will go well with so many of our other sets in our catalog. I can even see doing a holiday card with it~ just put that on my list of things to do.

This card is beautiful in a simplistic way. This card doesn't have any layers and many, that attended the Scrapbook Expo in St. Charles, IL., have already told me they couldn't believe it was stamped, that it lookes like professional stationary. Everyone was iterested in knowing how I got those straight, raised lines to form a frame around the images. This was a great opportunity to show them how to use our newest tool: The Simply Scored scoring tool. I showed them how to mark where they wanted to form their score lines, the 1/8" increments make it so easy to get the lines where you want them. I also explained how to use the ruler along the other edge to start and end their lines so they get them even. Many said this was a tool they would be getting on September 1, when it's released. You can click the link at the top of the page on Sept 1 to have yours delivered right to your front door!

I used Crumb Cake and Marina Mist Inks and all but one image from the Best Friends Forever stamp set and that's it! Wouldn't you like to be my Best Friend so you could receive this card?

BFF (800x591) HapBEE Stampin'!           Judi