Customizing your patterned paper: Adding a Personal Touch to the Brights Paper Stack. We call pattern paper Desgner Series Paper. It is avaiable in both, 12″ x 12″ and 6″ x 6″ and are double sided.
Patterned paper is a beloved staple in the world of papercrafting. Why settle for the pre-designed patterns when you can customize them to suit your unique style? In this blog post, I’ll explore the art of personalizing patterned paper. I will be coloring in some of the dots from the Brights 6″ x 6″ paper stack using Stampin’ Blends. I’ll also incorporate the adorable turtle image from the Rainy Days stamp set as a focal point on a card. Get ready to unleash your creativity and make your patterned paper truly one-of-a-kind.
Selecting the Perfect Paper and Colors Start by choosing a sheet of patterned paper from the Brights paper stack that you would like to customize. Consider the colors and patterns that will complement your overall design. Once you’ve chosen the paper, select a set of Stampin’ Blends markers in colors that coordinate well with the patterns and your chosen focal point image. I’ve chosen the color pallette of; Daffodile Delight, Coastal Cabana, Parakeet Party, and Poppy Parade.
Customizing your patterned paper is simple and rewarding. Let’s get started!
Coloring in the Dots: Using the fine tip of the Stampin’ Blends markers, carefully color in some of the dots on the patterned paper. You can choose a random or specific pattern to follow, allowing your creativity to guide you. The smooth and blendable nature of the Stampin’ Blends markers ensures a seamless and professional finish.
Adding a Focal Point: To enhance the customized patterned paper, incorporate a focal point on your card using the adorable turtle image from the Rainy Days stamp set. Stamp the turtle onto a separate piece of cardstock using a water based ink like Memento Tuxedo Black. Color it using Stampin’ Blends markers. Stamp the sentiment in any of the colors you are using. I wanted to cover the flower with a sparkler. I used an image from the retired Lights Aglow stamp set. *You could just draw this image with your Stampin’ Write Marker if you want.
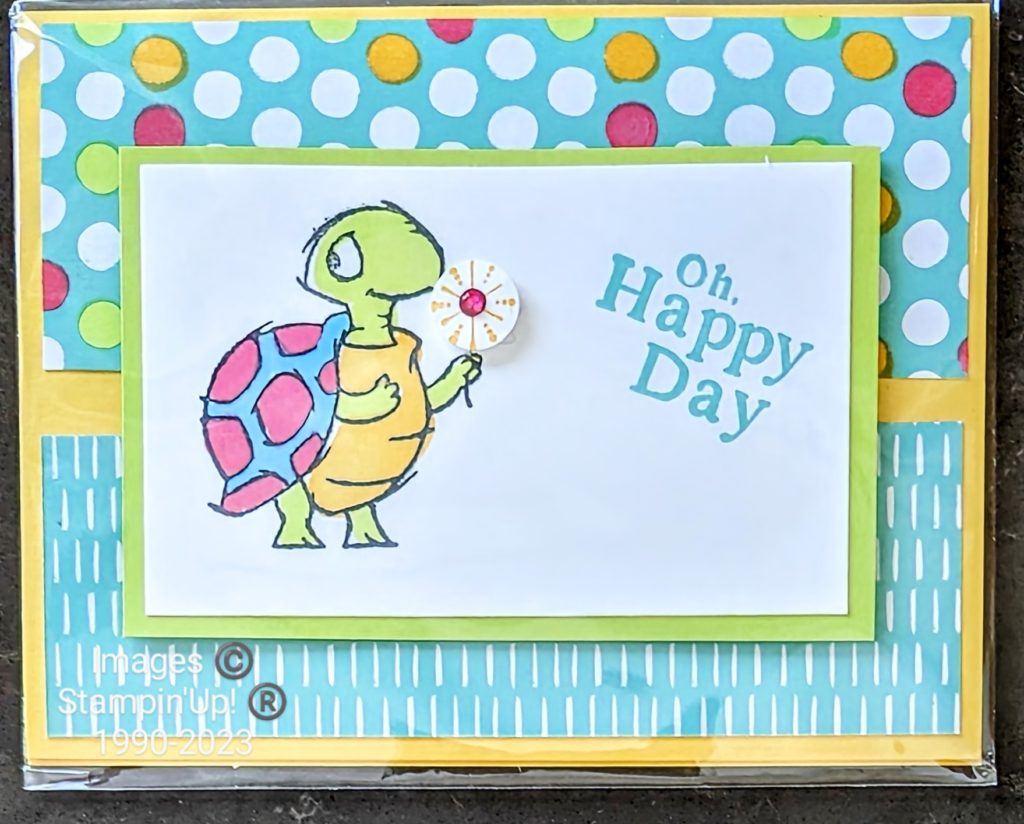
Bringing It All Together Adhere the customized patterned paper to your card base, ensuring that the colored dots are showcased prominently. Position the colored turtle image on the card, allowing it to become the focal point. Embellish the card with coordinating Glossy Dots embellishments that enhances the overall design.
Customizing your patterned paper is a fantastic way to infuse your personal style and creativity into your papercrafting projects. Transform pre-designed patterns into uniquely tailored backgrounds. Incorporating a focal point, such as the adorable turtle image from the Rainy Days stamp set, adds charm and visual interest to your card. Remember to experiment with different patterns, colors, and images to create a variety of customized designs.
Get ready to make a statement with your customized patterned paper—no more generic designs, just pure creativity and artistry at your fingertips!
Check out this bright card using the Rainy Days stamp set here.
Until we meet again. . .