DIY Video on Creating a Spooky Sky

How did you like my Spooky Halloween card yesterday where I showed off the stamping on your embossing folder technique? As promised, I am sharing a video I made to show you how I did the spooky sky. I know once you try this technique you are going to fall in love with it!  I will share a few more cards I created using the technique tomorrow. This will give you the chance to play and create to see what you can come up with.

And what did you think about my big announcement about my Periscope Button? Don’t forget to come back here at 11:30 Central time to give it a try!

Remember, You can purchase all materials I used in this video through MY ONLINE STORE HERE.

Til we meet again,

buy Stampin Up! here!


Scrapbook Expo Bound

It’s been a little crazy around here these past few weeks as I have been making samples for my upcoming classes and the Scrapbook Expo being held in Schaumburg this Friday and Saturday. I am so excited to see so many of you there again this year. I have had a spot at the expo for the past 15 years and have made many, many friends throughout the years. It is always so much fun to see those of you that come from out of state, seems like this is our meeting spot! We continue connecting through social media all year long but I always love seeing everyone in person ad chatting about what the past year has brought them.

Have you been watching me on Periscope? This is the newest way I am connecting with my friends across the country. We have tried other avenues but this is by far the simplest for everyone and they are loving it!! They get to watch me do projects and give tips live in addition to connect with me through their comments. They are also helping each other by offering tips and suggestions on their own through the chat portion of the scope. Do you know what the greatest part of us  connecting through scoping? They can do it on their phones!!!! If you would like to scop with me give me a shout out and I will let you know what you will need to do ( it’s SUPER simple!!).

Well, I am on my way now to set up and I just may do a quick scope from the Expo today as I am setting up as well as Friday and Saturday during the Expo.

Til we meet again,

buy Stampin Up! here!

Sprinkles of Life- how to build a snowman

It’s funny where inspiration will sneak up on us, isn’t it? Sitting outside eating an ice cream cone this time of year proves to be challenging, keeping from dripping all over your hands, feet and clothes is quite a chore. Bingo! That cloud in the Sprinkles of Life set reminds me of a melting snowman. Wow, where did that come from? I quickly finished my cone, went in to my imagine tablet and wrote down, let’s build a snowman with the Sprinkles of Life stamp set. And that my friends is how an idea for one of my swap cards for convention was born!

I knew you would want to make this cutie so I am sharing a video I made showing you how to build your own snowman.

Isn’t he just too dang cute? It is still summer but I have already begun making a bunch of these cuties to put onto some cute & simple winter gifts and treats. A simple way to do this is to stamp & punch all the pieces, put them into a container to assemble while watching TV with hubby, or while riding to that final summer getaway before school begins. This makes a great take-a-long kit. Why not make an extra kit for the kiddies so everyone can keep busy building their own snowmen? Don’t forget a glue stick for them!

Til we meet again,

buy Stampin Up! here!

Watercolor Wings, Butterfly Basics using Bohemian Designer Series Paper

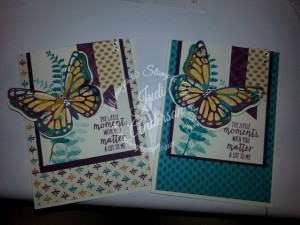
These cards using the Watercolor Wings & Butterfly Basic stamp sets with the Bohemian Designer Series Paper (DSP) were just one of the great projects attendees of our Summer HapBEE Stamping and Crafting Getaway created. It was actually one card, but depending on which side of the Bohemian DSP they chose to show is what their card looked like. In this particular class they created an assortment of 4 different cards using these stamp sets, DSP and coordinating cardstock. All were wow’d by all! The first 20 who registered were VIP’s and attended an exclusive class just for them on Friday night. The project they made was a coordinating card holder that coordinated with these cards.We also offered scrapbook themed classes in addition to the card classes, all were included in the registration fee.

Watercolor WIngs & Butterfly BasicsWhich side of the Bohemian Designer Series Paper would you have chosen?

Paper Pumpkin Monthly Kit in the Mail

*Only 3 days left to get your first TWO MONTHS of Paper Pumpkin at 1/2 off!!

  Be sure to check out the new Weekly Deals.

Shop My Online Store and have your purchase delivered to your front door.

buy Stampin Up! here!


Memory Monday

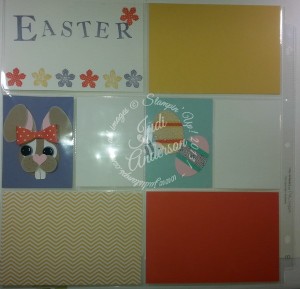
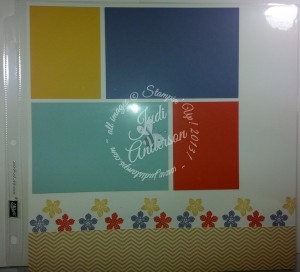
Today’s Memory Monday Page layout is a two page spread that I made for Easter. I loved creating this using one of our Project Life by Stampin’ Up! divided page protectors. This particular page has 4, 4″ x 6″ pockets and 4, 3″ x 4″ pockets.  Do you remember the bunny fry boxes I showed you how to make a few weeks ago?

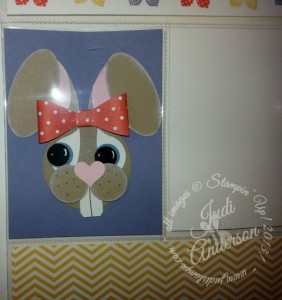
1bunnyI made a bunny for one of the 3″x4″ pockets.

I used Wisteria Wonder for a mat, created the bunny using crumb cake carstock and the bow was created with our bow builder punch and the 2013-2015 In-Color Designer paper Stack.

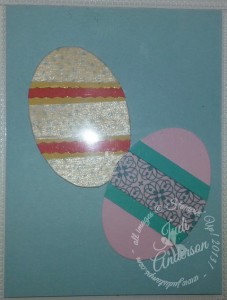
1eggsFor one of the other pockets I made 2 eggs using our Oval Framelits, cardstock and washi tape. The other two pockets were filled with cardstock. I will either add pictures, journaling or more embellishments once I decide the pictures that will go onto this layout.

I stamped the title and flowers for one of the 4″x6″ pockets, the others have cardstock and Designer Series Paper inserted until it is time to finish the pages- here is the first page.

1easterpage

The second page is a single 12 x 12 page with color blocking using the same papers as the first page. I have left a space along the right edge to put the year and add a few more embellishments. I stamped the same flowers along the top edge of the Designer Series Paper to create a fun border.

1easterpage2

FREE SHIPPING ON ALL ORDERS APRIL 6-10 through my online store!


Join me at my Getaway on June 19-20. Click for information.

Til we meet again,

buy Stampin Up! here!


March Fab Five Birthday Class


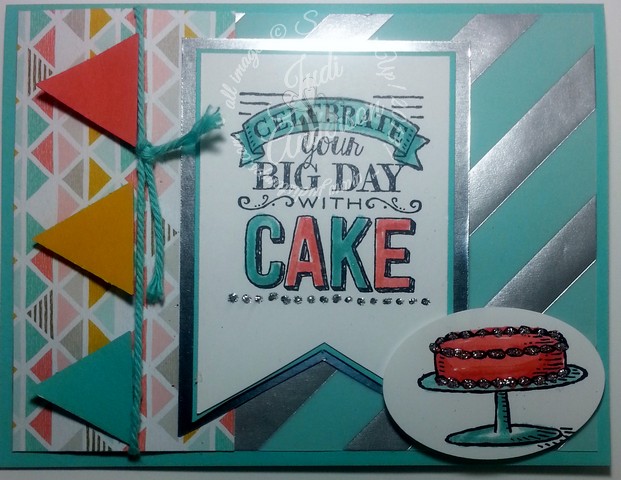
The March Fab Five Class was a big hit! Attendees got to create five fabulous birthday cards with lots of added embellishments & layers specialty papers. I love listening to the gals as they oooo and aaaaawww with each card. I can’t say that any one card was the favorite but I know this was near the top of the list. I did add a little change on this card when they created it~ we changed out the Silver Dazzling Details dots to a strip of mini Rhinestone Jewels.

1bigday4Our Silver Foil paper goes so nicely with our silver foil vellum.

1bigday5

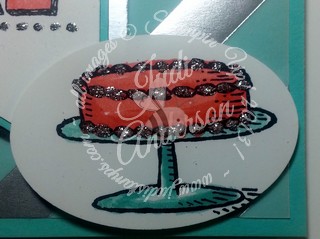
Adding our Silver Dazzling Details to the frosting takes the cake….

Everyone was hyper-ventilating when they left my March Fab Five class!

The stamp set we used for this card is the Big Day Sale-A-Bration stamp set (w-139109, c-139112) that you can choose for FREE with a $50 purchase until March 31st.

That’s right, Sale-A-Bration is ending in 5 days!

Did you hear? One of the benefits my Facebook Page subscribers are getting is; a different Sale-A-Bration idea every day from now through March 31st! Be sure to check it out.

Til we meet again,

buy Stampin Up! here!

A Happy Thing in Pink Pirouette or Soft Sky~ which do you prefer?

I just can’t decide, which of these 2 cards using the Sale-A-Bration stamp set, “A Happy Thing” do you prefer? Pink Pirouette or Soft Sky?

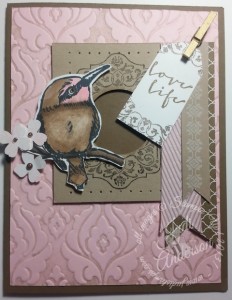
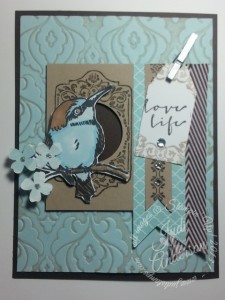
I participated in a few swaps for Leadership Conference in January and these were 2 of the cards I created for two of the swaps.The first time I set eyes on this stamp set I imagined this card.  I really loved the Pink Pirouette and Soft Suede card I did until I did the Soft Sky and Soft Suede card. I can’t decide which I like better. . .

A Happy Thing stamp set image


For this version I used our Pearl Jewels, colored them with our Crumb Cake Blendabilities for the flower centers. I colored this bird with the Crumb Cake & Pink Pirouette Blendabilities and brayered Crumb Cake ink onto the Beautiful Baroque Embossing Folder. I used a gold mini clothespin to hold the tag onto the banners.


A Happy Thing stamp set imageFor this version I used my Aqua Painter to color the bird with Soft Sky and Crumb Cake inks. I used our Rhinestone Jewels for the flower centers and on the banner for some added bling. I, again, colored the embossing folder with Crumb Cake ink. This version received a silver mini clothespin.

The A Happy Thing stamp set is found on page 19 of the Sale-A-Bration Catalog

Can you pick just one??

Sale-A-Bration ends on March 31st and this set is exclusive and will not be available through me after March 31st. Place your order here.

  • Would you like to learn how to make your own hand-made cards?
  • Do you like making your own hand-made cards and want to learn some fun ideas?
  • Do you enjoy meeting others who love to papercraft?

Check out my upcoming Getaway here!

Til we meet again,

buy Stampin Up! here!

Super Cute Easter Bunny Fry Treat Box

Easter is just around the corner and I have a super cute Easter bunny fry treat box for you to make. Tuck in some peeps, a chocolate bunny , jelly beans or my daughters favorite, a couple Cadbury eggs and you’re good to go. These make a great Easter basket for the adults (so we aren’t taking goodies out of the kids baskets!), an addition to any basket, placed around the house as decor, or at everyone’s place setting at the Easter table. Here is a list of supplies you will need:

  • Subtles assorted cardstock #131193         *Basic Black cardstock #121045
  • Whisper White cardstock  #100730          *Big Shot  #113439
  • Fry Box BigZ Die #132966                          *1/2″ Circle Punch #119869
  • 3/4″ Circle Punch #119873                         *1-3/4″ Circle Punch #119850
  • Large Oval Punch #119855                         *Bird Builder Punch #117191
  • Owl Builder Punch #118074
  • Itty Bitty Accents Punch Pack #133787
  • Project Life Journaling Pen

Here’s how you , too can make this little cutie!

Be the first to view my videos~subscribe to my You Tube Channel.

Sale-A-Bration is ending soon. Don’t miss out on getting your FREE Sale-A-Bration items, order today.

Til we meet again,

buy Stampin Up! here!

Celebrate Today with the Starburst Technique & Itty Bitty Epoxy Stickers

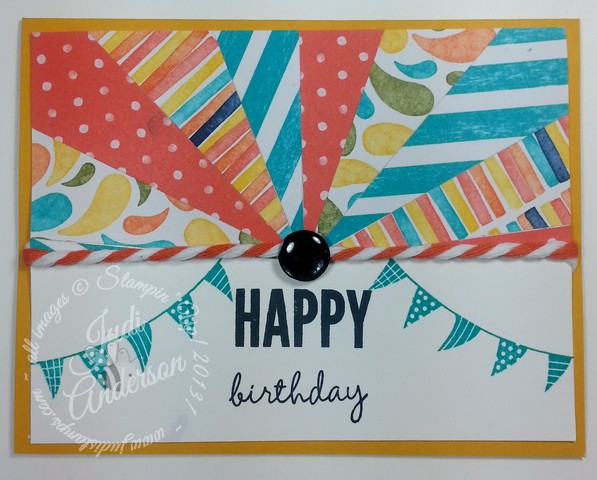
This Celebrate Today card uses the Starburst Technique and our Itty Bitty Epoxy Stickers. I was so excited when I received the Itty Bitty Accents Epoxy Stickers in the mail today. I received them from my mentor, Karen Titus, for participating in a Facebook party she held for her team last Saturday. Several of us received them and were challenged to make a card and share it on our team Facebook page. I had already created this card for my Techniques and Cards Class, tonight, at Panera Bread On Rt 59 & 95th Street in Naperville. I have been debating on what to put in the center of the card and was SO excited to get these in the mail. They are perfect!! I will be sharing a tutorial video next Tuesday, March 10 on creating this card and how to do the Starburst Technique. I don’t usually share the same technique as I do in class but I just HAD to share this one! ~That’s how excited I was to get these! I had already gotten a set but colored them all with my Blendabilities, of course not one matched.

Celebrate Today with Starburst TechniqueOur Tangerine Tango & White two toned twine (135838) was another perfect touch for this card. If you are local to me, be sure to check My Calendar of Events for upcoming events like my Techniques & Cards Class, we would love to have you join us! Be sure to watch my video on Tuesday.

You will find all these products:

  •  Celebrate Today stamp set #137138,
  • Birthday Bash Designer Series Paper #137783,
  • Itty Bitty Accents Epoxy Stickers #137856,
  • White & Tangerine Tango Two-Tone Twine #135838
  • Bermuda Bay Ink #131171
  • Crushed Curry cardstock #131199
  • Whisper White Cardstock #100730
  • Memento Pad #132708

In My Online Store here

Til we meet again,

buy Stampin Up! here!

Josephs Coat~ Two Minute Technique Tuesday

This weeks technique is one that can take on many different looks just by changing the colors you use. This was one of the first techniques I learned when I started stamping 15 years ago – I urge you beginning stampers to give it a try. When I learned to do this technique I learned on glossy cardstock and used a Kaliedascope pad. Since then I have experimented with different inks, papers and ways to get the variety of colors in the background. This week I am sharing how to do Joseph’s Coat using 3 colors of ink, our Whisper White cardstock and a rubber brayer. Next week I will share how to do it with sponge daubers. Let’s get started!

This card is so bright & bold in real life! The “twist” to this technique is that I stamped the leaves. In the basic Josephs Coat technique you just brayer the color onto the card base.

For more exclusive ideas & projects monthly, you’ll want to subscribe to my, “Your Creative Destination” publication

Til we meet again,

buy Stampin Up! here!

You Plus Me Memory Page Layout

You are going to love this on-trend memory page layout using the “You Plus Me” stamp set & our “Sweet Taffy” Designer Series Paper. You will find this layout quick and easy to create and it will hold from as little as two, and up to 12 pictures~ My kind of layout !. . . .

Enjoy this video on how to create it:

Shop Now!

Be sure to subscribe to my You Tube Channel  and don’t miss any of my videos!

Til we meet again,

buy Stampin Up! here!

Fun creating this Berry Basket!

I had fun creating this adorable berry Basket to share with you but first,I want  to apologize not posting my technique video yesterday. I downloaded it to You Tube only to discover it was really dark. I tried to lighten it by editing it but had no luck. I would have taped it again, however, I am at Leadership training without my stamping stuff and video camera. I promise I will share 2 videos and projects with you next week.

On a brighter note~ I was able to enjoy some sunshine today as I sat next to the pool planning my upcoming classes and events. I can’t wait for some fun & different events with you~soon!! If you haven’t already guessed, I’m not in Illinois right now. I will be sharing some fun in the sun with you on my facebook page so be sure to head over there to see what I am doing with my friends from across the country. Tomorrow night we will be heading to Manager’s Reception, one of my favorite perks as a demonstrator!

Boy, I think I got a little off task! Back to my Berry Basket. All I can say about this brand new BigZ Big Shot Die is ,”I’m in love!” I can picture making these for so many different occasions;baby or wedding showers, Easter baskets,birthday goody baskets and oh so much more. This was quick & easy to create and can take on so many different adorable looks.

Those goodies pictured with the berry basket are a few of the FREE Sale-A-Bration products you can choose with a qualifying order. I just love this bright, happy color combination of Cameo Coral, Coastal Cabana and Crushed Curry.
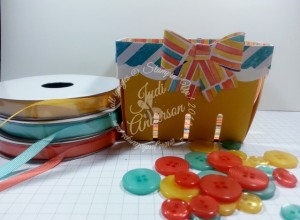
Stampin Up! Berry Basket Did you notice the detail of the trim around the basket? The smaller scallop is included with this BigZ die but I added the larger white scallop by using our large scallop edgelit. While this one has a more feminine look to it, I can imagine creating a more masculine look by using nautical colors and Designer Series Papers that take on that more masculine look. I used the Birthday Bash Designer Series Paper for the bow created with our NEW Bow Punch and the lining of the basket. Take a look. . .
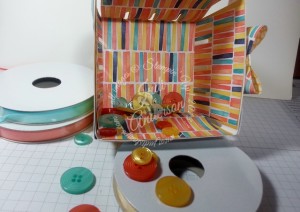
Stampin Up! Berry Basket BigZ Die insideI also missed sharing this week’s Weekly Deals yesterday so here they are.

These deals are a crafting fools dream!! You will get to choose a FREE Saleabration item when you purchase all of these great embossing folders and Texture Boutique Machine ( a must-have).

SHOP NOW!

Beautifully Baroque Textured Impressions Embossing Folder

Price: $7.95 $5.96
Decorative Dots Textured Impressions Embossing Folder

Price: $7.95 $5.96
Lovely Lace Textured Impressions Embossing Folder by Stampin' Up!
Lovely Lace Textured Impressions Embossing Folder

Price: $7.95 $5.96
Lucky Stars Textured Impressions Embossing Folders by Stampin' Up!
Lucky Stars Textured Impressions Embossing Folders

Price: $7.95 $5.96
More Amore Ensemble
More Amore Ensemble – Digital Download

Price: $9.95 $5.97
Polka Dot Textured Impressions Embossing Folder by Stampin' Up!
Polka Dot Textured Impressions Embossing Folder

Price: $7.95 $5.96
Texture Boutique Machine

Price: $29.95 $22.46
Zig Zag Textured Impressions Embossing Folder by Stampin' Up!
Zig Zag Textured Impressions Embossing Folder

Price: $7.95 $5.96

Don’t be sorry you missed out on these absolutely awesome embossing deals~ head on over to my online store and get them before they’re gone!

Til we meet again,
buy Stampin Up! here!

Be the Star Missing you

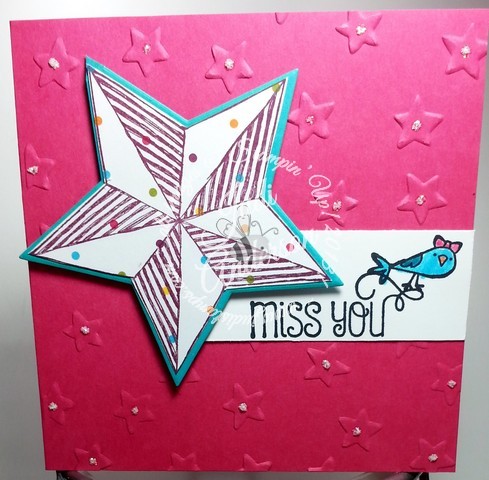
Be a star when you use the paper piecing technique with the Be the Star stamp set (w-135731) (c-135734)! You can even use this versatile technique with stamp set images that are partially outline and semi-solid too! Look at the awesome effect you get when using this star image from the Be the Star stamp set. How many of you would have combined Designer Series Paper with this image? Not many I am sure. But you can’t deny that the tiny dots in this Sweet Taffy Designer Series Paper (133693)  adds (as mom would say) some oomph!

Be the Star stamp set card

  • I wanted to create a simple background so in came the Lucky Star (135817) embossing folder and our Dazzling Details (124117) to add  interest to the card base.
  • The bird and verse came from the Sweet Stuff (w-134153)(c-134156) stamp set.
  • I used our Stars Framelits(133723) to cut out the Tempting Turquoise layer in the back of the star. This framelit is usually used to cut out the star image but I wanted it as a layer. To accomplish this I “fussy” cut out the star just outside of the stamped outline so I would have the Tempting Turquoise border instead of Whisper White.
  • Love the dimension of this image!!
  • The star seems to be popping right out.

Here is a larger view of this card.

Be the Star stamp set cardI will be sharing another cute project ( an adorable gift tag) in my February monthly publication. You will want to be sure to subscribe so you don’t miss out on more fun, free; ideas, information and inspiration!

All products shown are available through my online store. Don’t forget to choose your FREE Sale-A-Bration item for every $50. you purchase!!

Subscribe to my monthly publication

View the 2015 Occasions catalog online

2015 Sale-a-Bration catalog online  ( For every $50( before S&H and Tax) spent pick (1) item out of this catalog )

Til we meet again,

buy Stampin Up! here!


Paper Piecing Technique Card with About the Label stamp set

So many of you have shared that you have been playing with the Paper Piecing Technique that I shared here on Tuesday and couldn’t wait to see the card I created with it. This card is just as quick and simple as the technique. Be sure to watch the video to the end to see the unexpected embellishments~ they are all the craze right now!

If you are viewing this on your phone and do not see the video below please go to: judistamps.com to view it.


Did you hear that ? You can receive one of these cards when you make a purchase through my online store this month?

Oh my gosh!. . . .  Did you see the cute tag I shared on my FACEBOOK PAGE using this same technique? Just click this link and check it out. While you are there, be sure to “like” my page so you don’t miss out on what I post over there!

Another card using the Paper Piecing Technique and About the Label stamp set. I just couldn’t stop playing!!


About the Label card

Tomorrow there will be another card with a different stamp set.

Til we meet again,

buy Stampin Up! here!

Tuesday Two Minute Techniques

Today’s Two Minute Technique is sure to give your outline stamp images a different life( and look)! Grab your Designer Series Paper scraps, I have another quick and simple way to use those baby’s up. . .

If you are reading this on your phone and don’t see the video below go to judistamps.com to watch.

I know, I know! What a quick and simple way to use your outline images!! I will be sharing a card created with the element I created in this video on Thursday. Be sure to check out the other cards I created using this quick and simple technique this week, too. You know I love to watercolor so outline stamps are some of my favorites but when I want pattern, I go to paper piecing.

I would love to hear which stamp sets and papers you use when you play with this technique so be sure to comment below.

Here are the weekly deals for January 20 – 26

2013-2015 In Color Stampin' Write Markers
2013-2015 In Color Stampin’ Write Markers

Price: $14.95 $11.21
2014-2016 In Color Printed Clothespins by Stampin' Up!
2014-2016 In Color Printed Clothespins

Price: $5.95 $4.46
2014-2016 In Color Stampin' Write Markers
2014-2016 In Color Stampin’ Write Markers

Price: $14.95 $11.21
Basic Gray Baker's Twine by Stampin' Up!
Basic Gray Baker’s Twine

Price: $2.95 $2.21
Bermuda Bay Baker's Twine by Stampin' Up!
Bermuda Bay Baker’s Twine

Price: $2.95 $2.21
Box Of Chocolates Kit -- Digital Download
Box Of Chocolates Kit – Digital Download

Price: $9.95 $5.97
Crushed Curry Baker's Twine by Stampin' Up!
Crushed Curry Baker’s Twine

Price: $2.95 $2.21
Stampin' Blendabilities™ Markers Skin Tone Assortment by Stampin' Up!
Stampin’ Blendabilities™ Markers Skin Tone Assortment

Price: $22.95 $17.21

Til we meet again,

buy Stampin Up! here!