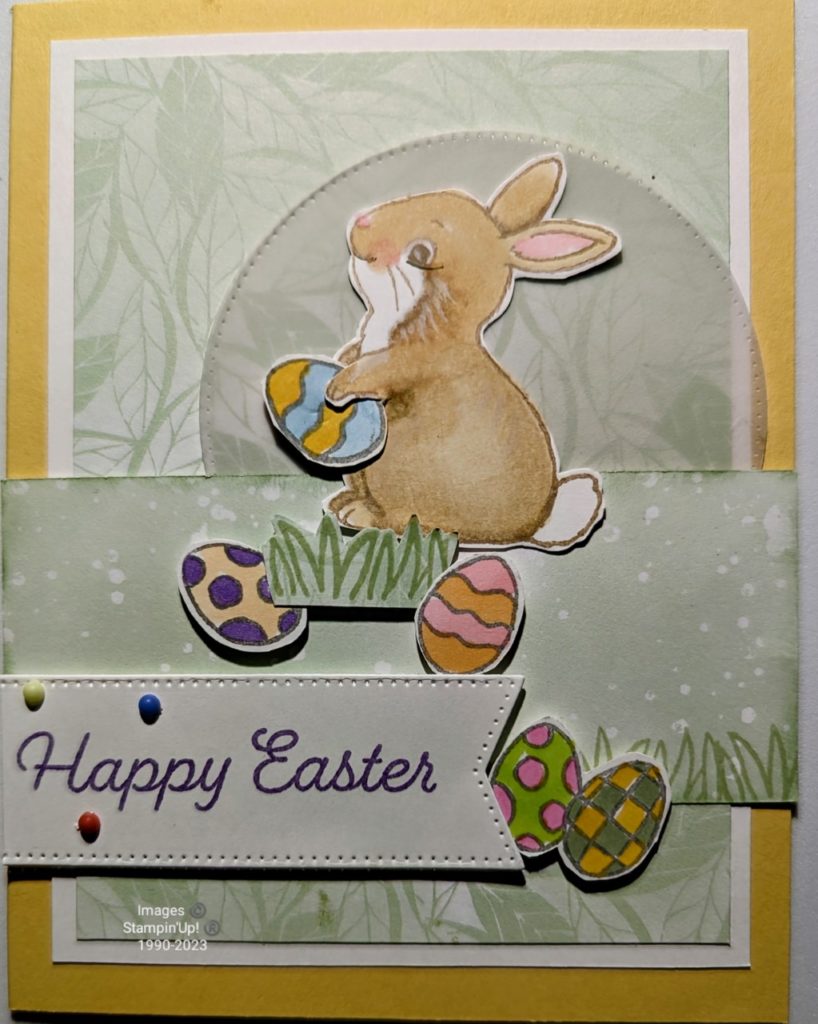
Cute Bunny wishing a Happy Easter

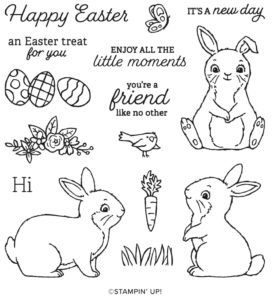
This Cute Bunny is wishing a Happy Easter on this adorable card. The Easter Bunny stamp set is filled with fun, cute images and sentiments perfect for different projects. Keep this set in mind for your Easter, Spring, baby & other projects!

#EasterBunnystampset
Images copyright Stampin’ Up! (Registered) 1990-2023

Featuring different elements to use for various scenes and creative options will have you loving this set. Build your own scene by adding the little birdy on top of a floral sprig, putting the carrot in the bunny’s paws, or placing the butterfly on a bunny’s nose. Use the grass or eggs images repeatedly to create a border for your card fronts. Then choose your favorite coloring technique, color these cute images, and pair with the greeting of your choice! 

A Cute Bunny, eggs and grass is the perfect combo to say Happy Easter!

I used several of the images in this set to create the card I am sharing with you today. What is the one thing I love about this card design? By switching out the eggs for the flower swag, bird, or carrots I would have an adorable baby card!

Here are the products I used:

  • Crumb Cake Classic Ink Pad
  • Highland Heather Classic Ink Pad
  • Soft Sea Foam Classic Ink Pad
  • Smokey Slate Classic Ink Pad
  • Stampin’ Blends; Crumb Cake, Daffodile Delight, Highland Heather, Pale Papaya, Parakeet Party, Polished Pink
  • So Saffron cardstock 8 1/2″ x 5 1/2″
  • Basic White cardstock 2 @ 3 3/4″ x 5″, 1 1/4″ x 4″, 3″ x 4 1/4″
  • Hello Irresistible Designer Series Paper 3 1/2″ x 4 3/4″ & 1 3/4″ x 4 1/4″, scrap
  • Vellum cardstock largest 3 1/2″ x 3 1/2″
  • 2022-2024 Matt Dot embellishments
Cute Bunny wishing a Happy Easter
#EasterBunnystampset

I invite you to watch how I created this card on my Facebook Page Here.

Create your own Cute Bunny card when you Purchase items used in this project through my online store.

Until we meet again. . .

Judi's online store

Saying good-bye to Fifteen Colors

Saying good-bye to Fifteen Colors

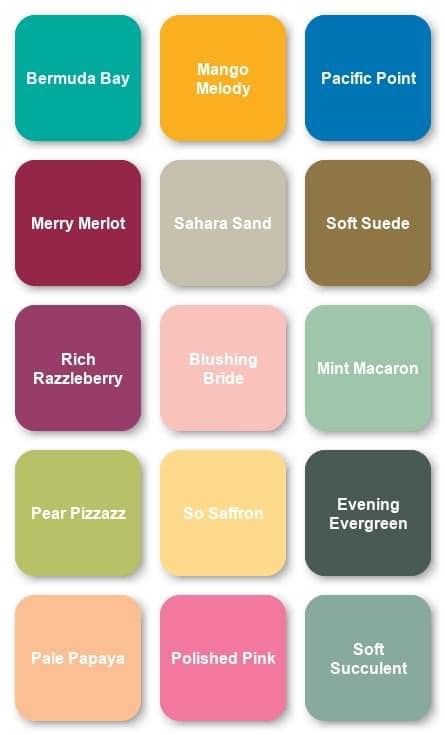
Saying good-bye to Fifteen Colors with the end of this years’ annual catalog. Stampin’ Up! Color Refresh is coming! The new colors will be available when the NEW 2023-2024 Annual Catalog goes live on May 2, 2024. I love that our color pallette stays fresh by updating our core colors every three-five years.

The above photo shows you the fifteen colors that are leaving this year. Seeing colors leave makes me sad. This year is no different with several favorites going. Which are your favorites? You will want to be sure to purchase your favorite products that have these colors in them. don’t foget ink refills, Stampin’ Blender Pens, and Stampin’ Write Markers and cardstock. These products are only available while supplies last. Once they are gone, they are gone

Saying good-bye to Fifteen Colors is never easy.

Fifteens colors are leaving, 11 core colors plus 4 In-Colors. Yes, one of the 2021-2023 In-Colors is returning in one of our core families! This means sixteen colors are being added to our color families. There are four NEW colors, five In-Colors, and 6 returning In-Colors. I know you will be happy to see many of your favorite, past, In-Colors come back. I know these new colors are going to give us newopportunities.

By exchanging our old favorites with new colors;

  • is one way to change the look of previous projects.
  • give our favorite color combos an uplift
  • Open our eyes to new color combinations

Purchase your outgoing colors & products on my Online Store Here!

Until we meet again. . .

Judi's online store
Last Chance Products for 4/4/23

View 2022-23 Annual Catalog Last Chance List Here!

View Jan – APr 2023 Mini Catalog Last Chance Here!

Starting Your Papercrafting Journey

Congratulations on starting your papercrafting journey! Now that you have gathered your basic tools and supplies, let’s take your first step into the wonderful world of papercrafting. One of the most popular techniques in papercrafting is stamping. Stamping allows you to easily create beautiful designs on your paper projects. I will guide you through the process of stamping, from choosing the right stamps to learning techniques every Monday. But for now let’s take that first step.

  • Choose your stamps: There are countless stamps available, from simple shapes to intricate designs. The first step with stamping is to choose the stamps you want to work with. Stamps come in solid and outlined images. Consider investing in different types of stamps, such as clear stamps (photopolymer) or cling stamps (red rubber).

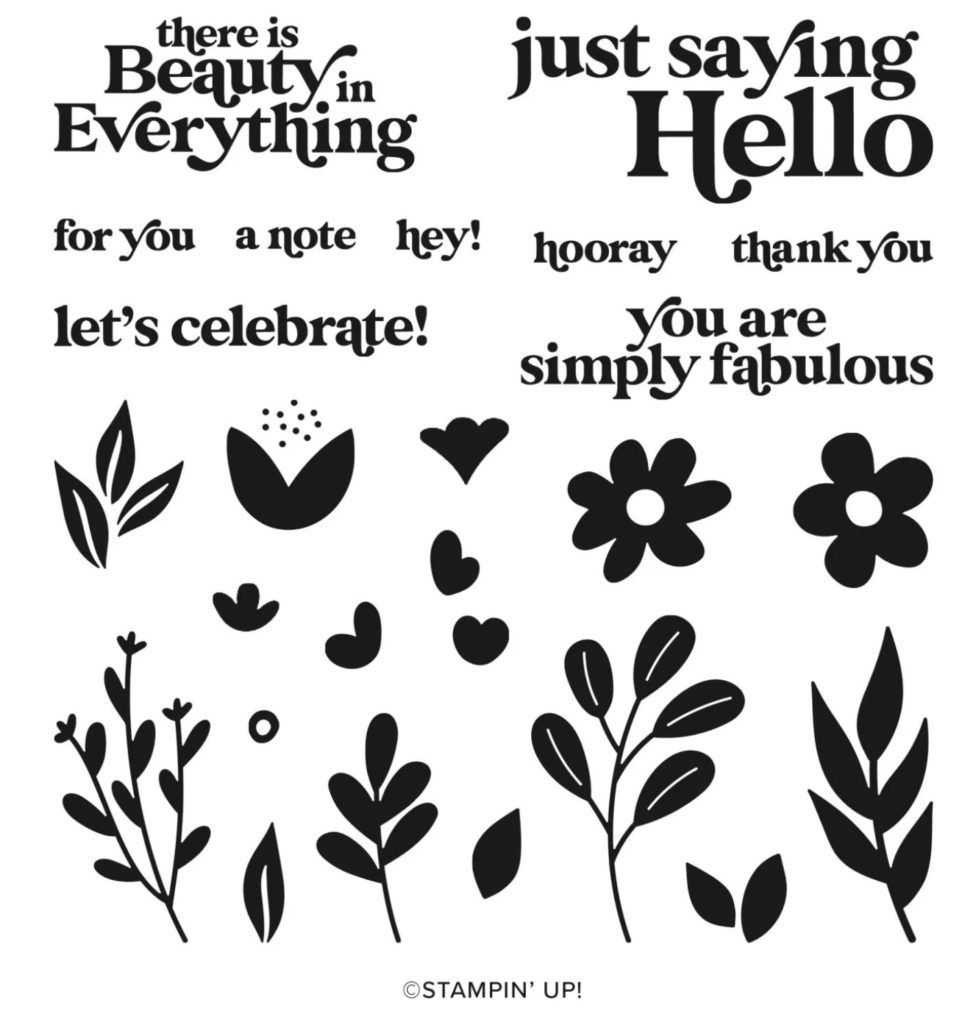
An example of solid images

Starting Your Papercrafting Journey with #SimplyFabulousStampSet
Images copyright Stampin’ Up! (Registered)1990-2023

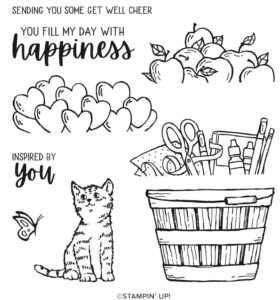
An example of outline images

#CheerfulBasketStampSet
Images copyright Stampin’ Up! (Registered) 1990-2023
  • Gather your supplies: Once you’ve chosen your stamps, you’ll need a few supplies to get started.
    • Ink pads in the colors you want to use.
Brights stamp pads
Brights Cardstock
Stampin' Mist

Stampin’ Shammy this reusable stamp cleaning cloth makes stamp cleaning effortless.

Stampin' Shammy

Starting Your Papercrafting Journey by a little practicing first.

  • Learn the basics: Before you begin stamping, it’s important to learn the basics. I recommend that you practice stamping on scrap paper to get a feel for how much ink you need to use and how much pressure to apply to the stamp.
  • Different papers will also give you different effects. I recommend using, and practicing on, good quality cardstock to get clean & crisp images.
  • Try different projects: Once you’ve mastered the basics, try different projects to see what you enjoy most. Stamping can be used in a variety of papercrafting projects, including card-making, scrapbooking, and even home decor. Experiment with different types of projects to see what you enjoy most.
  • Expand with techniques: As you become more comfortable with stamping, you may want to expand by trying different techniques. You may also want to try different techniques, such as heat embossing or watercoloring

By following these steps, you can begin your papercrafting journey with stamping. With practice and experimentation, you can create beautiful and unique papercrafting projects that showcase your creativity and style. Join me next Monday as we explore one of the easiest ways to start your papercrafting journey.

*Products shown may be purchased through my online store.

Judi's online store

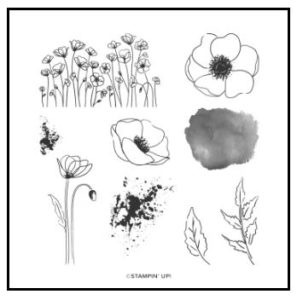
Painted Poppies 2-Step Stamping

Painted Poppies stamp set & 2-Step Stamping is a quick way to create a beautiful card. I love using the images to easliy make a card. Inspired by a field of poppies, this set features beautiful line-art images.

Choose to simply use the images in this set to fill in the larger flower images. Quickly create a card by using the 2-Step Stamping Technique. Choose your favorite coloring tools to color the outline images in to create beautiful works of art when you get that coloring feeling.

Here’s a look at the Painted Poppies stamp set.

Painted Poppies 2-Step card

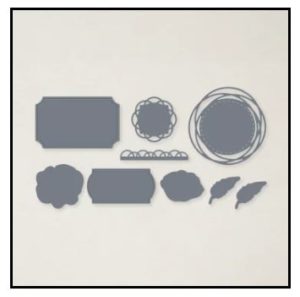
Using the Painted Labels Dies, I cut the flowers and leaf stem. A few of the dies cut images from the stamp set and the others compliment the stamp set. The larger label die with the swirls is one of my most used from this set of dies.

Painted Lables Dies

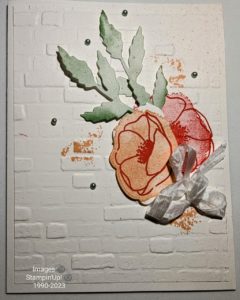
I created the background by first stamping the ink splotches in Calypso Coral. Then, I embossed the Basic White cardstock using the Brick & Mortar 3-D Embossing Folder.

The two flowers from Painted Poppies were then stamped.

I stamped the outline using Sweet Sorbet directly onto the cardstock. Next, I inked the shadow image, stamped off, then stamped it inside the outline image. This is one way to do 2-step stamping. Did you notice it isn’t “just right?” I love leaving white space when doing 2-step stamping to create dimension.

Painted Poppies 2-Step Stamping

I used Mint Macaron ink and a Blending Brush to add color to Basic White cardstock. I then cut out the leaf stem die. After putting the card together I decided to add some light splatters. I used Calypso Coral ink and a Water Brush and ink. My card is completed with a few pearls and ribbon. I will add a sentiment to the inside when I send it.

I hope you enjoyed this card using Painted Poppies stamp set and 2-step stamping. View another card using this stamp set here..

Purchase the products used in creating this card through my online store. Just click the links above or on my signature below.

Until we meet again. . .

Judi's online store

Top 10 Essential Tools for Papercrafters

When it comes to papercrafting, having the right tools can make all the difference. But if you’re just starting out, you can be overwhelmed trying to figure out which tools are essential and which ones you can skip. That’s why I’ve put together a list of the Top 10 Essential Tools for Papercrafters.

Top 10 Essential Tools for Papercrafters, #1-#5

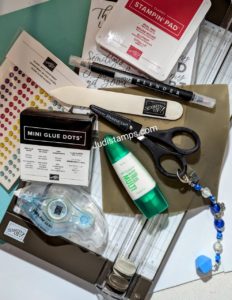
  1. Paper Trimmer: A paper trimmer is a must-have for precise, straight, and accurate cuts. Look for one with a sturdy base, clear ruler markings, and a sharp cutting blade. You’ll use this tool for almost every papercrafting project you do.
  2. Scissors: A good pair of scissors is essential for cutting paper and trimming small details. Look for scissors with sharp, pointed blades that are comfortable to hold. A smaller pair of scissors is great for cutting out intricate designs.
  3. Adhesive: There are many types of adhesive to choose from, including double-sided tape runners, liquid glue, and adhesive dots. Choose the type of adhesive that works best for the project you’re working on. For beginners, these are a great place to start.
  4. Bone Folder: A bone folder is a handy tool for scoring paper and creating crisp folds. Look for a bone folder made from sturdy materials like bone, Teflon, or plastic. I recommend a white or light colored bone folder.
  5. Silicone Craft Mat: A silicone craft mat is a non-stick surface that protects your work surface from damage from adhesives and hot glue. This will quickly become your best friend! To clean, simply let your liquid glue dry, or rub off double-sided adhesives with your fingers and they will peel right off the silicone mat. I occasionally wipe mine off with  a baby wipe.
Top 10 Essential Tools for Papercrafters

#6 – #10

6. Stamps: Stamps are a quick way to add designs and sentiments to your paper crafting projects. You will find stamps with images as far as your imagination. Choose from solid, outline, and a combination of images to fit your project needs.

7. Ink Pads: Start by finding ink pads in your favorite colors. I recommend a black or gray ink pad in your first selection. Ink pads come in all colors of the rainbow and then some.

8. Cardstock: Cardstock is a sturdy, heavyweight paper that is perfect for papercrafting projects. Look for a variety of colors and textures to add interest to your projects.

9. Blender Pen: Alowwing you to color yor images by using the ink from your ink pads, a Blender Pen makes an all-around marker. You can also use it with Watercolor Pencils and Pastel Chalks for basic water coloring on your projects.

10. Embellishments: Embellishments like stickers, ribbons, and sequins can add a fun and festive touch to your projects. Look for embellishments that match the theme of your project and your personal style.

With these 10 essential papercrafting tools, you’ll be well on your way to creating beautiful and unique paper projects. Whether you’re making cards, scrapbook pages, or home decor, having the right tools makes all the difference. So start building your paper crafting toolkit today!

Just click the product links to get your paper crafting tools today!

Until we meet again. . .

Judi's online store

An Easter craft that brings back memories.

An Easter craft for you to start now, is one you can di in steps as timde allows. This has nothing to do with paper crafting but it is a craft. I recommend making a plan and make time to enjoy creating these eggs. This is also an idea that brings me back to my childhood.

I thank my mom for so many wonderful memories during all the holidays throughout the year. Growing up in the 50’s and 60’s we prepared by making many of our gifts to family and friends. With Easter coming up, I have already begun thinking of the different traditions we celebrated.

One of my favorite memories was making sugar eggs. Oh my gosh, I remember our tiny kitchen filled with all kinds of goodies to decorate and fill these eggs with.

There were tiny flowers, , figures, and edible Easter grass. I loved all the spools of patterned and organdy ribbons in soft spring colors. The bags of super fine sugar and food coloring for the sugar egg. The decorator tips and bags to fill with royal frosting.

An Easter craft that you can do with your family is always a bonus in my book.

I would set aside 3 blocks of time if doing this with children. An afternoon, to make the eggs. I remember letting them sit overnight. We helped to pack the molds and mom scooped them out. Eventually we got good enough packing the sugar that mom didn’t have much to scoop.

The next day we got to make the scenes inside the egg glueing the items with royal icing. We let them dry a bit then mom put the top on and ran some icing or ribbon along the seam. This was usually another afternoon.The final steps were adding icing flowers or ribbon to the top of the egg.

Mom and I talked about these Easter eggs. She couldn’t remember if she still had the supplies to make them. I was hoping to run across mom’s egg molds when going through her baking and crafting things after she passed. Unfortunately she must have gotten rid of them.

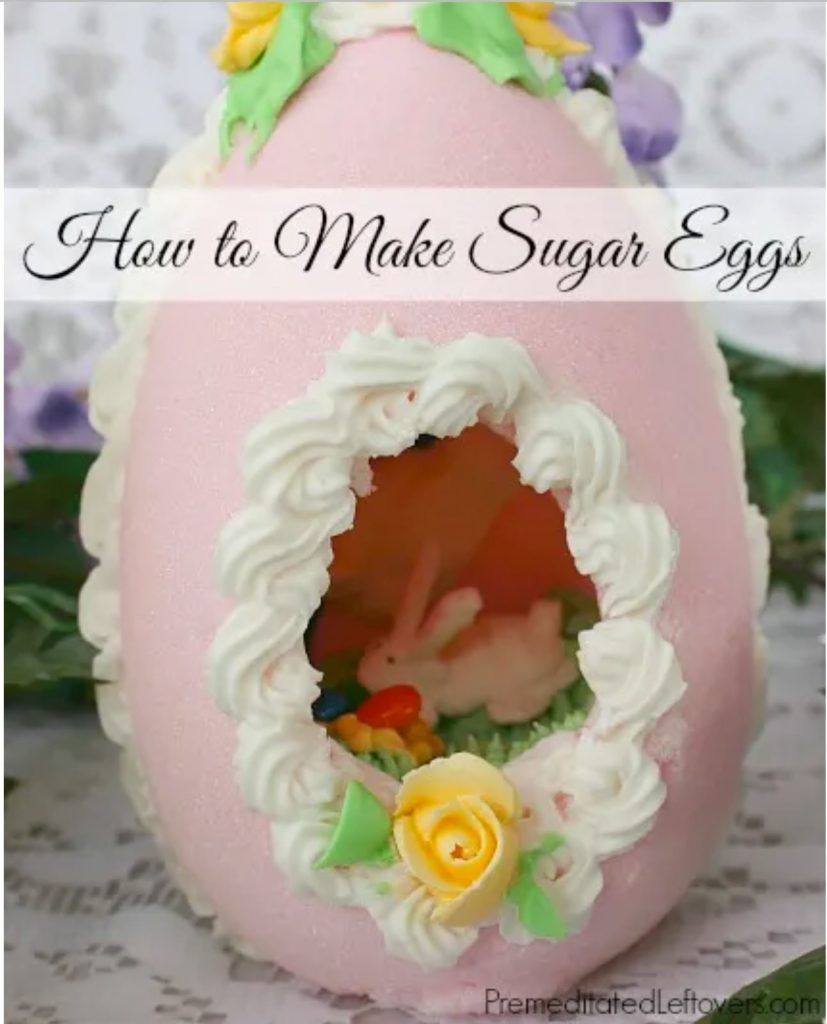
I ran across an article on Pinterest from Premediated Leftovers on how to make sugar eggs! This article is from 2014 but has wonderful directions and recipes.

An Easter craft
This photo is from premediatedleftovers.com

Please head over to: Premediated Leftovers for detailed instructions.

I feel that I can make a fake sugar Easter Egg with a plastic egg. I will be grabbing some supplies and make a video creating one soon. I hope you emjoyed reading this and learned about an Easter idea to try this year.

Until we meet again. . .

Judi's online store

Creating an elegant card using dies

Creating an elegant card can be simple when using dies. I recently talked about our bundles that consist of stamp sets and dies on my Facebook live. Several die sets can be used with many other stamps also.

We also have many die sets that can stand alone, without a stamp set. I encourage looking to see if there are tag dies. One’s to use as silhouettes, or can it be used with a stamp set you already own?

One of my viewers contacted me and asked if I could demonstrate how to use dies without the stamps. I was happy to!

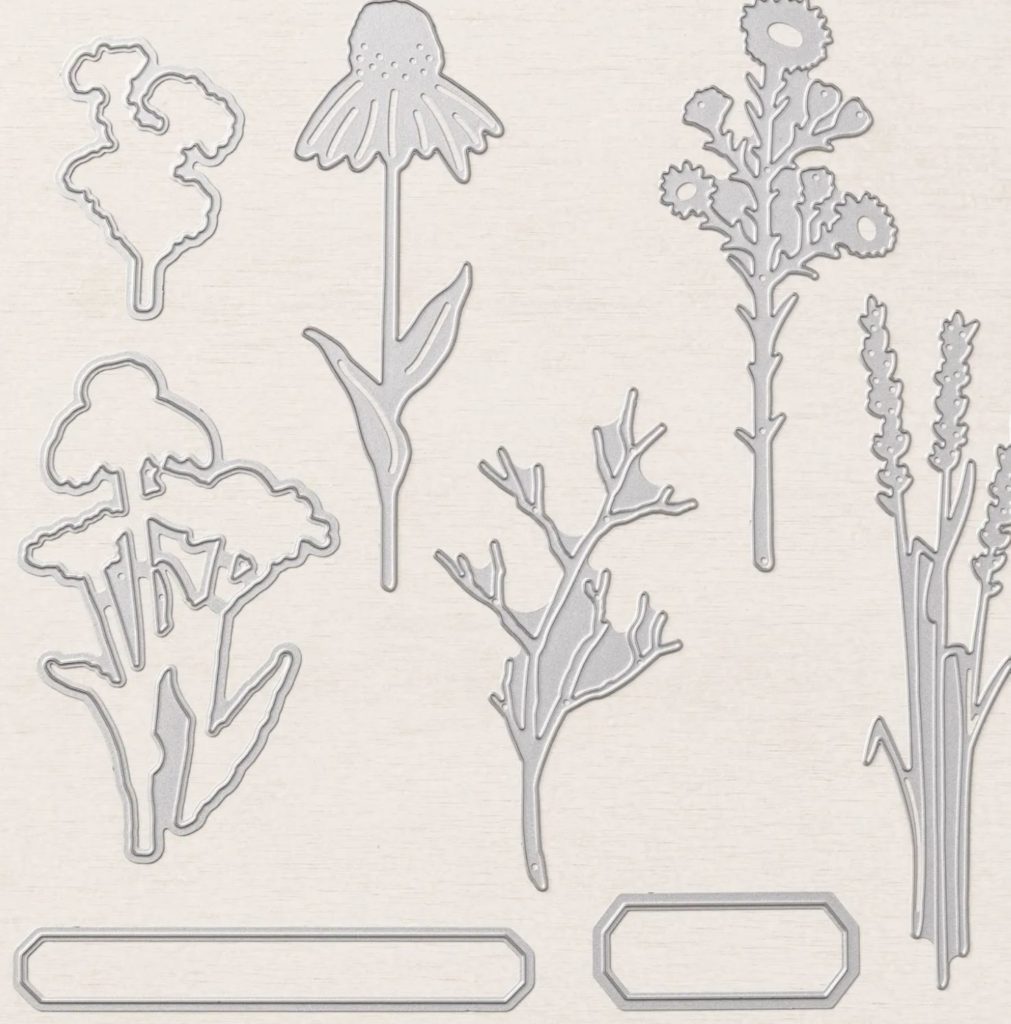
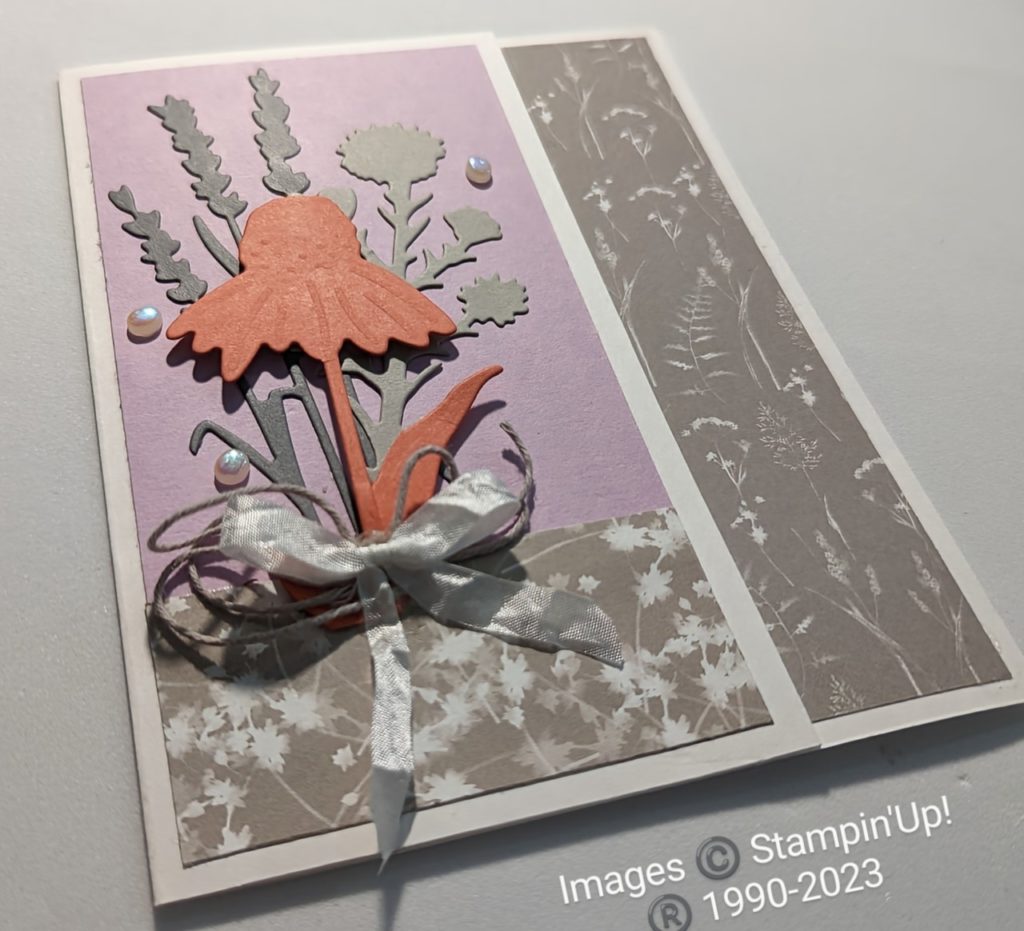
Creating an elegant card, with the Harvest Dies.

Images copyright Stampin’ Up! (Registered) 1990-2023

My color pallette is: Fresh Freesia, Gray Granite, and Calypso Coral. The Designer Series Paper I chose is the 12 x 12 pack, Sun Prints. The blue patterns on one side are beautiful. but am really drawn to the Gray Granite patterns.

Creating an elegant card using the #HarvestDies

I am sure you can see why! Changing out the fresh Freesia, Basic Gray and the Calypso Coral will give this card different looks. Polished Pink, Soft Succulent & Evening Evergreen, Pale Papaya, Soft Sea Foam, & Shaded Spruce are a few color combinations to consider.

Flip the Designer Series Paper over to the blue sides and you could use a pallette of; Night of Navy, Basic White, & So Saffron. You can easily use up this pack of DSP.

Judi's online store

A soft flannel anything to be comfy!

A soft flannel anything is my favorite way to be super comfy. I love a great flannel shirt. The softer and bigger the better. I will often go into my husbands side of the closet and grab one of his.

Just lounging around the house in a comfy, over-sized flannel is the best. They are great when reading a book, paper-crafting or doing housework. They keep me warm without being bothersome. I do have a few flannels of my own that I will also wear but for some reason his are just so comfy.

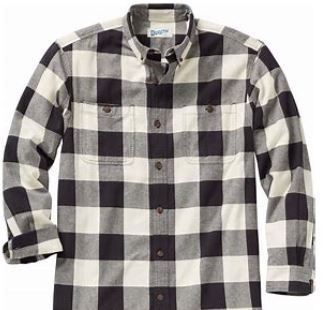
Now don’t get me wrong. I wear soft flannel shirts when out and about too! I will put on a pair of jeans or yoga pants, and a white T shirt. Grab a belt, and my favorite necklace and I’m ready to go out. This is a look anyone can pull off! My go-to is a black & white plaid, like this one. You can accent it with an accessory of your favorite color.

A soft flannel anything is my favorite!

There is nothing like being wrapped up in a soft flannel blanket, laying on the couch, watching a good movie. Or how about not having to get dressed and wearing a flannel robe? You know, just spending the day in the house without a worry. Now, that is what I am all about!

I’ve even had flannel sheets, slippers, flannel lined jackets, and pants in the past. I just love flannel! When I was small I would ask mom to sew on a little lace to a flannel shirt. I would then take some safety pins to “tuck” the waist so I didn’t look so boyish. When boating, I would choose the flannel lined sleeping bag over those nylon ones.

I think everyone has had something flannel at least once in our life. When we were babies we would be wrapped in receiving blanket. Today they are called swaddles. I just call them flannel baby blankets.

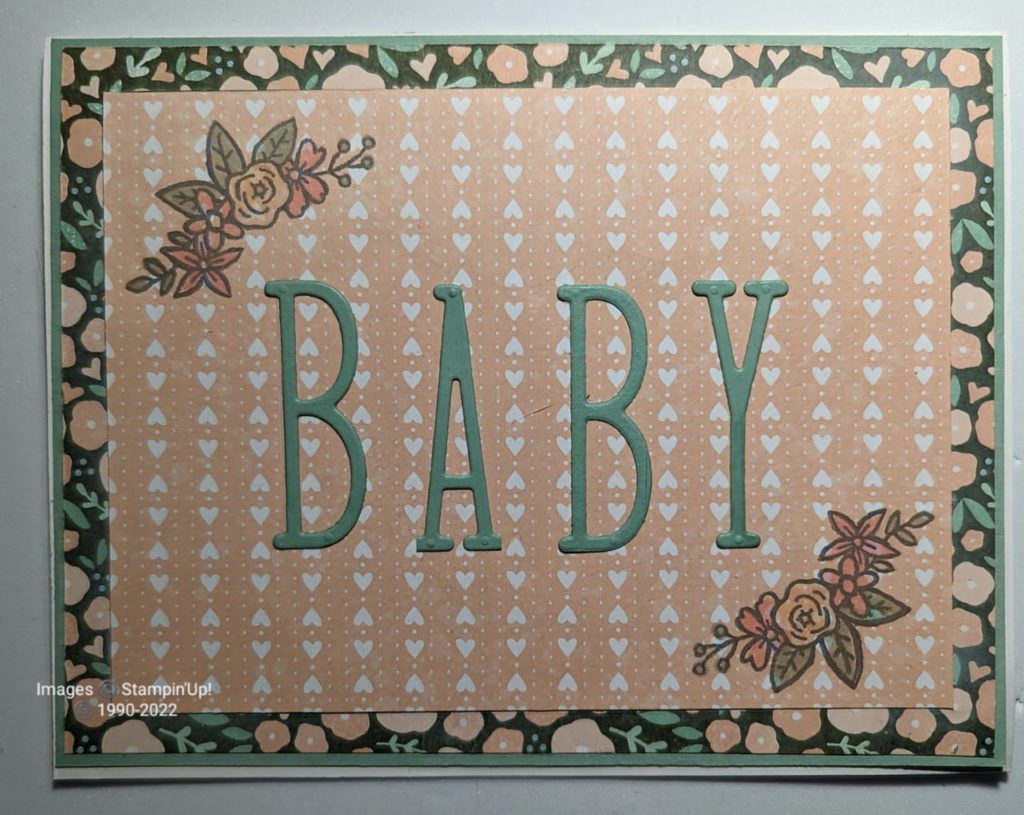
Today’s card was created with a flannel baby blanket in mind.

Flannel inspired baby card

I used one of the sheets from the Country Floral Lane 12 x 12 Designer Series Paper (DSP)pack. I used both sides of the same sheet. Using one of my small Blending Brushes I brushed on some White Craft Ink over both sides of this DSP. Doing this made it look fuzzy. I also used our new Alphabet a’ la’ mode Dies and the Easter Bunny stamp set to complete the card.

Show off your Designer Series Paper with this idea

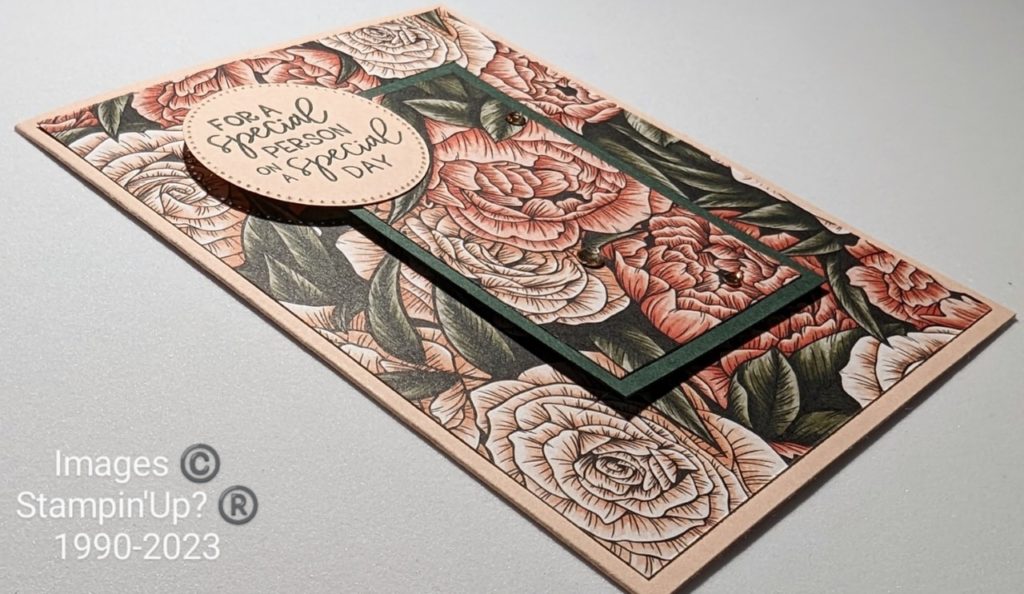
Show off your Designer Series Paper and make it the star of your cards! I will be sharing a simple paper-saving idea with you today.

I am using the Favored Flowers 12″ x 12″ Designer Series Paper. This paper is a Sale-A-Bration offering through TODAY, Feb 28, 2023. It has Lush, full florals in rich colors on one side of each sheet. Basic geometric patterns in solid colors on the other side. Perfect on any project, no matter how frilly or basic. Use each side to show it off!

Show off your Designer Series Paper

Adding interest and dimension is a bonus of this simple technique. Experiment with different shapes and sizes to achieve different looks to your cards. Here’s my tip: cut your shape from an area of the DSP mat where you plan on popping up the second layer. You won’t see this cut-out because you will be adding a 1/4″ layer of the same shaped colored cardstock to the back of this DSP. By cutting it from the center of the mat you aren’t waisting DSP by cutting it from the original sheet.

The most important part of this technique is to make sure you keep your pattern lined up. It will be off a bit because of the layer of colored cardstock between the two layers. For some reason your eye just continues the pattern tho.

Show off your Designer Series Paper and you decide how much to add to it.

The completion of this card can be as simple as you want to make it. I decided not to cover up the paper too much. heck, it is so beautiful I just couldn’t! Deciding to use a simple circle to add my sentiment.

Have fun creating while nyou show off your Designer Series Paper using this technique.

Until we meet again. . .
Judi's online store

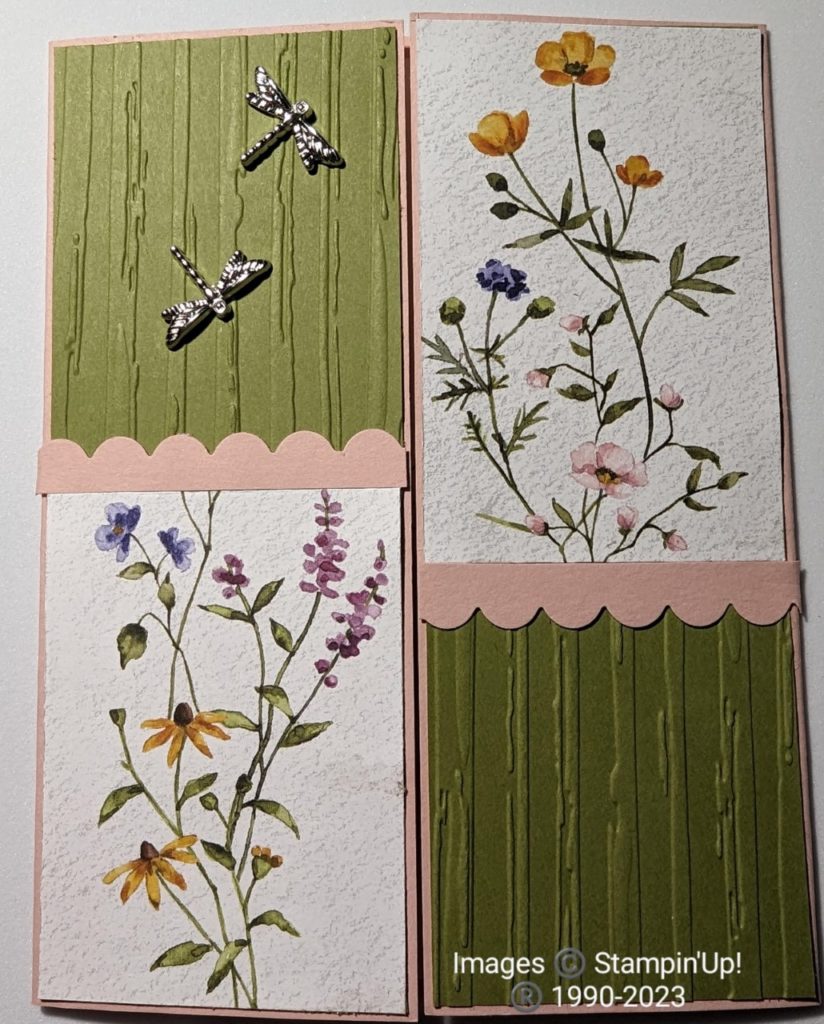
An Easy Gatefold Card when using Designer Series Paper

An Easy Gatefold Card when you use the Designer Series Paper (D.S.P.). I used a DSP that was available during Sale-A-Bration but is sold out.

It sold out after I planned on sharing this card today. Substitute any of your favorite patterned paper you have on hand. Each paper will give this card a different look.

An Easy Gatefold Card is created by scoring a basic card base into three sections.

Take your 5 1/2″ x 8 1/2″ card base and score it at 2 1/8″ from each end. Be sure to have the 8 1/2″ along the edge of your paper trimmer. When folded on the score lines, your edges will line up in the center, front of your card. The next layer will be, two, pieces that measre 1 7/8″ x 5 1/4″. Next, cut a piece of DSP to measure 1 5/8″ x 5″. You will next determine where to cut it in two pieces. You can cut it in 1/2 at: 2 1/2″ or any size you wish. I let the paper determine where to cut it.

For the strip I used, I went with where the design seemed to naturally split in half. This created a flow to the design.

I embossed the two 1 7/8″ x 5 1/4″ sections where not covered by the DSP. I used the Stripes Embossing Folder. This folder comes in a set of two with the Splatters folder. Both of these are 3-D. Check them out here!

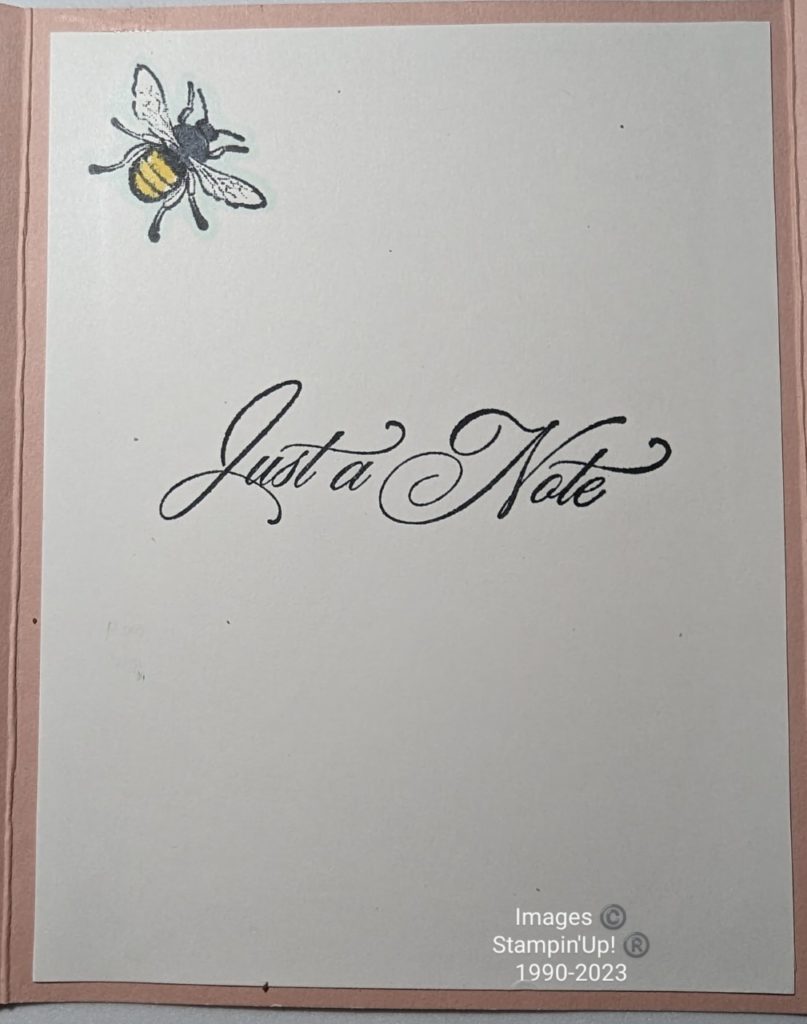
Assemble your card and embellish as desired. This is what the inside of the card looks like.

An Easy Gatefold Card inside

I completed my card on the inside with the Honeybee Home (157943) and Go-To Greetings (158763).

Click here to watch how I created this card (& 2 more)by going to my Facebook page.

Until we meet again. . .
Judi's online store

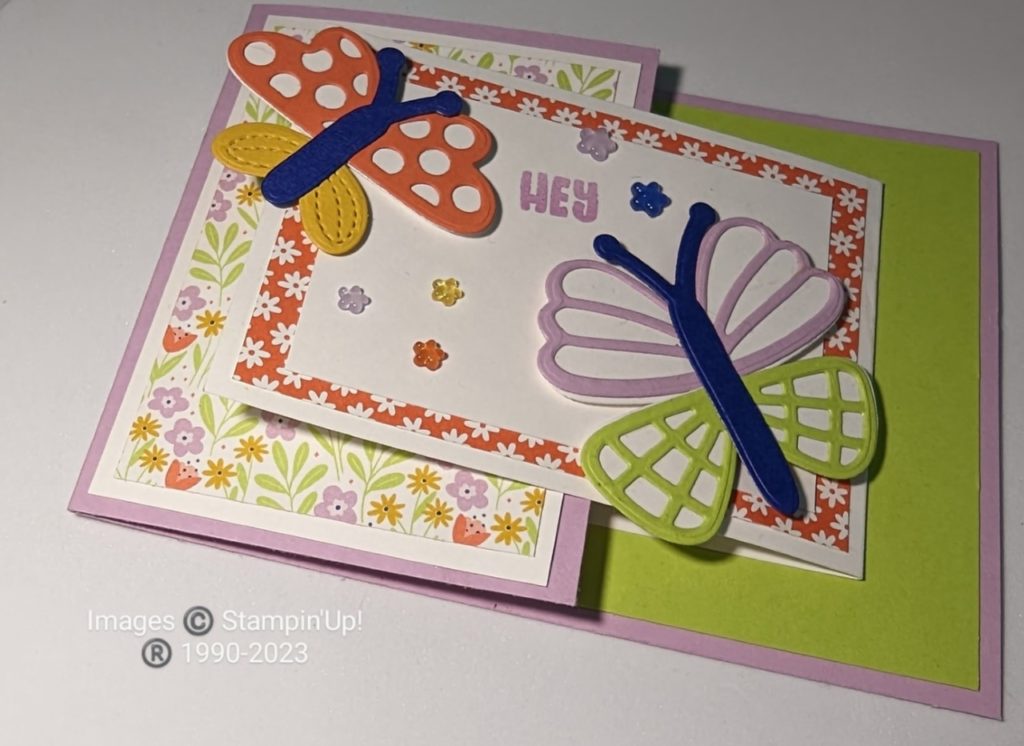
Bright butterflies for spring colored card

Bright butterflies for spring themed card will bring a smile to your face. Ready for winter to end, I wanted to make a card that says spring.

What got me thinking of butterflies and spring? I was cleaning up our front yard the other day when I noticed some of my flowers beginning to pop their leaves through the dirt. It is a little early for this to begin happening in our area. It has been a pretty mild winter here so it didn’t surprise me.

Seeing these bits of green made me think that I might begin seeing butterflies earlier this year. Knowing that we can still get a heavy snowfall yet, I don’t plan on cleaning out the leaves and plant cover for a while yet. This means I won’t be planting any seeds for the butterflies for a while either. But, it doesn’t hurt to start thinking of these brightly colored insects.

Bright butterflies for spring makes the perfect theme for your cards this time of year.

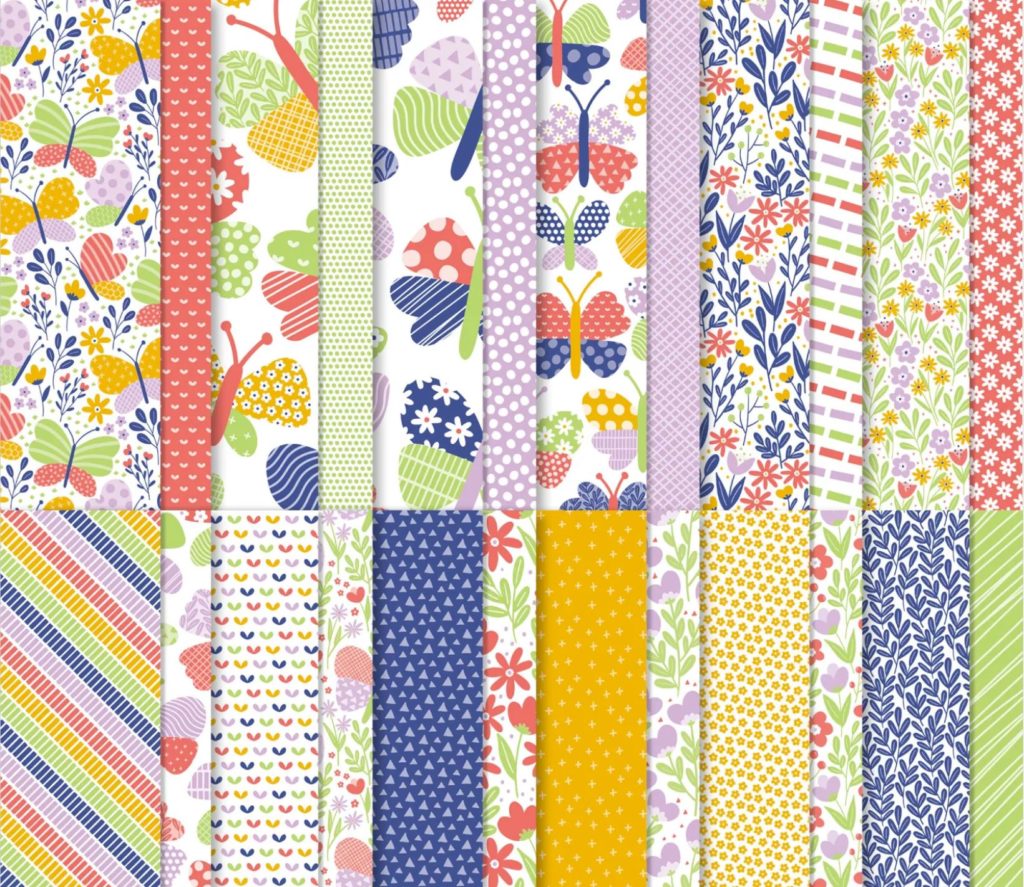
I knew that using the Butterfly Kisses 6″x6″ Designer Series Paper would help me achieve this. The butterflies and little florals will fill your projects with color and energy. If your project needs something other than butterflies or flowers, just flip the paper over and use the pattern design on the other side. It’s like getting two packs of paper in one! CalypsoThe bright colors in this paper are; Calypso Coral, Crushed Curry, Fresh Freesia, Parakeet Party, Starry Sky

Images Copyright Stampin’ Up! (Registered) 1990-2023

Products I used to make my card:

Best Butterflies Bundle, 2021-2023 In-Color Assortemnt 8 1/2 x 11 cardstock, 2022-2024 In-Color Assortment 8 1/2 x 11 cardstock, Basic White Cardstock, Butterfy Kisses DSP, Classic Ink Pads in the following colors; Crushed Curry, Fresh Freesia, Parakeet Party, & Starry Sky.

These are the papers, with dimensions, you will need to recreate the card;

  • Fresh Freesia card base: 8 1/2″ x 4 1/4″, score @ 3″. Your card base will be 5 1/2″ x 4 1/4″
  • Parakeet Party: 4″ x 5 1/4″, this is for the inside of card base
  • Basic White; 3″ x 8″, score @ 4″. This is sentiment base.
  • DSP: 2 3/4″ x 3 3/4″, layer onto sentiment base
  • Basic White: 2 1/2″ x 3 1/2″, layer onto DSP on sentiment base
  • Basic White: 2 3/4″ x 4″, layer onto small section of card front
  • DSP: 2 1/2″ x 3 3/4″, layer onto Basic White on card front.
  • Scraps of: Basic White, Calypso Coral, Fresh Fresia, Parakeet Party, & Starry Sky.
Bright butterflies card using #BestButterfliesBundle

Look here to see another card using this bright Designer Series Paper with another of our butterfly sets.

I am sure I will be bringing you more Bright butterflies in the future!

Until we meet again. . .
Judi's online store

How to make a simple card layout to say Hello!

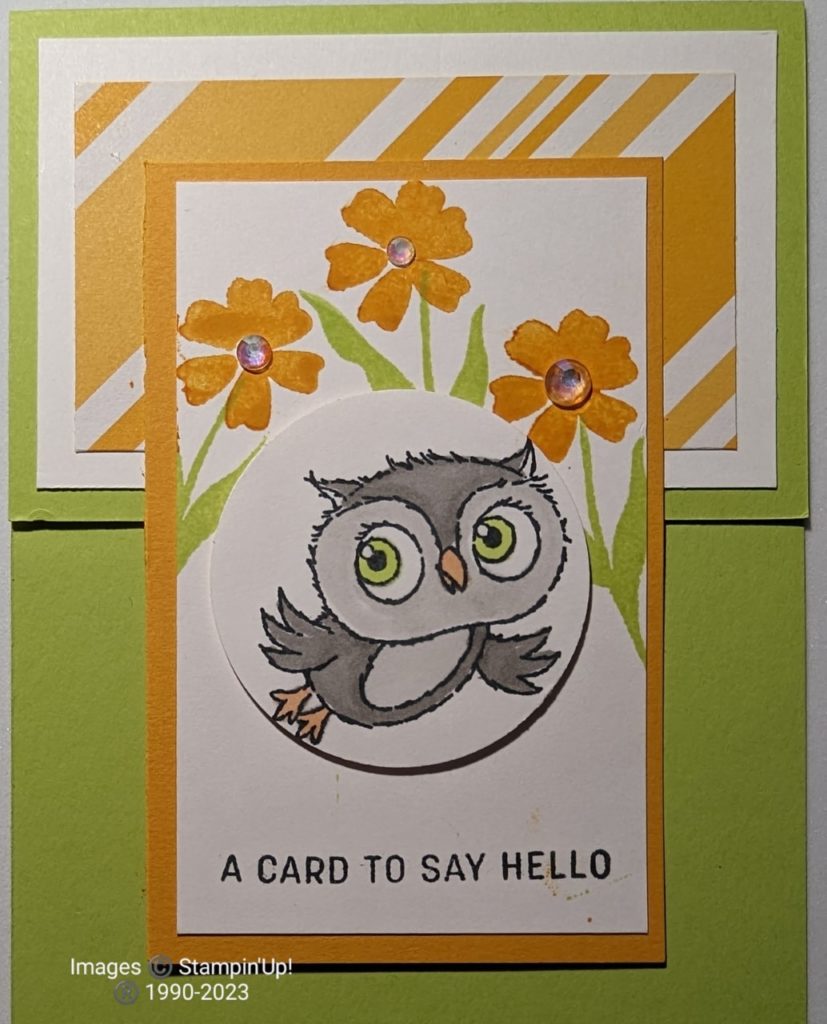
How to make a simple card that is one of my go-to layouts. I changed it up a bit for this adorable card that simply says “Hello”!

Begin by cutting a base to measure 4 1/4″ x 11. and score at 5 1/2″. Next, cut off 2 1/2″ from one end. This is the front of your card. Use this cut off as the base to this next piece. This is the base of your card. From here on, you can adorn your card any way you wish.

How to make a simple card layout using  #AdorableOwls

How to make a simple card layout then adapt it to shake things up!

I chose to shake this layout up a little bit. Choosing to cut a piece of Mango Melody 2 3/4″ x 4 1/4″ instead of using the cut-off. I then cut a 2 1/4″ circle from a piece of 2 1/2″ x 4″ Basic White. This will be layered onto the Mango Melody after stamping. Choosing the flying owl from the Adorable Owls set, I stamped it onto the circle with Memento Ink. Next, I colored the owl using my Stampin’ Blends. NOTE: this stamp set is only available thru 2/28/23.

Onto this same piece I stamped the flowers, stems and sentiment. I adhered this to the Mango Melody piece. Using Stampin’ Dimensionals, I adhered the circle over where I punched it out.

I cut a piece of Basic White to measure 2 3/4″ x 4″ to layer onto the remaining section on the card base. Next, I cut a piece of the Dandy Designs Designer Series Paper at 2 1/2″ x 3 3/4″ to put on top of this Basic White layer. This was adhered to the smaller section of the card base.

The owl piece was then attached to the smaller section, centered. Give my go-to layout a try!

Until wr=e meet again. . .

Judi's online store

You still have time to Join My Team and choose this Exclusive Boho Blue Mini Cut & Emboss Machine! *This offer ends 2/28/23.

JOIN HERE!

Creating A Beautiful Background Two Ways!

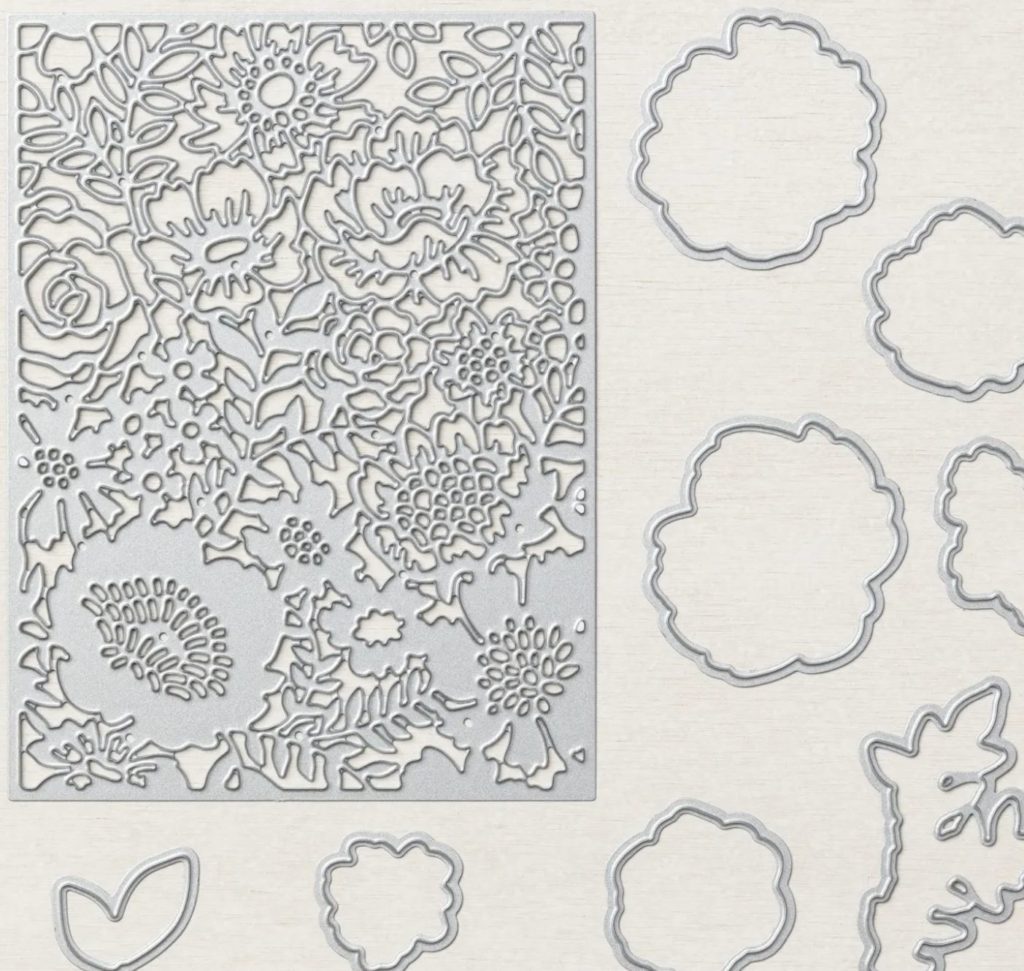
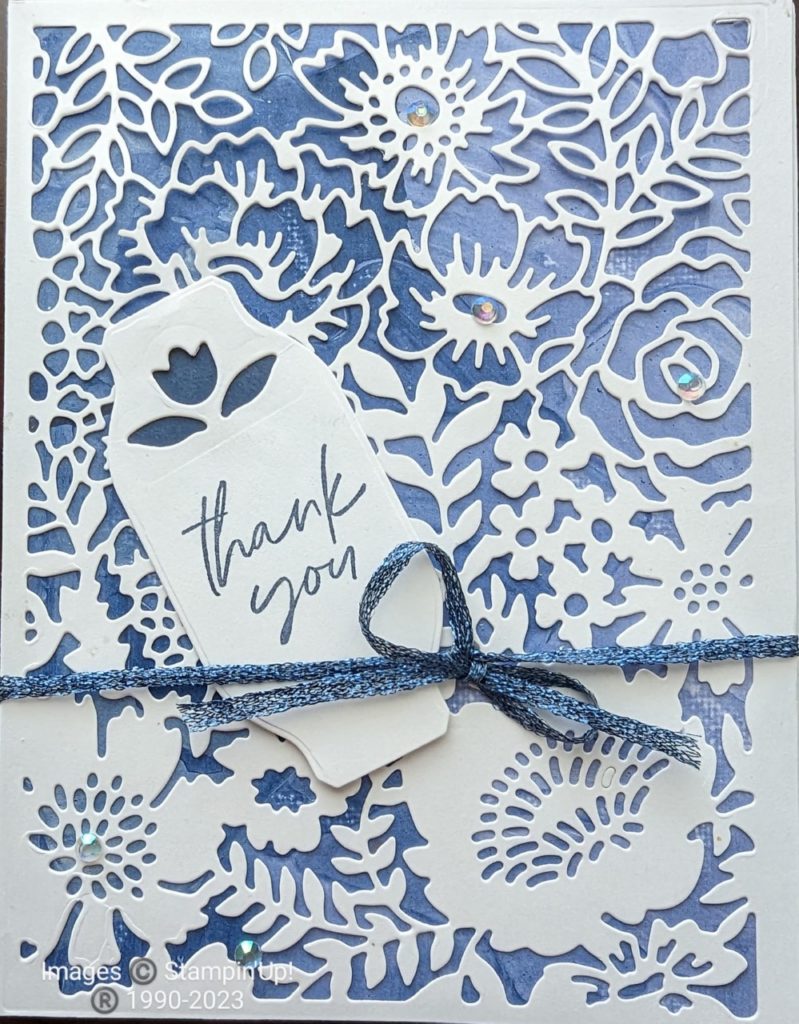
Creating A Beautiful Background for your cards can be done at least two ways when you use the Two-Tone Flora Dies. The particular die cut I am talking about is the large one in this set.

This die is just so beautiful! And versatile!

When in a hurry, just cut and glue. That’s right. Just cut out the die from any color cardstock or Designer Series Paper. By cutting it from a colored cardstock, you can dress up a plain base of Basic White. Cut it from a piece of Designer Series Paper (DSP),and not only the die will take on a totally different look, but so will the DSP!

You will be amazed at how that DSP pattern, that you just couldn’t phathom how to use, will look beautiful! Try putting an un-cut layer of DSP onto your card base. Now, adhere a solid colored or white cardstock cut from the large die, onto it. The DSP will be peeking through the cut-outs of the die.

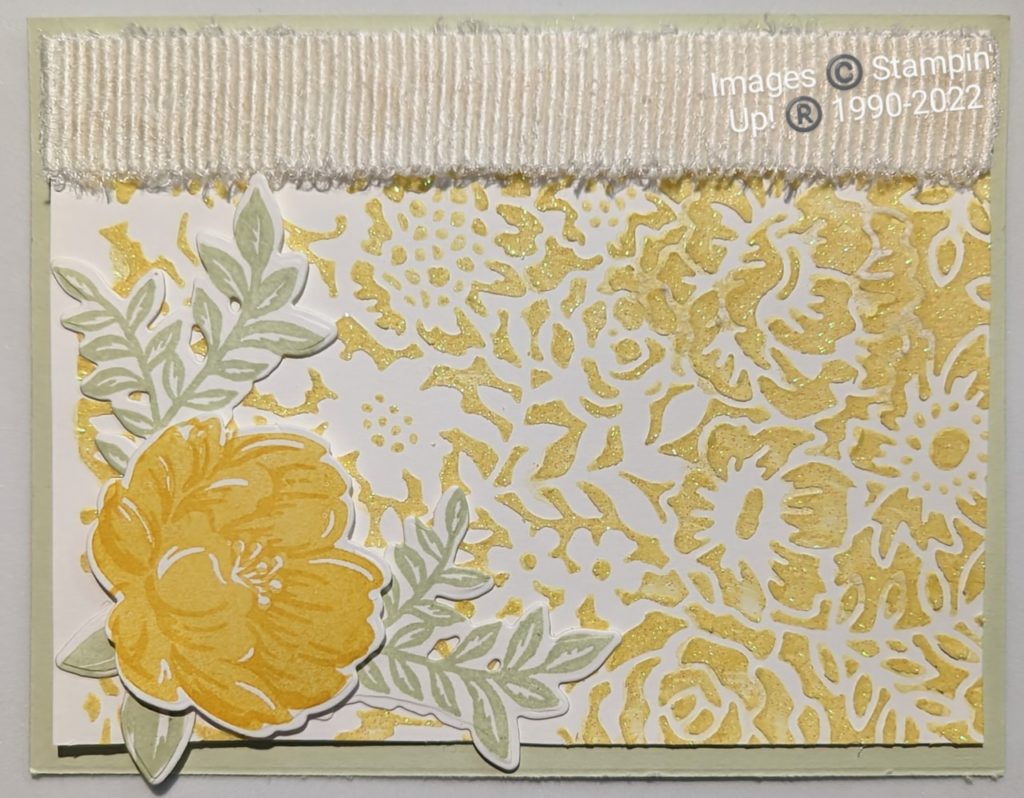
Creating a beautiful background two ways for two different looks like I did in these two cards.

I used the larger die in the Two-Tone Flora Die set (#159181)

#TwoToneFlora, #beautifulbackgrounds
Images copyright Stampin’ Up! (Registered) 1990-2023

This is what I did in this first card. Adhering a DSP of varigated colors of Stary Sky onto the card base. Then I added a white layer cut from the die. I wrapped a ribbon around it. Added a tag ( the Something Fancy Dies). A few Faceted Rhinestone Jewels and I created this card within minutes. Just think of all those pieces of DSP you can use with this idea!

Creating A Beautiful Background with #TwoToneFloraDies

This second background will make you feel like a kid again! You will cut the die from the center of a 5″ x 5 1/2″ piece of Basic White cardstock. You will use this as a stencil. Mix one drop of re-inker (color of your choice) to some Shimmery White Embossing Paste. Place the stencil onto your card front. Now spread the embossing paste all over as desired. Let dry for about a minute before carefully removing the stencil. I used the coordinating Two-Tone Flora stamp set to create the embellishments on this card. You can decorate it as you wish. Here is what mine looks like.

#Glimmerpaste, #TwoToneFlora, #BeautifulBackground

I know I said you can create beautiful backgrounds two ways with this die set and I have already shared three! There are at least two more ways I can think of at the moment. I encourage you to start creating with this die set and let me know how many different ways of using this one die you can come up with. To purchase this die so you can start creating just hop on over to my online store to purchase it!

(I recommend getting the stamp set too. You can save 10% by purchasing the bundle [#160414].

Click here to see another card using this great bundle & the Glimmer Embossing Paste.

Until we meet again. . .
Judi's online store

How to use Watercolor Pencils on your hand made projects

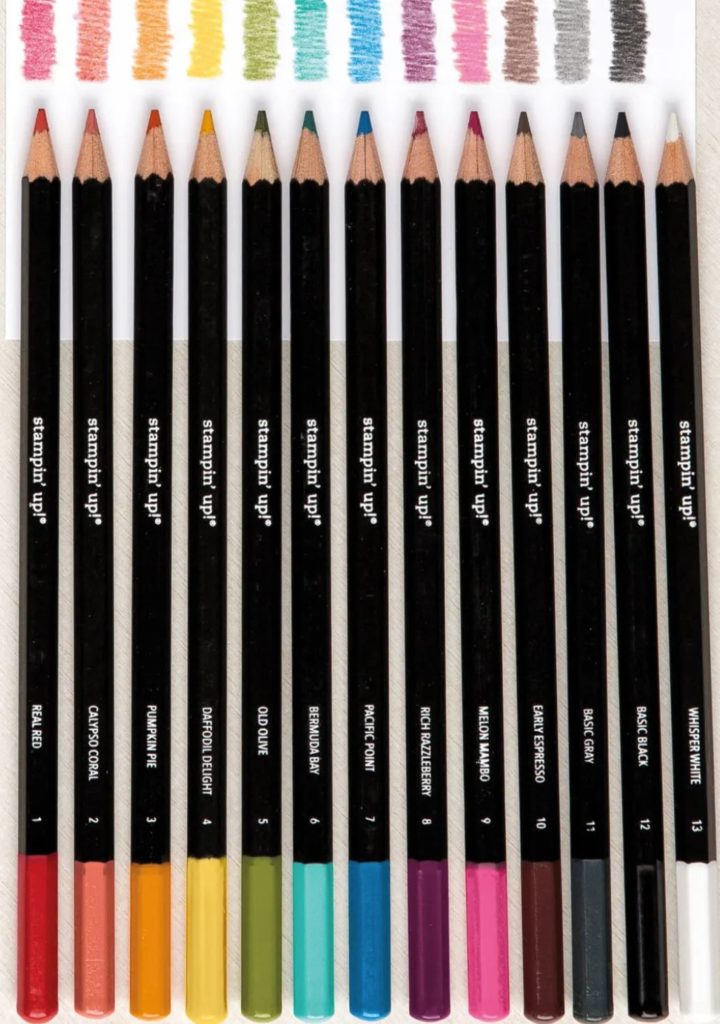
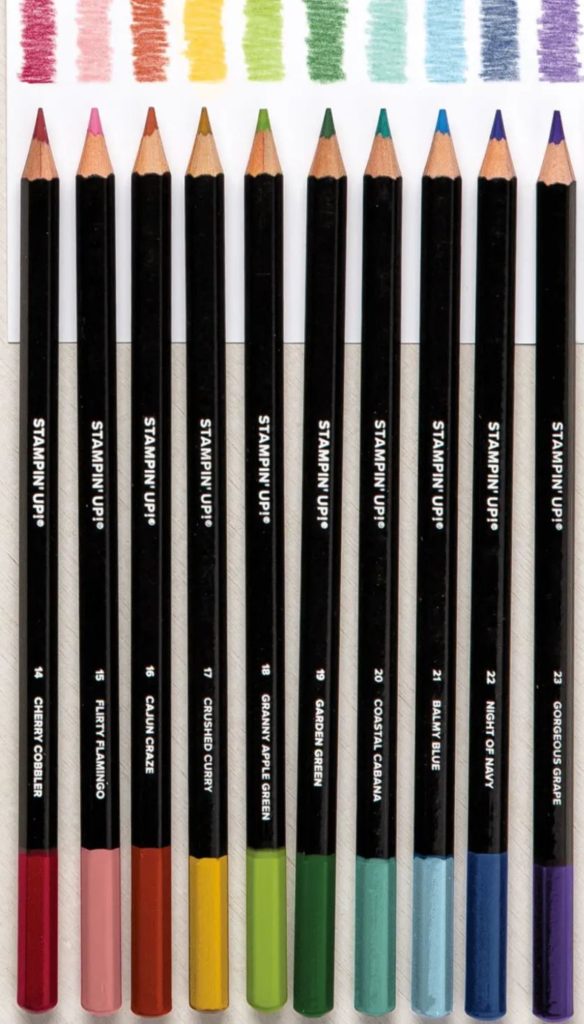
How to use Watercolor Pencils when coloring images is a great question. When I have a newer stamper they will ask what to use for coloring images, when first starting out. My answer is Watercolor Pencils!

We carry two different assortments that coordinate with our colors. By using one or both of these assortments you can be sure your iages will coordinate with your other inks and papers. Here is the first collection

watercolor pencils

And the second

watercolor pencils assortment 2

Recently I shared several ways to use them on a Facebook Live.

The first item I covered is which inks to use to stamp your images. I recommend using a sovent based ink like Staz On. Think of it like oil & water, they don’t mix. (A side note ~ you don’t want to use Staz On ink with photopolymer stamps.) How to clean stamps with Staz On Cleaner to keep them from getting stained is another tip learned.

I then moved on to showing how to color the images so you get dark and light areas by coloring around the inside of the images. Then, use either a Water Painter or Blender Pen to spread the pencil and achieve a water color look. I recommend blending the lightest colors then moving on to the medium and dark.

I showed how to get a more intense color by rubbing your Blender Pen or Water Painter directly onto the pencil then coloring. This is a great technique to use with lighter colors like Daffodil Delight.

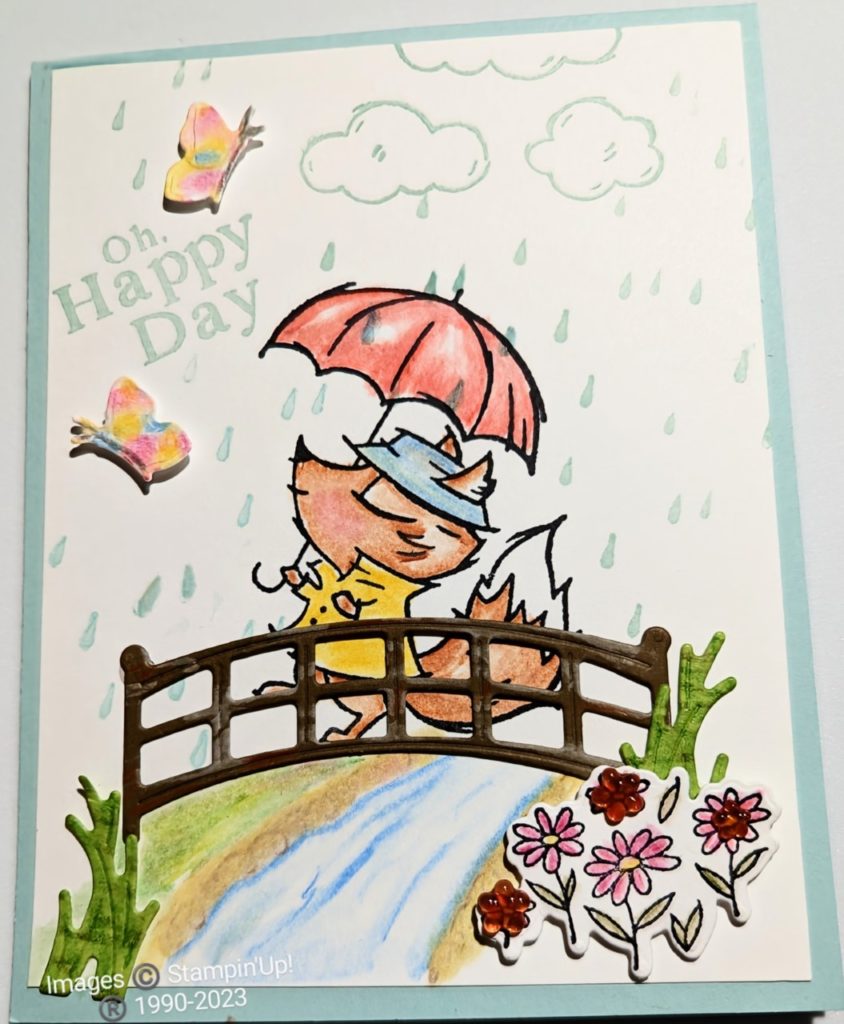
Coloring directly onto cardstock to create your own design or add interest to die-cuts is another way to use Watercolor Pencils. We used this technique on the butterflies and grass.

How to use Watercolor Pencils to create a bubbling creek?

How to use Watercolor Pencils with #PlayingintheRain stamp set

After stamping the fox I shared how to createyour own background detail with Watercolor Pencils. First, using the Balmy Blue pencil to create the creek. I mixed colors together to create the creek bank. The final touch was adding Old Olive and Garden Green to create the grass.

Coloring with Watercolor Pencils is fun and relaxing. If you would like to watch the replay of the live you can view it here. Be sure to like and follow my page to get more ideas!

Until we meet again. . .
Judi's online store

Weekly e-mail tips & more when you receive my newsletter

Weekly e-mail tips & more in your in-box each week when you subscribe to my newsletter. I love sharing ideas as well as tool tips, techniques, card sketches and more with my readers.

I share exclusive content in my newsletters. This is also a great place to have your stamping questions answered! I answering the questions my readers may have. One that I recently answered was about using our Stampin’ Pastels.

If you love learning more about stamping and paper crafting be sure to sign up. Just fill out the form in the upper right hand corner and you will begin receiving them each Wednesday morning.

Weekly e-mail tips is just one of the things you will receive when you subscribe.

Do you love exclusive specials, be kept up to date on events I offer, & surprises? How about card tutorials? These are just a few more things that I include in these emails.

In the tutorials, you will receive, a list of the products used, measurements of the papers used, instructions, and photos of cards and 3-D projects. This card is similar to the project tutorials I share.

Weekly e-mail tips & more

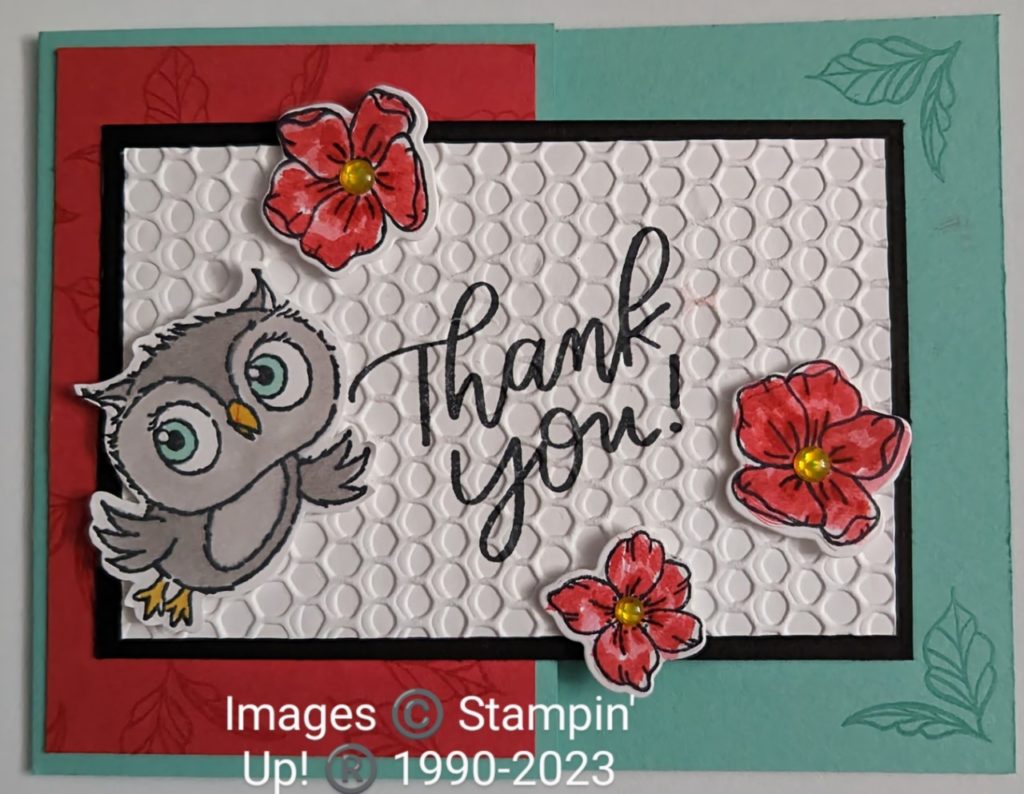
I am ready for bright spring-like colors, how about you? This bright thank you card uses; Coastal Cabana, Sweet Sorbet & Daffodil Delight. I used the Adorable Owls stamp set (160269) that is available as a Level 1 Sale-A-Bration item. You can earn this stamp set free with a minimum purchase now through the end of the month, while supplies last. I paired it with the flowers from the Framed Florets stamp set. See more ideas using this stamp set here.

I also would like to mention that you will receive a FREE special fold tutorial and an exclusive offer when you sign up to receive these weekly e-mails. I am sure you will enjoy the tips & more!

Until we meet again. . .
Judi's online store