How to Create A Gate-Fold card that will surely impress your loved ones? I will be sharing the steps in this post, you may be surprised at how easy it is. Adding a touch of elegance to your handmade cards, a gatefold card is the perfect choice. Embrace your creativity and let’s embark on this exciting paper crafting journey together!
First, gather your supplies. The supplies below are what I used. These are available for purchase at my ONLINE STORE.
- STAMPS: Go To Greetings #158763 (I used “Just A Note”)
- INKS: Starry Sky #159212
- Paper:
- Balmy Blue #146982: [5 1/2″ x 8 1/2″ scored @ 2 1/4″, 6 1/2″]
- Night Of Navy #100867: [2″ x 5 1/4″]
- Calypso Coral #122925: [3 7/8″ x 3 3/8″, 1″ x 3 1/4″]
- Basic White #159276: [ 3 1/4″ x 3 3/4″, 4″ x 5 1/4″, 3/4″ x 3″]
- Les Shoppes DSP #161322
- Pattern 1: 1 1/2″ x 5 1/4″
- Pattern 2: choose a sweet shoppe
- scrap for inside
- Accessories and Tools:
- Medium Envelope, Basic White #159236
- 2022-2024 In Color Pearls #161621
- Multipurpose Liquid Glue #110755
- Paper Snips Scissors #103579
- Stampin’ Cut & Emboss Machine #149653
- Cane Weave 3D Embossing Folder #160580
- Bone Folder #102300
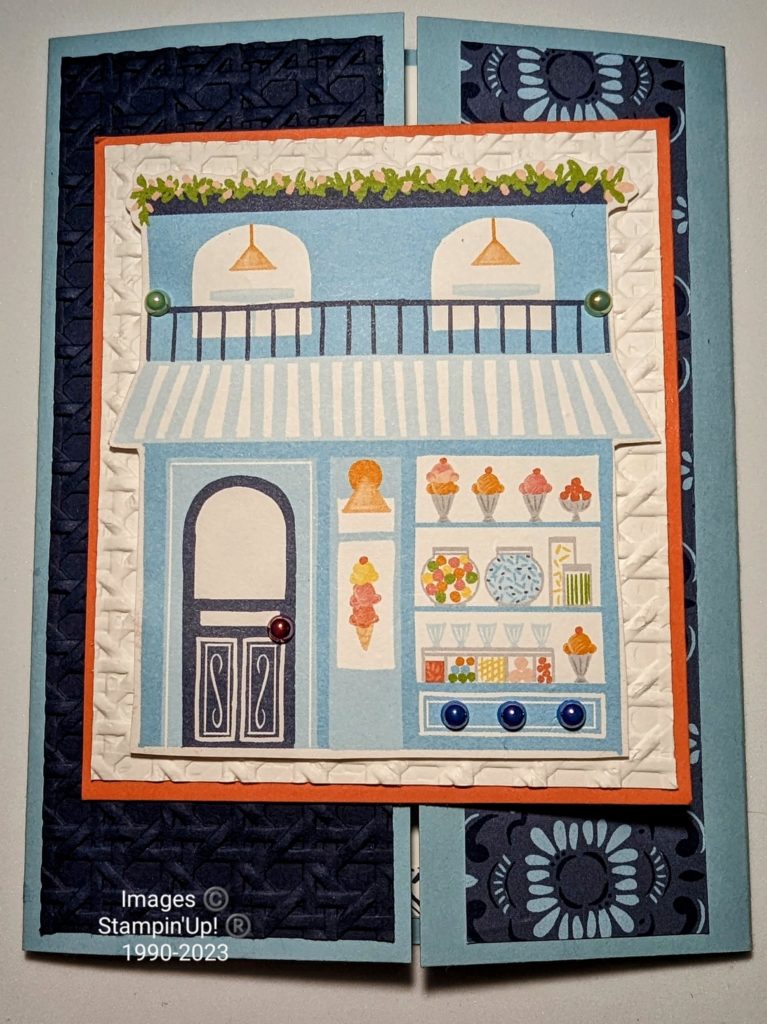
You will adhere all pieces with the Multipurpose Liquid Glue. TIP: Using this glue on embossed pieces of cardstock ensures your layer won’t come off.
A bone folder will come in handy to create crisp and clean folds.
How to Create A Gate-Fold Card with the above supplies
- Score the 5 1/2 x 8 1/2 carstock as listed above. Fold on the score lines to create the gatefold effect.
- Using the Cut & Emboss Machine & Cane weave 3D Embossing Folder, emboss the Night of Navy strip. Adhere this to the 2 2/4″ section on the card front.
- Emboss the 3 1/4″ x 3 3/4″ piece of Basic White with the same embossing folder. Adhere to the Calypso Coral piece.
- Adhere the 1 1/2″ x 5 1/4″ strip to the 2″ section on the card front.
- Adhere the Calypso Coral rectangle to the left side of the card front over the Night of Navy section.
- Cut out your desired sweet shoppe from the DSP (Designer Series Paper). Adhere to Basic White rectangle on card front.
- Adorn your sweet shoppe with the pearls.
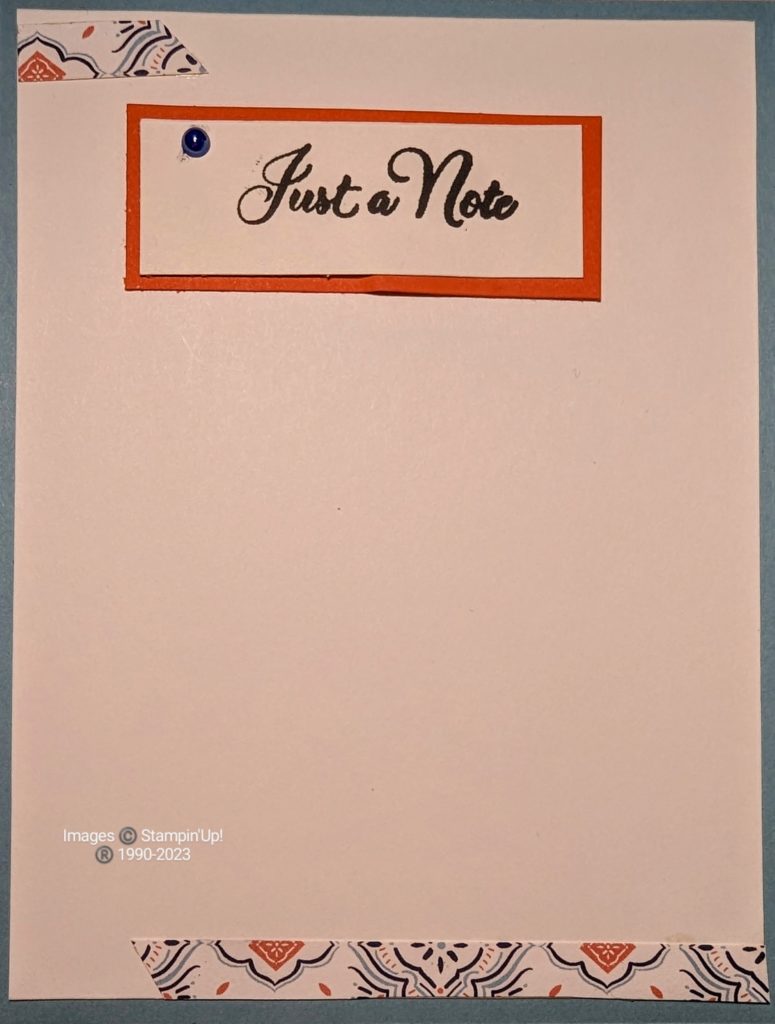
- Use the Starry Night ink to stamp your desired sentiment onto the 3/4″ x 3″ Basic White, trim. Adhere to Calypso Coral 1″ x 3 1/4″ – trim if necessary.
- Onto 4″ x 5 1/4″ Basic White, adhere sentiment and strips of scrap DSP as shown (if desired). Adhere this to the inside of the card.
- Decorate your envelope as desired.
If you would like to watch my live class on creating this card, click here to watch it on my Facebook Page.
Creating a gatefold card is a delightful paper crafting adventure, that will bring joy to both you and your cherished recipients. With a blend of artistic flair, you can design cards that leave a lasting impression. The gatefold style adds a surprising touch, making it a standout choice for your handmade creations.
Embrace your creativity, gather your supplies, and let the magic of paper crafting unfold with every gatefold card you create.
Until we meet again. . .


Leave a Reply