Thank you Fresh Fruit

I came up with this card while prepping for my Facebook Live Event that was supposed to happen last night. Like many others, I experienced technical difficulties, my phone would not / could not connect! After many attempts I had to abort the event for last night.

Now you all know that I am not the most technical person but I won’t give up! Got up this morning and after several more attempts my phone still would not connect so I could do a live event, even standing right next to the router!! I had to take a break to enjoy some time with my friends in my product of the month class.

We had a fun time in class and it was just the break I needed! I decided it was a phone problem and not an internet so I started digging into my phone ( Galaxy 6) I mean what is the worse thing that would happen? I would have to take a trip to the phone store for them to get it up and running because I did something I shouldn’t? Wouldn’t be the first time and I am quite sure not the last.

I did it!

Sorry for the babbling, on to the card. . . .

Well, I came up with the start of the card and admittedly finished the design right there with everyone watching! I know, scarrrrrrrrrry! My motto is, ” It’s only paper.”

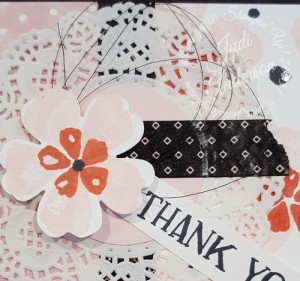
I created the card using the flower images from the Fresh Fruit stamp set, one of my new favorites! I chose Pink Pirouette, Watermelon Wonder, and Basic Black and added a Delicate White Doily (141701), Pop of Pink Washi Tape (141659) & Black Metallic Thread (141695) & a few Rhinestone Basic Jewels (119246).

Don’t you just love it?
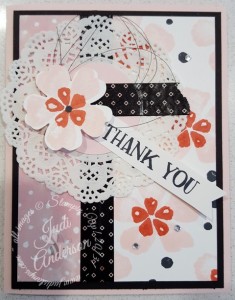
Fresh Fruits Stampin' Up!

Here is the detail of the new Black Metallic Thread
fresh fruit Stampin' Up!detail

If you would like to watch the video on how to create this card do a search on Facebook for

Judi Stamps. Be sure to “LIKE” my page so you can get more project ideas & watch my next Facebook Live event next week!


Shop 24/7 for the products I used here at My Online Store

Til we meet again,

Judi's Stampin' Up! online store

Going Global Sneak Peek Project!

I thought I would share a Sneak Peek project using the Going Global Stamp Set with you today. Many of you are aware that you may begin ordering from our new 2016 Occasions Catalog tomorrow AND you can earn a FREE Sale A Bration item with each $50 you purchase! Sadly, this means that the End of Year Sale ends today. It is also the last day you can order product from our 2015 Holiday Catalog, I will miss many of those products. In fact, I stocked up on several of the consumables to begin creating some fun holiday goodies for next year.

Today marks the beginning of  new season of paper crafting for me. I look forward to our Occasions Catalog and spring ( well, spring won’t be here for a little while). I love creating projects for birthday’s during the month of January as well as some Valentine goodies. You would think that with all the cards I create, I would send birthday cards. I want to be honest here, my intentions are there, but I seem to forget to send them!! Yep, I have an entire box of birthday cards just waiting to be sent! This changes this year! I will get a system in place, during January, and send birthday cards all year. I didn’t put a birthday greeting inside this card yet, but I will when I put it into my January slot. I will be doing a more feminine version using a different color pallet but the design will be the same. My mission for today is to go through my Birthday Book and see how many masculine and how many feminine cards I need for this month. I will then create them, this week, and share the pile of cards with you on Friday.

Here is a video showing you how you can create your birthday cards for the month of January too! (Don’t forget, you can order these items beginning tomorrow, January 5,2016)

I will be sharing my monthly design with you right here, each month to help keep me on track!! I will be sharing my card for February next week to give you time to order the supplies and create your cards by the first of February. Are you up for the challenge? Let me know by leaving a comment below.

This is what I used for this card:

STAMPS:

Going Global Stamp Set (W-140745) (C-140748)

INKS:

Mossy Meadow (133645)

Delightful Dijon (138327)

Lost Lagoon (133644)

Memento Jet Black

PAPER:

Very Vanilla (101650)

Tip Top Taupe (138336)

Going Places Designer Series Paper Pack (140581)

Foil Sheets- Gold (132622)

ACCESSORIES:

Fast Fuse (129026)

Multipurpose Liquid Glue (110755)

Stampin’ Dimensionals (104430)

3/8” Satin Stitched Ribbon – Basic Black (138430)

Banner Triple Punch (138292)

Confetti Stars Border Punch (135861)

Label Bracket Punch (132153)

World Traveler Textured Impressions Folder (138289)


Til we meet again,

buy Stampin Up! here!


Project Life Halloween Page & Save 15% off stamps!

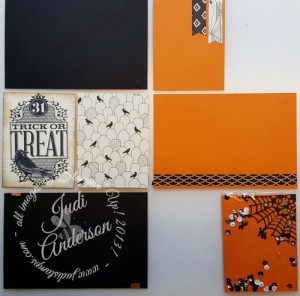
Scrapping Friends created this Halloween Page this month and I know they will be excited to learn they can get the stamp sets used to create it at 15% off this week! Each month, Scrapping Friends get together to create 2 layouts and 3 Birthday cards and I get to choose the themes! I ask them what they would like in the future and then I design the pages for them to make. Sometimes they copy me exactly but other times their creative minds run! ( I like it when that happens!). They all have young children so Birthday’s, Holiday’s and Sports layouts are always welcomed. This month I brought them 2 different Halloween layouts to make, in each they created 1 traditional 12×12 page & 1 Project Life by Stampin’ Up! page ( they love Project Life). Here is the Project Life page.

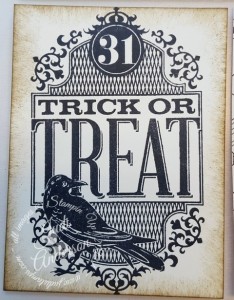
Project Life Halloween They loved combining the different elements to coordinate with their first page. We used the Happy Haunting Designer Series Paper, the Witches’ Night Stamp set, Happy Hauntings Washi Tape, Spider Web Doilies, Metallic Sequins in creating the page.

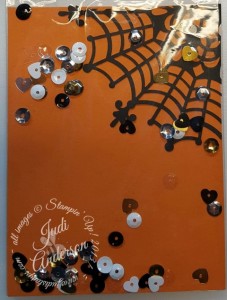
Spider Web shaker pocketWe used a small cello bag to create this Spider Web Shaker Pocket to fit into one of the 3 x 4 pockets. Don’t you just love it? Adds lots of bling to the layout!

Witches' Night stamp set imageHappy Huntings Designer Series Paper


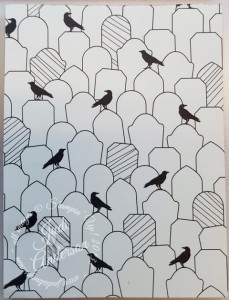
Don’t you just love, love,love how this pattern from the Happy Hauntings Designer Series Paper coordinates with the Witches’ Night stamp set (#139708)? Look closely. . .  do you see that those crows are sitting on tombstones!

I actually created the coordinating page to this one on Periscope last week, did you see it? You will want to be sure to catch my scopes because I share other exclusive, fun projects on my scopes.  Be sure to go to my ONLINE STORE to purchase your stamps because. . . .

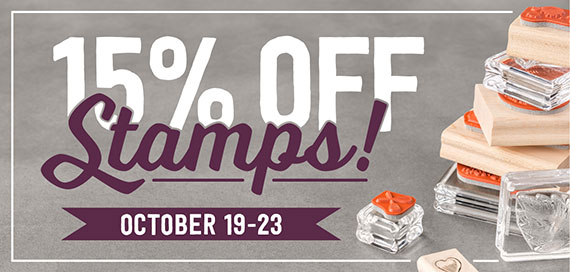
Did you hear the news?? You can purchase stamp sets at 15 % off this week!! Here are the details:

Header_15-Stamps_Demo_10.19.2015_NA

Details:

  • Dates: October 19-23, 2015
  • Host stamp sets, rotary stamps, and supply list stamp sets are not eligible for the 15 percent promotional discount on stamps.
  • Bundles are not eligible for this promotional discount, but they will retain their current 15 percent Bundle & Save discount. The stamp set from the bundle may still be purchased ala carte with the 15 percent promotional discount.
  • Stamps purchased using a 50 percent Stampin’ Rewards discount will not be available for this 15 percent promotional discount. Stamps purchased using Stampin’ Rewards discounts will still be 50 percent off retail value of the stamp set.
  • All order types qualify for this promotion.
  • There is no limit to how many discounted stamp sets can be placed on an order.
  • There is no minimum purchase required for this promotion.
  • Order Deadlines:
    • Phone: October 23, 2015 by 6:50 PM (MT).  CALL ME- 630-853-1908 to place your order
    • Online THROUGH MY STORE: October 23, 2015 by 11:55 PM (MT).  Use Hostess Code 99NBFXKD


I just can’t believe it-Stampin’ Up! has all stamps on sale for 15 percent off for just a few days. This rarely happens, so check it out and get your stamps ordered today! Everyone that uses the HOSTESS CODE    99NBFXKD  will be receiving a special surprise from me in their mailbox!!

Don’t forget about the host promotion happening this month, too. You can combine orders (or simply order $300 on your own) to achieve extra Stampin’ Rewards AND deals on stamp sets!  PLEASE don’t use the hostess code if you choose this option!!

Til we meet again,

buy Stampin Up! here!


Did you click on it? Questions about Periscope Answered.

I shared about my Periscope Button yesterday, did you click on it? I know several of you did!! If not, you will want to be sure to click on it at 1:30 each weekday to watch something new.

I have had some questions

about using Periscope, while I am in no means an expert I thought I would try to share a few simple items with you.

  • To get Periscope on your phone: go to play store, type in periscope, download FREE App, register by using your phone or Twitter account ( twitter is easiest I have found)
  • When watching on your phone;
  • To comment, click on the “say something” in the lower left corner and type in the box that pops up.
  • To let me know you like what I am sharing, tap in the lower right hand corner to give me love hearts.
  • To comment to someone else who comments just tap on their comment box, click reply when the next box pops up, type your reply and send.
  • If watching on your computer:
  • you can not comment or give hearts on the scope BUT
  • You can comment through Twitter

Why do I do these scopes? I have been asked over and over again to do live  workshops and shares online. I have tried Google Hang Outs but most had troubles figuring it out and I was spending more time explaining on how to get on than actually doing live events. Also, they were limited to the first 10 who joined so several of you were left out. I tried doing Facetime, but again too many obstacles and hoops to jump through. Periscope seems to be a good fit, easy to use, easy to get on, several of you cn get on. AND BEST OF ALL- you and I can talk with each other!! WOOO!!HOOO!!

SO why not give it a try and join me at 1:30 today?? Just click on the Periscope (judistamps) bar on the left at the end of all my social media buttons. It is blue when  I am not live and turn red when I am live. Remember if you click on it when it is blue it will bring you to my last scope within the past 24 hours.

As always, all materials shown can be purchased through my ONLINE STORE 24/7 !!

Til we meet again,

buy Stampin Up! here!


DIY Video on Creating a Spooky Sky

How did you like my Spooky Halloween card yesterday where I showed off the stamping on your embossing folder technique? As promised, I am sharing a video I made to show you how I did the spooky sky. I know once you try this technique you are going to fall in love with it!  I will share a few more cards I created using the technique tomorrow. This will give you the chance to play and create to see what you can come up with.

And what did you think about my big announcement about my Periscope Button? Don’t forget to come back here at 11:30 Central time to give it a try!

Remember, You can purchase all materials I used in this video through MY ONLINE STORE HERE.

Til we meet again,

buy Stampin Up! here!


My new “LIVE” Periscope Button!!

I am so excited to let you know about my brand new LIVE Periscope button!! What is even more impressive,this tech challenged person did it all by myself!! As many of you know you can watch me share stamping tips, techniques, projects, and more live on my Periscope Channel ( Judistamps). WHOA!! I better back up a bit for those of you that are sitting their thinking,” What in the heck is this crazy lady jabbering about?” Periscope is a free app that you can download onto your phone. It is easy to do through Twitter but you can also do it through your phone number if you don’t have a Twitter account. I have a twitter account and found it super easy to do my periscope account through it. Once you set up your profile you click onto the 3 little heads towards the left corner, click search, type in judistamps, I should pop up. Click “FOLLOW”. You will now get an tiny bell ring when I do  live presentation. Don’t worry if you can’t watch it live, you have 24 hours to watch the replay. I explain  how you can then show me how you are liking what I am sharing as well as how you can ask me questions LIVE!!

Ok, now for that LIVE Periscope Button that I was supposed to be telling you about. You will find it in the left column . The Periscope Button is the far right one right after the Twitter birdie. If the button is blue, I m not live. If the button is red and flashing I am currently doing a live scope!! When you click onto the blue button it will bring you to my profile page, ( there mat be a replay on if I have scoped within the past 24 hours so be sure to click on the blue button each time you come too! when you click on the red flashing button, it will bring you to my LIVE scope!!

<It’s that button right there. The blue one that has a red ball in an upside down teardrop and judistamps next to it.

Isn’t that absolutely fun?? I will be doing  scope tomorrow at 11:30 AM Central Time. Why not come back then and check it out? If you are like me, tech challenged, you will be able to watch me on your computer just by tapping onto my new “LIVE” Periscope button!

Don’t forget that all materials I use can be purchased through MY ONLINE STORE!

Til we meet again,

buy Stampin Up! here!

Scrapbook Expo Bound

It’s been a little crazy around here these past few weeks as I have been making samples for my upcoming classes and the Scrapbook Expo being held in Schaumburg this Friday and Saturday. I am so excited to see so many of you there again this year. I have had a spot at the expo for the past 15 years and have made many, many friends throughout the years. It is always so much fun to see those of you that come from out of state, seems like this is our meeting spot! We continue connecting through social media all year long but I always love seeing everyone in person ad chatting about what the past year has brought them.

Have you been watching me on Periscope? This is the newest way I am connecting with my friends across the country. We have tried other avenues but this is by far the simplest for everyone and they are loving it!! They get to watch me do projects and give tips live in addition to connect with me through their comments. They are also helping each other by offering tips and suggestions on their own through the chat portion of the scope. Do you know what the greatest part of us  connecting through scoping? They can do it on their phones!!!! If you would like to scop with me give me a shout out and I will let you know what you will need to do ( it’s SUPER simple!!).

Well, I am on my way now to set up and I just may do a quick scope from the Expo today as I am setting up as well as Friday and Saturday during the Expo.

Til we meet again,

buy Stampin Up! here!

Sprinkles of Life- how to build a snowman

It’s funny where inspiration will sneak up on us, isn’t it? Sitting outside eating an ice cream cone this time of year proves to be challenging, keeping from dripping all over your hands, feet and clothes is quite a chore. Bingo! That cloud in the Sprinkles of Life set reminds me of a melting snowman. Wow, where did that come from? I quickly finished my cone, went in to my imagine tablet and wrote down, let’s build a snowman with the Sprinkles of Life stamp set. And that my friends is how an idea for one of my swap cards for convention was born!

I knew you would want to make this cutie so I am sharing a video I made showing you how to build your own snowman.

Isn’t he just too dang cute? It is still summer but I have already begun making a bunch of these cuties to put onto some cute & simple winter gifts and treats. A simple way to do this is to stamp & punch all the pieces, put them into a container to assemble while watching TV with hubby, or while riding to that final summer getaway before school begins. This makes a great take-a-long kit. Why not make an extra kit for the kiddies so everyone can keep busy building their own snowmen? Don’t forget a glue stick for them!

Til we meet again,

buy Stampin Up! here!

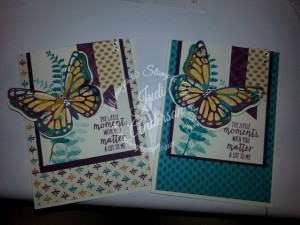
Watercolor Wings, Butterfly Basics using Bohemian Designer Series Paper

These cards using the Watercolor Wings & Butterfly Basic stamp sets with the Bohemian Designer Series Paper (DSP) were just one of the great projects attendees of our Summer HapBEE Stamping and Crafting Getaway created. It was actually one card, but depending on which side of the Bohemian DSP they chose to show is what their card looked like. In this particular class they created an assortment of 4 different cards using these stamp sets, DSP and coordinating cardstock. All were wow’d by all! The first 20 who registered were VIP’s and attended an exclusive class just for them on Friday night. The project they made was a coordinating card holder that coordinated with these cards.We also offered scrapbook themed classes in addition to the card classes, all were included in the registration fee.

Watercolor WIngs & Butterfly BasicsWhich side of the Bohemian Designer Series Paper would you have chosen?

Paper Pumpkin Monthly Kit in the Mail

*Only 3 days left to get your first TWO MONTHS of Paper Pumpkin at 1/2 off!!

  Be sure to check out the new Weekly Deals.

Shop My Online Store and have your purchase delivered to your front door.

buy Stampin Up! here!


How to create your own dimensional polka dot background paper

Ever find yourself looking for a polka dot background paper only to find you don’t have any in the colors you are using? This is your lucky day! I ran into the same problem recently and thought you may have also so I made this quick video teaching you how I solved my problem

If you can’t view video please go to: https://youtu.be/aa9dZgR9rQY to view.)

I hope the next time you run into the problem of needing a polka dot background in a color you don’t have, you remember this video and make your own!

Do you love surprises?

How about surprises for 1/2 off?

You will want to be sure to sign up for our (Paper Pumpkin) Monthly Kit in the Mail BEFORE August 10th. WHY? Because when you do you will receive the August & September kits for 1/2 off each! I was able to get a Sneak Peak at the kits during convention a few weeks ago and they are simply adorable!! Here’s a hint for the August Kit; Do you love pink & black? Septembers’ hint is; it’s a bewitching treat!

If you enjoy sitting down and having a project all designed for you, these kits are for you!! You will receive fully designed projects with everything included ( pre cut paper, ink, embellishments ).  And if you are one who loves putting your own personal touch on your projects, these kites are a great starting point!

For more information visit;

Paper Pumpkin Monthly Kit in the Mail

  Be sure to check out the new Weekly Deals.

Shop My Online Store and have your purchase delivered to your front door.


Til we meet again,

buy Stampin Up! here!


Memory Monday

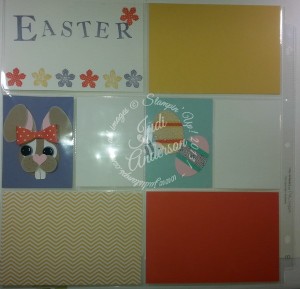
Today’s Memory Monday Page layout is a two page spread that I made for Easter. I loved creating this using one of our Project Life by Stampin’ Up! divided page protectors. This particular page has 4, 4″ x 6″ pockets and 4, 3″ x 4″ pockets.  Do you remember the bunny fry boxes I showed you how to make a few weeks ago?

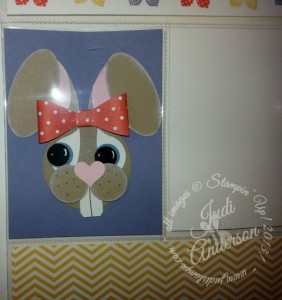
1bunnyI made a bunny for one of the 3″x4″ pockets.

I used Wisteria Wonder for a mat, created the bunny using crumb cake carstock and the bow was created with our bow builder punch and the 2013-2015 In-Color Designer paper Stack.

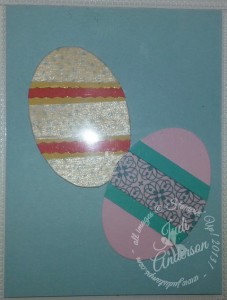
1eggsFor one of the other pockets I made 2 eggs using our Oval Framelits, cardstock and washi tape. The other two pockets were filled with cardstock. I will either add pictures, journaling or more embellishments once I decide the pictures that will go onto this layout.

I stamped the title and flowers for one of the 4″x6″ pockets, the others have cardstock and Designer Series Paper inserted until it is time to finish the pages- here is the first page.

1easterpage

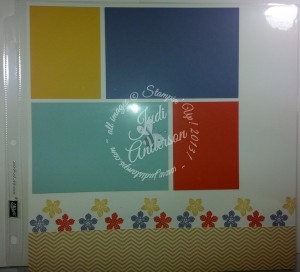
The second page is a single 12 x 12 page with color blocking using the same papers as the first page. I have left a space along the right edge to put the year and add a few more embellishments. I stamped the same flowers along the top edge of the Designer Series Paper to create a fun border.

1easterpage2

FREE SHIPPING ON ALL ORDERS APRIL 6-10 through my online store!


Join me at my Getaway on June 19-20. Click for information.

Til we meet again,

buy Stampin Up! here!


March Fab Five Birthday Class


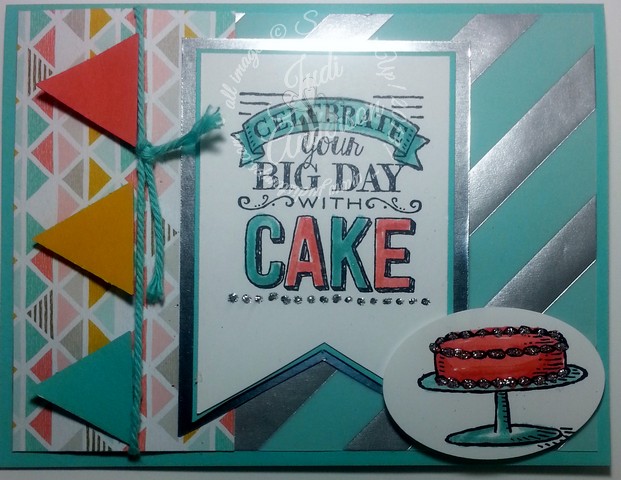
The March Fab Five Class was a big hit! Attendees got to create five fabulous birthday cards with lots of added embellishments & layers specialty papers. I love listening to the gals as they oooo and aaaaawww with each card. I can’t say that any one card was the favorite but I know this was near the top of the list. I did add a little change on this card when they created it~ we changed out the Silver Dazzling Details dots to a strip of mini Rhinestone Jewels.

1bigday4Our Silver Foil paper goes so nicely with our silver foil vellum.

1bigday5

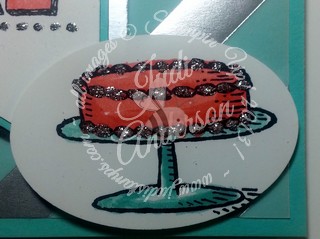
Adding our Silver Dazzling Details to the frosting takes the cake….

Everyone was hyper-ventilating when they left my March Fab Five class!

The stamp set we used for this card is the Big Day Sale-A-Bration stamp set (w-139109, c-139112) that you can choose for FREE with a $50 purchase until March 31st.

That’s right, Sale-A-Bration is ending in 5 days!

Did you hear? One of the benefits my Facebook Page subscribers are getting is; a different Sale-A-Bration idea every day from now through March 31st! Be sure to check it out.

Til we meet again,

buy Stampin Up! here!

A Happy Thing in Pink Pirouette or Soft Sky~ which do you prefer?

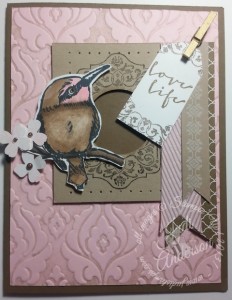
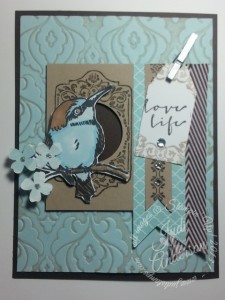
I just can’t decide, which of these 2 cards using the Sale-A-Bration stamp set, “A Happy Thing” do you prefer? Pink Pirouette or Soft Sky?

I participated in a few swaps for Leadership Conference in January and these were 2 of the cards I created for two of the swaps.The first time I set eyes on this stamp set I imagined this card.  I really loved the Pink Pirouette and Soft Suede card I did until I did the Soft Sky and Soft Suede card. I can’t decide which I like better. . .

A Happy Thing stamp set image


For this version I used our Pearl Jewels, colored them with our Crumb Cake Blendabilities for the flower centers. I colored this bird with the Crumb Cake & Pink Pirouette Blendabilities and brayered Crumb Cake ink onto the Beautiful Baroque Embossing Folder. I used a gold mini clothespin to hold the tag onto the banners.


A Happy Thing stamp set imageFor this version I used my Aqua Painter to color the bird with Soft Sky and Crumb Cake inks. I used our Rhinestone Jewels for the flower centers and on the banner for some added bling. I, again, colored the embossing folder with Crumb Cake ink. This version received a silver mini clothespin.

The A Happy Thing stamp set is found on page 19 of the Sale-A-Bration Catalog

Can you pick just one??

Sale-A-Bration ends on March 31st and this set is exclusive and will not be available through me after March 31st. Place your order here.

  • Would you like to learn how to make your own hand-made cards?
  • Do you like making your own hand-made cards and want to learn some fun ideas?
  • Do you enjoy meeting others who love to papercraft?

Check out my upcoming Getaway here!

Til we meet again,

buy Stampin Up! here!

Super Cute Easter Bunny Fry Treat Box

Easter is just around the corner and I have a super cute Easter bunny fry treat box for you to make. Tuck in some peeps, a chocolate bunny , jelly beans or my daughters favorite, a couple Cadbury eggs and you’re good to go. These make a great Easter basket for the adults (so we aren’t taking goodies out of the kids baskets!), an addition to any basket, placed around the house as decor, or at everyone’s place setting at the Easter table. Here is a list of supplies you will need:

  • Subtles assorted cardstock #131193         *Basic Black cardstock #121045
  • Whisper White cardstock  #100730          *Big Shot  #113439
  • Fry Box BigZ Die #132966                          *1/2″ Circle Punch #119869
  • 3/4″ Circle Punch #119873                         *1-3/4″ Circle Punch #119850
  • Large Oval Punch #119855                         *Bird Builder Punch #117191
  • Owl Builder Punch #118074
  • Itty Bitty Accents Punch Pack #133787
  • Project Life Journaling Pen

Here’s how you , too can make this little cutie!

Be the first to view my videos~subscribe to my You Tube Channel.

Sale-A-Bration is ending soon. Don’t miss out on getting your FREE Sale-A-Bration items, order today.

Til we meet again,

buy Stampin Up! here!

Celebrate Today with the Starburst Technique & Itty Bitty Epoxy Stickers

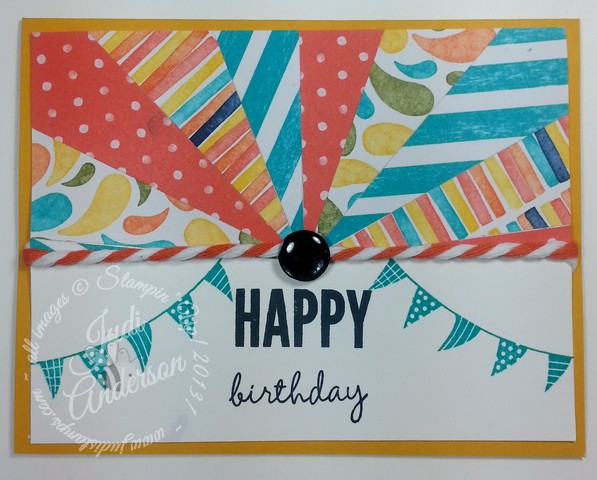
This Celebrate Today card uses the Starburst Technique and our Itty Bitty Epoxy Stickers. I was so excited when I received the Itty Bitty Accents Epoxy Stickers in the mail today. I received them from my mentor, Karen Titus, for participating in a Facebook party she held for her team last Saturday. Several of us received them and were challenged to make a card and share it on our team Facebook page. I had already created this card for my Techniques and Cards Class, tonight, at Panera Bread On Rt 59 & 95th Street in Naperville. I have been debating on what to put in the center of the card and was SO excited to get these in the mail. They are perfect!! I will be sharing a tutorial video next Tuesday, March 10 on creating this card and how to do the Starburst Technique. I don’t usually share the same technique as I do in class but I just HAD to share this one! ~That’s how excited I was to get these! I had already gotten a set but colored them all with my Blendabilities, of course not one matched.

Celebrate Today with Starburst TechniqueOur Tangerine Tango & White two toned twine (135838) was another perfect touch for this card. If you are local to me, be sure to check My Calendar of Events for upcoming events like my Techniques & Cards Class, we would love to have you join us! Be sure to watch my video on Tuesday.

You will find all these products:

  •  Celebrate Today stamp set #137138,
  • Birthday Bash Designer Series Paper #137783,
  • Itty Bitty Accents Epoxy Stickers #137856,
  • White & Tangerine Tango Two-Tone Twine #135838
  • Bermuda Bay Ink #131171
  • Crushed Curry cardstock #131199
  • Whisper White Cardstock #100730
  • Memento Pad #132708

In My Online Store here

Til we meet again,

buy Stampin Up! here!