What you can do to avoid boredom while staying inside

What you can do to avoid boredom might be easier than you think! Are you running out of things to do to keep you and your children busy after 3 weeks of staying in your home? This fun technique will keep you and your children busy for hours. Creating a fun way to do art and learn about colors is quite easy with this technique I am sharing with you today.

Flourishing Phrases and smashed ink refilll technique you can do to avoid boredom
Images © 1990 – 2020 Stampin’ Up! ®
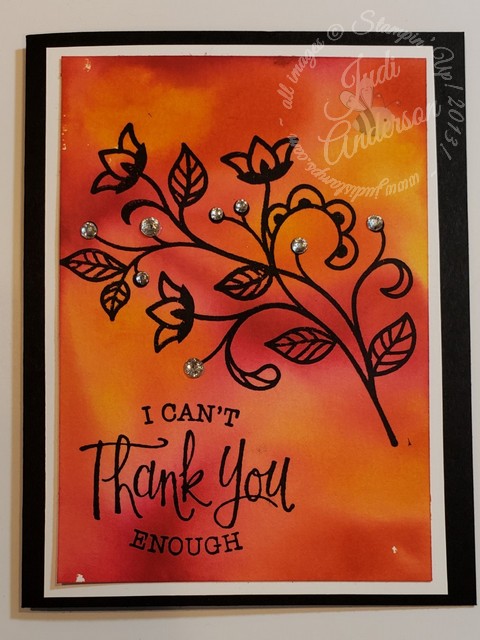
Card with rhinestone jewels

Materials needed for this project are:

  • a vinyl table cloth to protect your table,
  • two – three ink refills
  • Water spritzer with a fine mist
  • Fluid 100 Watercolor Paper
  • window sheets/cello bags/or plastic wrap (cut larger than Watercolor paper pieces)

Let’s get ready!

Cover your table, it’s about to get messy! Cut your Whisper White cardstock into pieces measuring 4″ x 5 1/4″. Let them choose two to three ink refill colors. I am sure they will be experimenting with different color combinations. Surprisingly, half the fun will be learning how two colors will create a third color when they combine together. Guiding your children with their color choices will help with their project not end up being a muddy mess .

Here are the products I used to create the card in this video.

Click here to purchase the products used in this video.

  • Flourishing Phrases Stamp Set #151407
  • Staz On ink pad #101406
  • Pineapple Punch Ink Refill # 147180
  • Calypso Coral Ink Refill #122934
  • Melon Mambo Ink Refill #115662
  • Fluid 100 Watercolor Paper #149612
  • Stampin’ Spritzer #126185

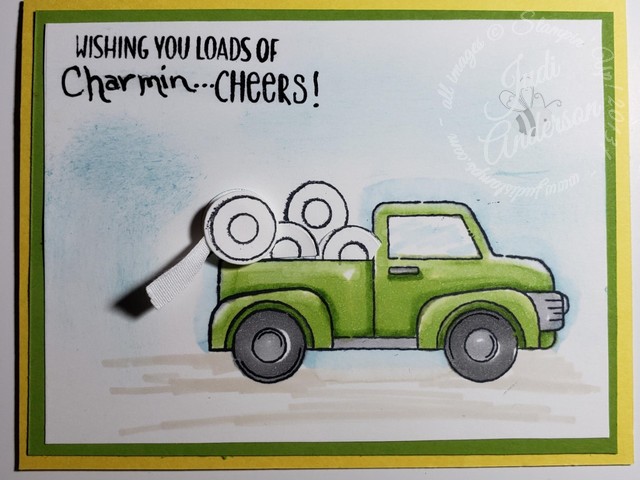
Let them have fun and get messy!

Getting ink on their hands is sure to happen. Don’t worry, it will eventually wash off with a little soap and water. I guarantee your children won’t be patient enough to wait for their creations to dry. Have them create the mats one day. Let them dry overnight. The next day they can use markers or crayons to create a unique drawing or stamp images on the mats.

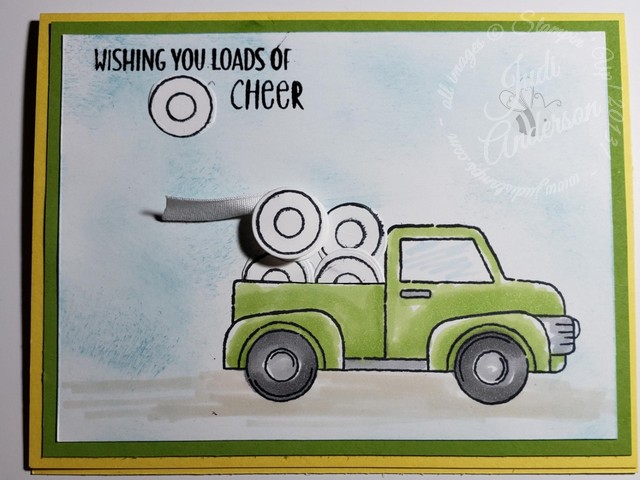
Now to decide what to do with these works from their heart! They may choose to adhere them to card bases and send off to someone to put a smile on their face. They may choose to add them to a frame to give as a gift. Whatever they decide, your children will be proud of the end result and not even realize they were learning while creating.
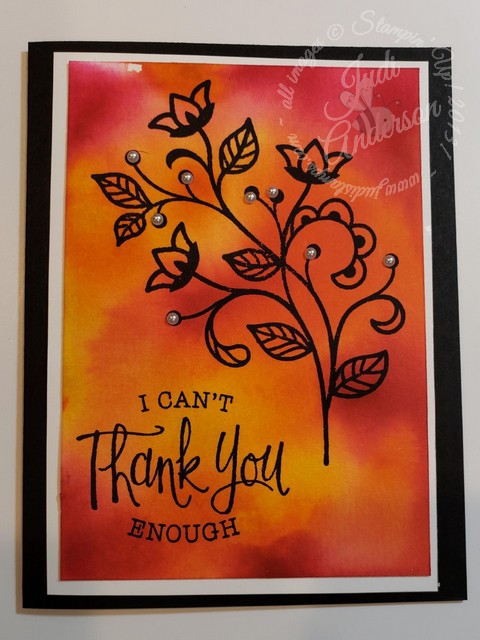
Flourishing Phrases with the smashed refill technique you can do to avoid boredom
Images © 1990 – 2020 Stampin’ Up! ®
Using Pearls Jewels

Do you or your children love to paint or water color? Check out this other technique that can help when you hear,”I’m bored!”

Who knew? A technique you use on hand made greeting cards can help you when you are thinking up things to do with your children & what you can do to avoid boredom.

Judi's online store

A truck full of toilet paper, create a fun greeting card!

Is a greeting card with truck full of toilet paper appropriate for a gift? We have some wonderful neighbors that have helped during this time of social distancing. We wanted to give back in some way so my husband asked if I could make a few greeting cards but they had to have a bit of humor.

A truck full of toilet paper came to me in my dreams!

Ride with Me stamp sets makes a truck full of toilet paper fun greeting card!
Images © 1990 – 2020 Stampin’ Up! ®

Laying in bed, drifting into sleep, I was thinking of the cards my husband wanted me to make. And that’s when it hit me. I needed to use the Ride With Me Bundle (# 151106). The tire stamp and die are perfect for rolls of toilet paper!

I gathered up some supplies and began creating 5 cards of one design using different colors.

Besides the Ride With Me Bundle I used the following supplies in creating my greeting cards.

  • Memento Tuxedo Black Ink Pad #132708
  • Balmy Blue Classic Ink Pad #147105
  • Granny Apple Green Light Stampin’ Blend #146876
  • Balmy Blue Light Stampin’ Blend #148540
  • Crumb Cake Light Stampin’ Blend #144582
  • Smokey Slate Light & Dark Stampin’ Blend #145058
  • 2018-2020 In-Color carstock #146973
  • Granny Apple Green cardstock #146990
  • Whisper White cardstock #100730
  • Basic Black Stampin’ Write Marker #100082
  • Whisper White 1/4″ Crinkled Seam Binding Ribbon #151326

It so much fun designing the toilet paper cards. I knew I wanted them to be bright and fun bringing a smile on the recipients face when they opened the envelope. But, I also wanted to personalize each in some way. That’s when I decided to change up the colors I used in making each card. The video below shows you one of the color combinations I used for the five cards I made.

Images © 1990 – 2020 Stampin’ Up! ®

Are you wondering what the gifts are that these cards were attached to? I made a few batches of caramel chocolate chip brownies and wrapped up a roll of toilet paper. They loved them! And they loved the cards too!

Images © 1990 – 2020 Stampin’ Up! ®

Do you have someone that has done something special for you that would appreciate one of these cards with a truck full of toilet paper?

Judi's online store

Let’s make Easter Baskets!

Let’s make Easter Baskets! I’m making several of these to put onto the porches of neighbors in hopes to put a smile on their faces. These quick & cute Easter Baskets can be decorated any way you wish and filled with a variety of treats.

The pattern I am sharing with you today is quick and easy to duplicate. You will use very little materials and can use up a lot of elements you have lying around to decorate these.

Are you ready to make Easter Baskets too?

Gather up some paper you have laying around, any cardstock or Designer Series Paper will work. You will need to cut the paper into 6″x6″ squares. Using a scoring blade and your Paper Trimmer, score at 2″ and 4″. Turn your paper 90 degrees and score at 2″ and 4″. I explain what to do next in this video.

Images © 1990 – 2020 Stampin’ Up! ®

Can you believe how easy those were to make? This is another project you can have your children help with. Your older children can assemble the baskets. Have the younger children stamp, color, or punch out different elements to decorate their baskets. The possibilities are endless. I can imagine doing baskets in Pacific Point cardstock and filling it with an egg decorated like a Minion.

I used the Welcome Easter stamp set (151559) for decorating the basket below. This & the other images in this set also make an adorable baby shower favor or May Baskets for friends. In fact, the set has a verse for each of these occasions too!

Welcome Easter stamp set for a quick and easy Easter Basket
Images © 1990 – 2020 Stampin’ Up! ®

Fill the baskets with a few goodies, attach a little note and drop them off on the porches of those you wish to bring a smile of joy to.

Gather your children and after they are done coloring eggs today. Gather up the materials ahead of time and you can surprise them when you say, “Let’s make Easter Baskets!”

Judi's online store

Stamparatus, the tool you’ve been waiting for!

Stamparatus, positioning tool

I am happy to let you know that I am one of 2000 Stampin’ Up! demonstrators that helped to design the Stamparatus, the tool you’ve been waiting for! As part of the LDL Team, we are sworn not to share anything we work on or hear about. Believe me, it was hard not to be able to tell you about the Stamparatus these past 4 years. Yes, it took 4 years to design & test this amazing positioning tool. We wanted to get it right and to give you the best on the market. I. like you have watched and wanted to get a positioning tool but am so happy I held out, you will ABSOLUTELY LOVE it!! I am loving the unique “hinge stamping” technique you can accomplish on it. Watch the video below to see how you can position 4 different stamps at one time!!!!

Now that you’ve watched the video, leave me a comment below to let me know what you think.

Here is the information on how you can reserve yours so you can be one of the first to use the Stamparatus.

With the launch of this tool, we’re trying something different: testing a new reservation system. It acts like a true preorder: you reserve your spot and we guarantee shipment as soon as the product arrives in our warehouse. Demonstrators and customers will place reservations and receive their product at the same time. This system will allow us to get the product to market as soon as possible while avoiding backorders and efficiently managing inventory.

  • Reservation quantities are while supplies last.
  • Limit is 1 tool per customer per reservation window.
  • Customers may participate in multiple reservation windows (order 1 per window).
  • In order to reserve your Stamparatus, you are required to provide your credit card information.
  • Credit cards will not be charged until the Stamparatus ships from our facility. When you close your order, be sure to verify that your credit card and shipping information is correct.
  • Reservation Windows Available to Ship
    November 16–30, 2017 Approx. February 1, 2018
    December 5–30, 2017 Approx. March 19, 2018
    January 15–30, 2018 Approx. April 15, 2018

I will be posting details on how to reserve your on November 15th, the day before the reservation period begins! (It will not work until the 16th)

Be sure to leave a comment below and let me know if you are as excited as I am!

buy Stampin Up! here!


Going Global Sneak Peek Project!

I thought I would share a Sneak Peek project using the Going Global Stamp Set with you today. Many of you are aware that you may begin ordering from our new 2016 Occasions Catalog tomorrow AND you can earn a FREE Sale A Bration item with each $50 you purchase! Sadly, this means that the End of Year Sale ends today. It is also the last day you can order product from our 2015 Holiday Catalog, I will miss many of those products. In fact, I stocked up on several of the consumables to begin creating some fun holiday goodies for next year.

Today marks the beginning of  new season of paper crafting for me. I look forward to our Occasions Catalog and spring ( well, spring won’t be here for a little while). I love creating projects for birthday’s during the month of January as well as some Valentine goodies. You would think that with all the cards I create, I would send birthday cards. I want to be honest here, my intentions are there, but I seem to forget to send them!! Yep, I have an entire box of birthday cards just waiting to be sent! This changes this year! I will get a system in place, during January, and send birthday cards all year. I didn’t put a birthday greeting inside this card yet, but I will when I put it into my January slot. I will be doing a more feminine version using a different color pallet but the design will be the same. My mission for today is to go through my Birthday Book and see how many masculine and how many feminine cards I need for this month. I will then create them, this week, and share the pile of cards with you on Friday.

Here is a video showing you how you can create your birthday cards for the month of January too! (Don’t forget, you can order these items beginning tomorrow, January 5,2016)

I will be sharing my monthly design with you right here, each month to help keep me on track!! I will be sharing my card for February next week to give you time to order the supplies and create your cards by the first of February. Are you up for the challenge? Let me know by leaving a comment below.

This is what I used for this card:

STAMPS:

Going Global Stamp Set (W-140745) (C-140748)

INKS:

Mossy Meadow (133645)

Delightful Dijon (138327)

Lost Lagoon (133644)

Memento Jet Black

PAPER:

Very Vanilla (101650)

Tip Top Taupe (138336)

Going Places Designer Series Paper Pack (140581)

Foil Sheets- Gold (132622)

ACCESSORIES:

Fast Fuse (129026)

Multipurpose Liquid Glue (110755)

Stampin’ Dimensionals (104430)

3/8” Satin Stitched Ribbon – Basic Black (138430)

Banner Triple Punch (138292)

Confetti Stars Border Punch (135861)

Label Bracket Punch (132153)

World Traveler Textured Impressions Folder (138289)


Til we meet again,

buy Stampin Up! here!


Sprinkles of Life- how to build a snowman

It’s funny where inspiration will sneak up on us, isn’t it? Sitting outside eating an ice cream cone this time of year proves to be challenging, keeping from dripping all over your hands, feet and clothes is quite a chore. Bingo! That cloud in the Sprinkles of Life set reminds me of a melting snowman. Wow, where did that come from? I quickly finished my cone, went in to my imagine tablet and wrote down, let’s build a snowman with the Sprinkles of Life stamp set. And that my friends is how an idea for one of my swap cards for convention was born!

I knew you would want to make this cutie so I am sharing a video I made showing you how to build your own snowman.

Isn’t he just too dang cute? It is still summer but I have already begun making a bunch of these cuties to put onto some cute & simple winter gifts and treats. A simple way to do this is to stamp & punch all the pieces, put them into a container to assemble while watching TV with hubby, or while riding to that final summer getaway before school begins. This makes a great take-a-long kit. Why not make an extra kit for the kiddies so everyone can keep busy building their own snowmen? Don’t forget a glue stick for them!

Til we meet again,

buy Stampin Up! here!

How to create your own dimensional polka dot background paper

Ever find yourself looking for a polka dot background paper only to find you don’t have any in the colors you are using? This is your lucky day! I ran into the same problem recently and thought you may have also so I made this quick video teaching you how I solved my problem

If you can’t view video please go to: https://youtu.be/aa9dZgR9rQY to view.)

I hope the next time you run into the problem of needing a polka dot background in a color you don’t have, you remember this video and make your own!

Do you love surprises?

How about surprises for 1/2 off?

You will want to be sure to sign up for our (Paper Pumpkin) Monthly Kit in the Mail BEFORE August 10th. WHY? Because when you do you will receive the August & September kits for 1/2 off each! I was able to get a Sneak Peak at the kits during convention a few weeks ago and they are simply adorable!! Here’s a hint for the August Kit; Do you love pink & black? Septembers’ hint is; it’s a bewitching treat!

If you enjoy sitting down and having a project all designed for you, these kits are for you!! You will receive fully designed projects with everything included ( pre cut paper, ink, embellishments ).  And if you are one who loves putting your own personal touch on your projects, these kites are a great starting point!

For more information visit;

Paper Pumpkin Monthly Kit in the Mail

  Be sure to check out the new Weekly Deals.

Shop My Online Store and have your purchase delivered to your front door.


Til we meet again,

buy Stampin Up! here!


Hexagon Hive & Build A Birthday – Love this card!

Just like you, my monthly hostess club loves different ideas for their stamping supplies.  They have been asking me for an idea using the Hexagon Hive Thinlit in a way besides as a bee hive or soccer ball.

Have you ever had one of those cards that you design and say,” It’s ok. Then later fall in love with it?” This is one of those.

To be honest, when I first made it I thought, ” This card is OK. Not WOW! Just OK.”

I had to run upstairs to let Maxx out and when I came back to the card I thought,” I really like this card!”  When I shared how to make the card at club, I told them,” I really love this card!” And I do.

I designed this card using the Build A Birthday stamp set and the Hexagon Hive embossing folder, just for them. I used Sahara Sand as the card base and Mint Macaron, Watermelon Wonder, Soft Sky & Crushed Curry inks.

I wanted to share this card with you but also wanted to share how easy and fun it is to make. So, I made this video. For you!

Now, I am sure you are saying, “I love that card!” too.

For some reason the Sahara Sand brings out the brightness, yet softness of this color combination. The small details add to the wow factor and I know the person receiving this card will also love it.

We would love to have you join us as I share tips and ideas like this each month.

Not local? Ask me about my monthly in the mail club.

All products seen in this video may be purchased through MY ONLINE STORE.

Til we meet again,

buy Stampin Up! here!


Super Cute Easter Bunny Fry Treat Box

Easter is just around the corner and I have a super cute Easter bunny fry treat box for you to make. Tuck in some peeps, a chocolate bunny , jelly beans or my daughters favorite, a couple Cadbury eggs and you’re good to go. These make a great Easter basket for the adults (so we aren’t taking goodies out of the kids baskets!), an addition to any basket, placed around the house as decor, or at everyone’s place setting at the Easter table. Here is a list of supplies you will need:

  • Subtles assorted cardstock #131193         *Basic Black cardstock #121045
  • Whisper White cardstock  #100730          *Big Shot  #113439
  • Fry Box BigZ Die #132966                          *1/2″ Circle Punch #119869
  • 3/4″ Circle Punch #119873                         *1-3/4″ Circle Punch #119850
  • Large Oval Punch #119855                         *Bird Builder Punch #117191
  • Owl Builder Punch #118074
  • Itty Bitty Accents Punch Pack #133787
  • Project Life Journaling Pen

Here’s how you , too can make this little cutie!

Be the first to view my videos~subscribe to my You Tube Channel.

Sale-A-Bration is ending soon. Don’t miss out on getting your FREE Sale-A-Bration items, order today.

Til we meet again,

buy Stampin Up! here!

Using Blendabilities on your pictures- Two Minute Technique Tuesday

Have you seen those black and white photos that have a pop of color on them? You know those cute little babies with a bright bow or ruffly diaper cover? Or a cute furry pet with a bright bow or collar? How would you like to be able to get that look quickly and easily? Are you like me and taken pictures at colorful images at night only to find out that they lack the brilliant color once you have them printed? Today’s technique is for you! Watch and see how I turn colorless fireworks into fireworks of many colors.

Now these photos weren’t black and white but as you can see you can get wonderful results with color photos that lack color also. I am on the hunt for some black and white photos to play some more. I will share them when I do.

Did you receive my monthly publication with exclusive projects,tips & techniques? Be sure to subscribe here and subscribe today so you don’t miss next week’s weekly tip!

Til we meet again,

buy Stampin Up! here!

Josephs Coat~ Two Minute Technique Tuesday

This weeks technique is one that can take on many different looks just by changing the colors you use. This was one of the first techniques I learned when I started stamping 15 years ago – I urge you beginning stampers to give it a try. When I learned to do this technique I learned on glossy cardstock and used a Kaliedascope pad. Since then I have experimented with different inks, papers and ways to get the variety of colors in the background. This week I am sharing how to do Joseph’s Coat using 3 colors of ink, our Whisper White cardstock and a rubber brayer. Next week I will share how to do it with sponge daubers. Let’s get started!

This card is so bright & bold in real life! The “twist” to this technique is that I stamped the leaves. In the basic Josephs Coat technique you just brayer the color onto the card base.

For more exclusive ideas & projects monthly, you’ll want to subscribe to my, “Your Creative Destination” publication

Til we meet again,

buy Stampin Up! here!

You Plus Me Memory Page Layout

You are going to love this on-trend memory page layout using the “You Plus Me” stamp set & our “Sweet Taffy” Designer Series Paper. You will find this layout quick and easy to create and it will hold from as little as two, and up to 12 pictures~ My kind of layout !. . . .

Enjoy this video on how to create it:

Shop Now!

Be sure to subscribe to my You Tube Channel  and don’t miss any of my videos!

Til we meet again,

buy Stampin Up! here!

Tuesday Two Minute Techniques

Today’s Two Minute Technique is sure to give your outline stamp images a different life( and look)! Grab your Designer Series Paper scraps, I have another quick and simple way to use those baby’s up. . .

If you are reading this on your phone and don’t see the video below go to judistamps.com to watch.

I know, I know! What a quick and simple way to use your outline images!! I will be sharing a card created with the element I created in this video on Thursday. Be sure to check out the other cards I created using this quick and simple technique this week, too. You know I love to watercolor so outline stamps are some of my favorites but when I want pattern, I go to paper piecing.

I would love to hear which stamp sets and papers you use when you play with this technique so be sure to comment below.

Here are the weekly deals for January 20 – 26

2013-2015 In Color Stampin' Write Markers
2013-2015 In Color Stampin’ Write Markers

Price: $14.95 $11.21
2014-2016 In Color Printed Clothespins by Stampin' Up!
2014-2016 In Color Printed Clothespins

Price: $5.95 $4.46
2014-2016 In Color Stampin' Write Markers
2014-2016 In Color Stampin’ Write Markers

Price: $14.95 $11.21
Basic Gray Baker's Twine by Stampin' Up!
Basic Gray Baker’s Twine

Price: $2.95 $2.21
Bermuda Bay Baker's Twine by Stampin' Up!
Bermuda Bay Baker’s Twine

Price: $2.95 $2.21
Box Of Chocolates Kit -- Digital Download
Box Of Chocolates Kit – Digital Download

Price: $9.95 $5.97
Crushed Curry Baker's Twine by Stampin' Up!
Crushed Curry Baker’s Twine

Price: $2.95 $2.21
Stampin' Blendabilities™ Markers Skin Tone Assortment by Stampin' Up!
Stampin’ Blendabilities™ Markers Skin Tone Assortment

Price: $22.95 $17.21

Til we meet again,

buy Stampin Up! here!

Birthday Surprise quick card

I shared the Shadow Stamping with a brush marker Technique on Tuesday and promised to share a card I created using the element I created in that video. I will be sharing two! I made a video showing the steps in creating the first card and I will then share a second card.

Who wouldn’t want to receive either of those cards on their birthday?  Those who subscribe to my publication editions receive information, inspiration and ideas like this every month. Be sure to subscribe by clicking the link in the upper left hand corner for your free stamping source for ideas, inspiration & information.

til we meet again,

buy Stampin Up! here!

Shadow Stamping with the Birthday Surprise stamp set

This Tuesday’s Two Minute Technique is Shadow Stamping using our Stampin’ Write markers and the Birthday Surprise stamp set.

If you have this set grab it, a light colored ink pad and a darker color of Stampin’ Write Marker and play along!


Wasn’t that fun? Please let me know what you have made using this technique by leaving a comment below~ I can’t wait to hear what you’ve created!!

Don’t forget you can order from the NEW 2015 Occasions Catalog today! What could be more exciting than that?

Sale-A-Bration also begins today!! Be sure to choose your favorite Sale-A-Bration exclusive product for every $50.oo (before shipping & tax) you spend. Click here to view it online.

If you haven’t received a copy of either of these catalogs yet, let me know and I will send them your way. I only ask that if you are currently working with a demonstrator that you ask her for your own copy. Thank you.


I will share a card I created using this technique on Thursday- ya’ll come back now!!!

Til we meet again,

buy Stampin Up! here!