CASE the Catalog with Seaside Bay

CASE the Catalog means to,”Copy And Share Everything”. When you CASE a project you may be copying a layout, a color combination, or the project exactly. I will often CASE a project when I am in need of pumping up my creative juices.

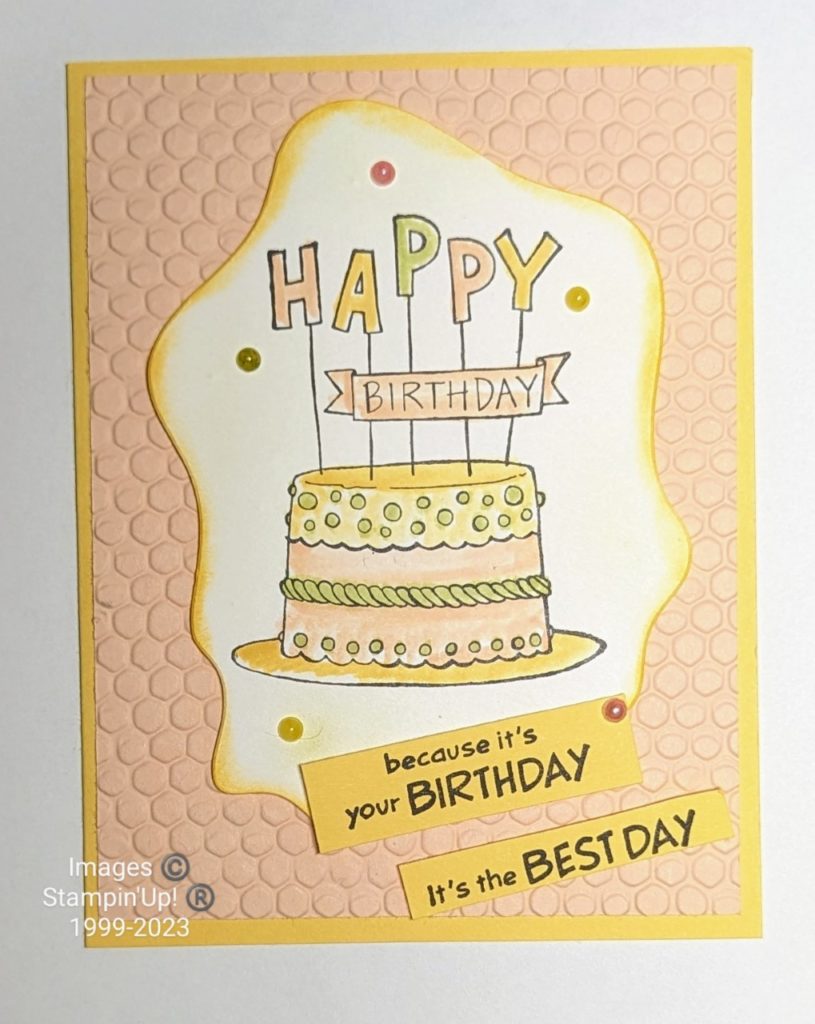
I open my catalog when I am stumped and can’t seem to come up with an idea. Then I start flipping through the pages to find something that catches my eye. This is exactly what I did for today’s card.

I give a weekly challenge in my Facebook Group: HapBEE Stamping with Judi Community. each week the challengeis different. Sometimes I give measurements, sometimes a layout, sometimes a color inspiratio and sometimes CASE the Catalog project.

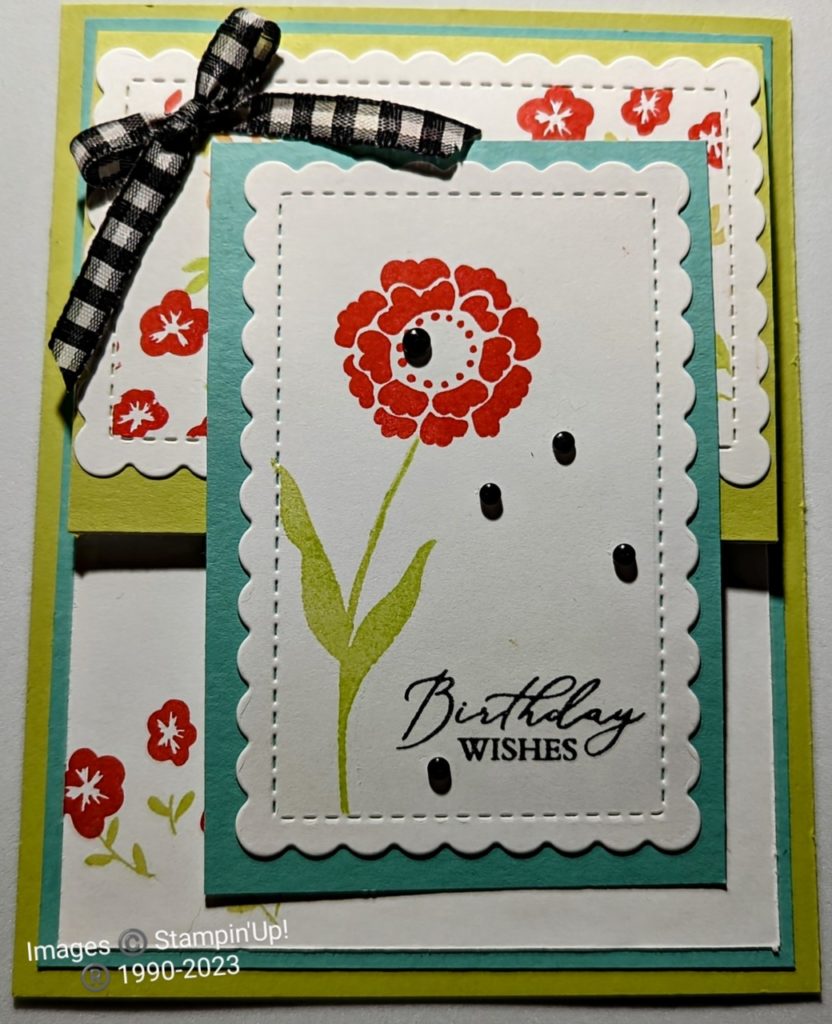
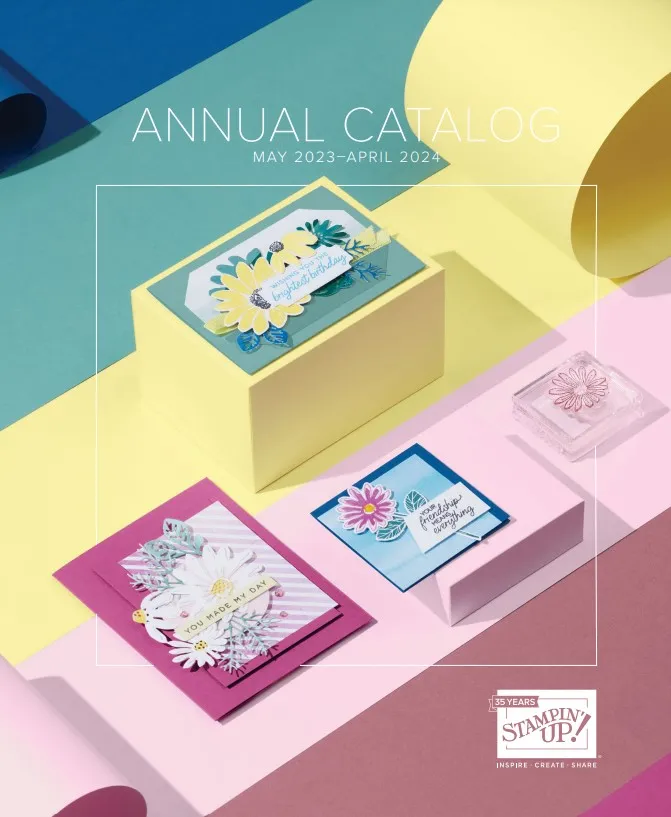
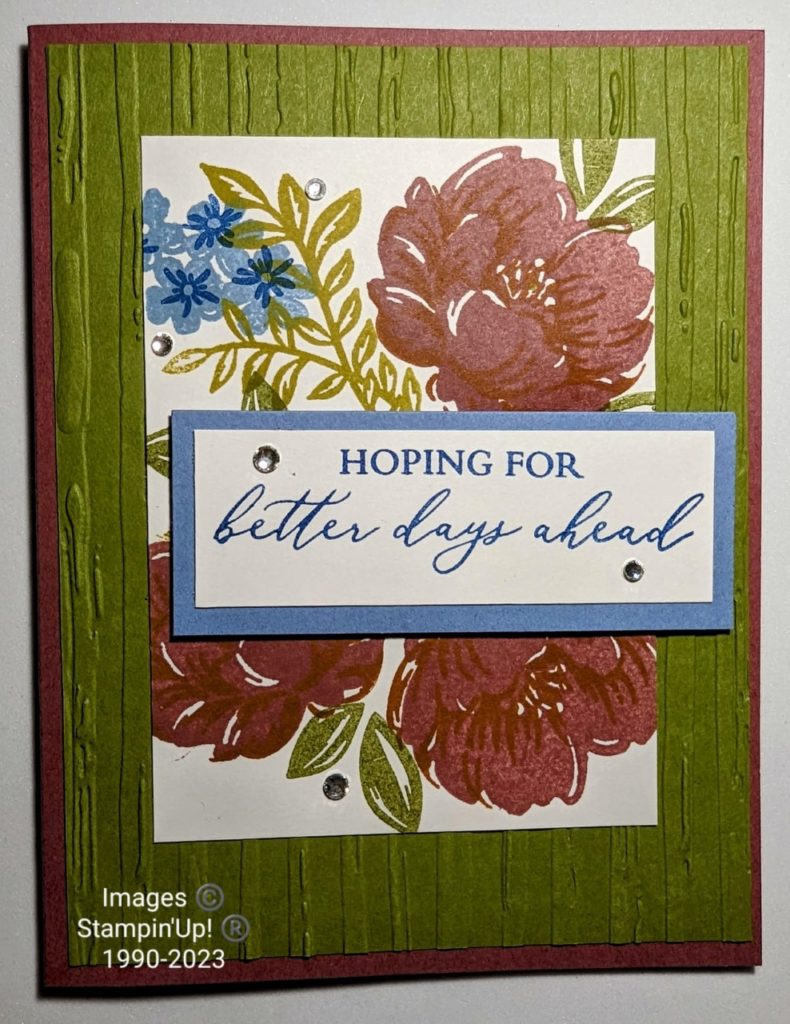
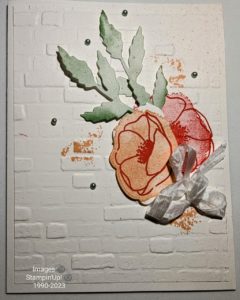
For this challenge I shared this car on page 65 of the Annual Catalog. The instructions were to use this layout BUT they couldn’t use any floral images. Here is the card they were to case.

Card cased from page 65 of the Annual Catalog
Images Copyright Stampin’ Up! (Registered) 1990-2023

As you can see, this is a very simple layout and we had several projects shared. The measurements of the cardstock were: 5 1/2 x 8 1/2, 4 1/4 x 5 1/4, 3 x 1, 3 x 2.

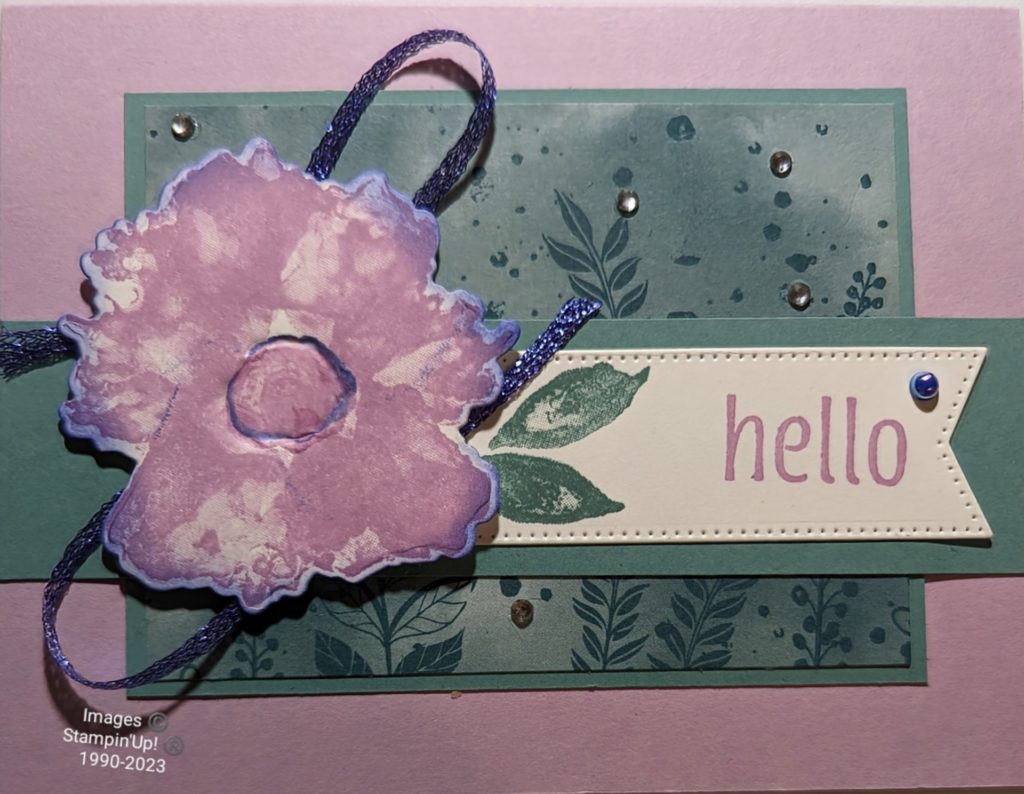
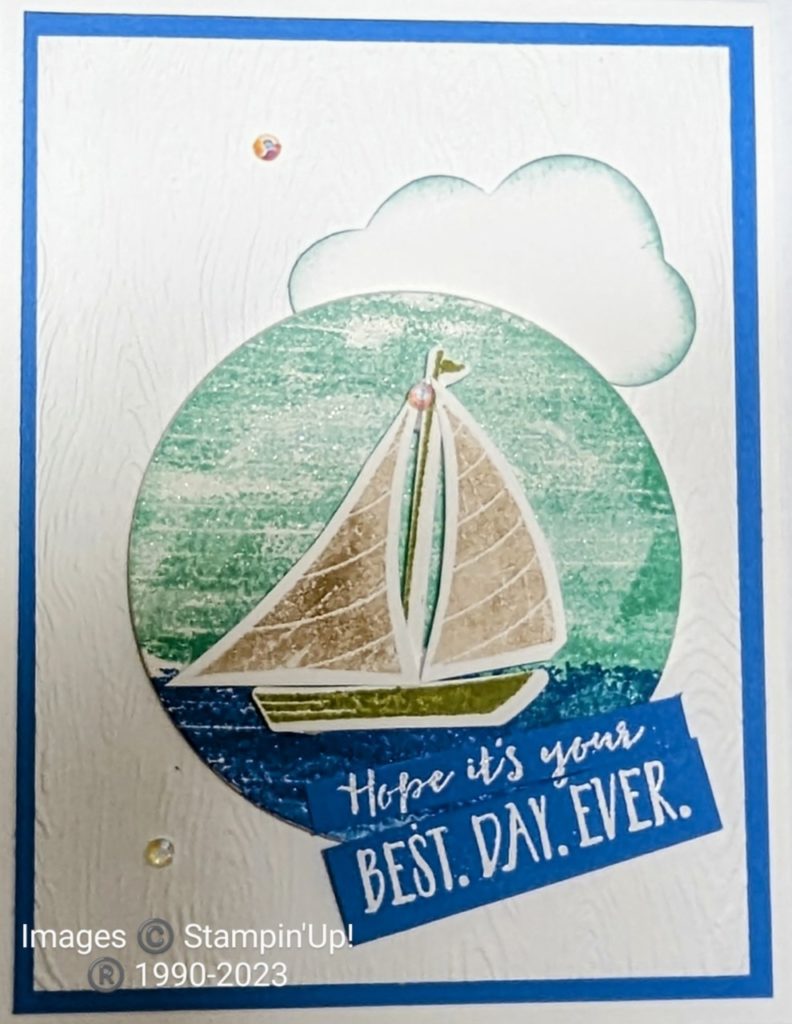
CASE the Catalog directly to begin with then change the stamp set.

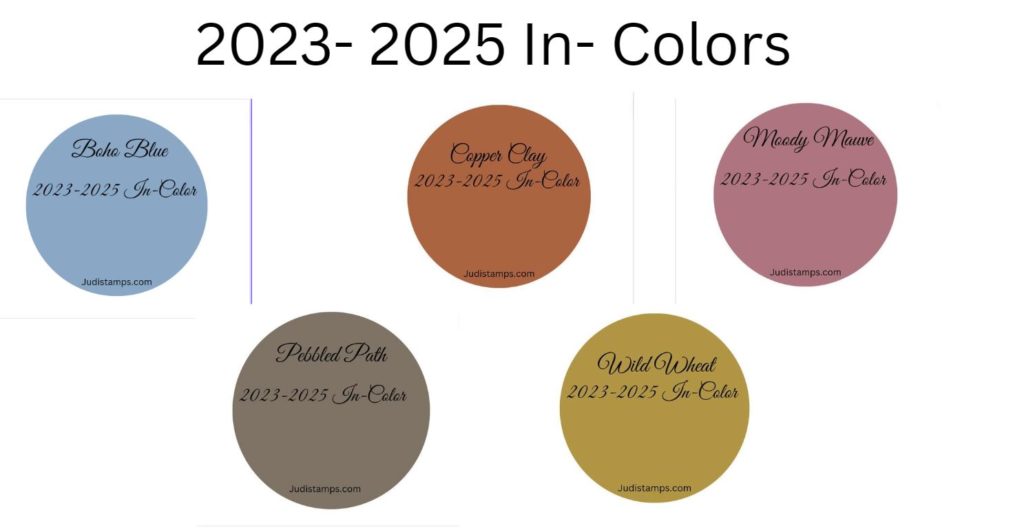
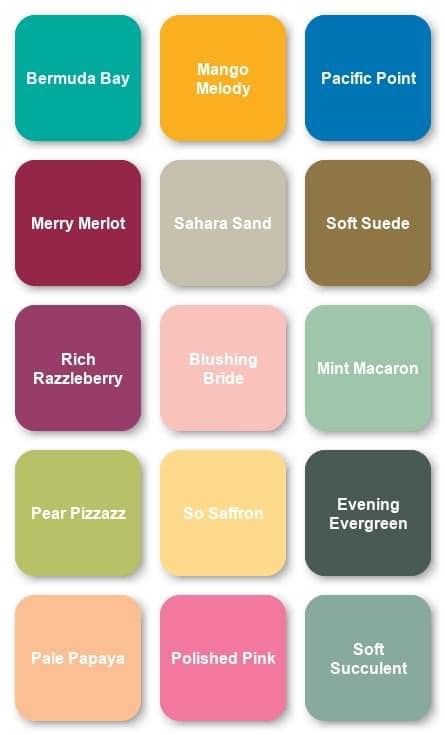
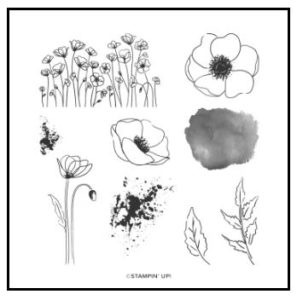
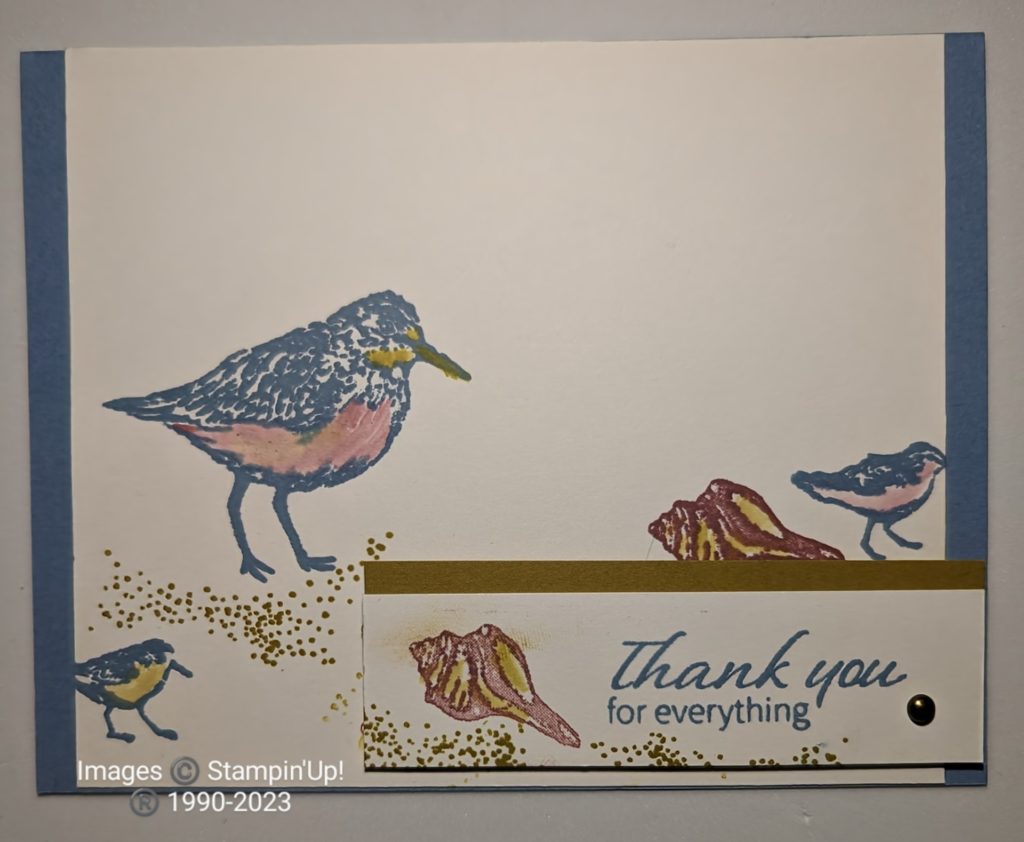
I decided to challenge myself by using the Seaside Bay stamp set. The colors I chose to use are; Night of Navy, Moody Mauve, and Pecan Pie. Using the Night of Navy, Moody Mauve, and Pecan Pie Classic Ink Pads to stamp the images. I then colored them using the Moody Mauve, Pecan Pie, and Whild Wheat Classic Inks and a Water Pen.

CASE the Catalog with Seaside Bay

I urge you to CASE the Catalog whether or not you need a creative boost. Are willing to share projects and love challenges? Join us in my HapBEE Stamping with Judi Community on Facebook. You can ask to join here.

Products I used can be purchased through my ONLINE STORE.

Until we meet again. . .

Judi's online store

A Bright Colorful Birthday Card

A Bright Colorful Birthday Card: Celebrating in Coastal Cabana, Daffodil Delight, and Poppy Parade.

When it comes to celebrating birthdays, nothing sets the mood better than a bright and colorful card. Imagine a birthday card adorned with the vibrant colors of Coastal Cabana, Daffodil Delight, and Pop Parade. With a delightful image of a balloon adorned with a playful tassel, this card is sure to bring joy and excitement to the reciever. Let’s dive into the world of this captivating birthday card and explore its cheerful features.

I love using Coastal Cabana as it is reminiscent of a tropical getaway. It’s a soothing and invigorating shade of blue-green. Incorporating this color into my birthday card’s design evokes a sense of serenity and anticipation.

Daffodil Delight brings the warmth and radiance of a sunlit day. This vibrant yellow hue exudes happiness and positivity, making it an excellent choice for a festive occasion like a birthday. Daffodil Delight infuses the card with a sense of joy and energy, setting the perfect tone for the celebration.

To amplify the festive atmosphere, the Poppy Parade color adds a dynamic and lively element to the card. This bold and vibrant shade represents the excitement and enthusiasm that accompanies birthdays.

A Bright Colorful Birthday Card using the Beautiful Balloons stamp set.

A Bright Colorful Birthday Card

For my central image, the balloon with a tassel hanging from it adds an extra touch of whimsy and charm. Balloons are timeless symbols of joy and celebration, instantly evoking feelings of happiness. The tassel adds an element of fun, making the card even more special and memorable.

I colored a few of the polka dots in the Brights 6 x 6 Designer Series Paper to add even more fun to my card. The addition of the Glossy Dots added to the festive feel of my card.

In conclusion, my bright and colorful birthday card featuring Coastal Cabana, Daffodil Delight, and Poppy Parade colors, with an image of a balloon and tassel, is the perfect way to celebrate a special day. The combination of these vibrant hues, along with the whimsical balloon and elegant tassel, creates a visually striking and joyful card. So, get ready to spread the birthday cheer with this captivating card design!

Until we meet again. . .

Judi's online store

Getting Artistic is fun with Artistically Inked stamp set!

Getting Artistic is fun and easy with the Artistically Inked stamp set. Creating a unique watercolor look with the images is quick and easy. Combine the flowers, leaves, and watercolor washes to create beautiful project. Use the greetings any time you want to say thanks, hello, or send your best wishes.

Let your imagination run wild and embrace the joy of artistic expression. Whether you’re a seasoned crafter or just starting out, the Artistically Inked stamp set will inspire you to create breathtaking projects that reflect your unique style.

Experiment with different techniques such as rock & roll, using Heat & Stick Powder with Gold Leafing, or simple stamping to explore the full potential of the Artistically Inked stamp set. The versatility of this set allows you to achieve various effects, from bold and vibrant to soft and subtle.

Getting Artistic is fun so let’s get started!

I created this card uaing a basic layout. Cutting the Designer Series Paper so the images look like a field of greenery. The paper adds depth and a but of whimsy. Don’t you like how it draws your eyes past the flower? I stamped the image in Fresh Freesia. Using the coordinating dies, I cut the flower out. I then used my Blending Brush and Orchid Oasis Ink around the edges. I used the Rock and Roll Technique for the flower center. The scattering of Rhinestones looks like fireflies glittering in the night.

Supplies used:

Artisticallyy Inked stamp set

Fresh Freesia Classic Ink Pad

Lost Lagoon Classic Ink Pad

Hello Irresistable 6×6 Designer Series Paper 3″ x 4″

Subtles Assorted Cardstock (Fresh Freesia cardstock 5-1/2″ x 8-1/2″, Lost Lagoon cardstock 3-1/4 x 4-1/4, 1-1/4″ x 5-1/2″)

Basic White cardstock: 1-1/2″ x 4-1/4″, scrap

Rhinestone Basic Jewels

2022-2024 In-Color Pearls

Orchid Oasis Metallic Woven RIbbon

Getting Artistic is Fun

So, grab these supplies from my Online Store by clicking the links above. Then gather your crafting supplies, and embark on a creative journey. Getting artistic has never been more fun!

Until we meet again. . .

Judi's online store

Mastering Outline Stamps- the next step

Mastering Outline Stamps- the next step in learning how to stamp on paper craft projects. Outline stamps are an essential tool for papercrafting enthusiasts. They are versatile and can be used to create stunning cards, scrapbook layouts, and other projects. The best part is that you don’t need to be an artist to use them. In this post, I’ll share some tips on how to stamp and color outline stamps with ease.

Stamping Outline Stamps

To stamp outline stamps, you will need some basic supplies like stamp pads, a stamping block, and the stamp itself. First, select the stamp you want to use and apply ink to it. Make sure you cover the entire stamp with ink. Then, position the stamp on your paper or cardstock and press down firmly. Hold it for a few seconds and then lift the stamp away from the paper. Voila! You now have a stamped outline image.

Mastering Outline Stamps to color or not to color?

In the project I am sharing I have chosen not to color in the images. Very often people think you have to color outline images in. This card proves the opposite.

Coloring Outline Stamps

One of the great things about outline stamps is that you can color them in different ways to achieve various looks. Here are some of the ways you can color them:

  1. Using colored pencils
  2. Using markers
  3. Watercoloring
  4. Alcohol Markers
  5. 5. Using your Ink Pads

I will dive into each of these ways of coloring in the future.

Outline stamps are a great way to add a personal touch to your papercrafting projects. By following these tips, you’ll be able to create beautiful stamped images without fuss. Remember to experiment with different mediums and techniques to find what works best for you. Happy crafting!

Until we meet again . . .

Judi's online store

Lasting Joy stamp set, have you created with it yet?

Lasting Joy stamp set, are you a fan? If you are, you’ll love this card design that showcases the versatility of this beautiful set. If not, you will be! The best part? I’ve used the same layout as I have shared before but created a completely different look.

The card features a simple yet stunning layout that highlights the gorgeous floral images in the Lasting Joy stamp set. The large flower is arranged in the center of the card, with leaves and stem extending outwards. I then used the smaller clusters of flowers to create a fun background on the card front. Then again, on the inside with them peeking to the front bottom, left corner. The design is elegantly framed with a black and white gingham ribbon, and Black Mat Dots, adding a touch of playfulness to the overall look.

Lasting Joy stamp set

Lasting Joy stamp set, you won’t be able to put it down!

I’ve used a different color scheme to create a completely new look for this version. Combining Parakeet Party, Coastal Cabana with Sweet Sorbet, gives the card a fresh, summery feel. The overall effect is one of vibrancy and fun, perfect for sending a message of joy and celebration to someone special.

If you loved the original Lasting Joy card design but are looking for a new twist, this card is perfect for you. It’s a great way to showcase the versatility of this beautiful stamp set and inspire your creativity. Order yours today and create your own unique version of this stunning card design.

In conclusion, this “Same layout with a different look” card is a perfect example of how you can use the same layout to create a new, unique design. The first card I created with this layout and stamp set can be seen here. With the Lasting Joy stamp set, the possibilities are endless. So why not give it a try and see what kind of beautiful creations you can come up with?

Until we meet again. . .

Judi's online store

Cute Turtle enjoying May Flowers

A Cute Turtle enjoying May Flowers to wish you a Happy Day! Spring has arrived, and with it comes the beauty of May flowers. To celebrate this lovely season, I’ve created an adorable card featuring a little turtle holding a flower it picked.

The card features a whimsical scene with a green turtle standing among the colorful flowers of May, holding a flower of Orchid Oasis in its little claw. The turtle’s cute expression and playful demeanor perfectly capture the joy of spring.

The flowers in this scene in shades of pink, yellow, and orchid, and are accented with green leaves and stems. The overall effect is one of cheerful whimsy, perfect for sending a message of joy and happiness to someone special.

A Cute Turtle enjoying May Flowers in the new color, Lemon Lolly.

Cute Turtle enjoyhing May Flowers #PlayingInTheRain

I used Lemon Lolly as my card base. Wanting the card to be bright and cheery, I also used the colors, Bubble Bath (another new color) and Orchid Opulence. I knew the In-Color of Parakeet Party would be the perfect green! I used the following products:

  • Playing in the Rain stamp set (# 160542)
  • Memento Tuxedo Black
  • Stampin’ Blemds ( Lemon Lolly, Orchid Oasis, Bubble Bath, Parakeet Party
  • Cardstock- Lemon Lolly ( 4 -1/4″ x 11″), Basic White ( 3-1/8″ x 4- 1/8″), Orchid Oasis ( 2-1/4″ x 3-1/4″)
  • Share A Milkshake Dies
  • Stampin’ Cut & Emboss Machine
  • Brushed Brass Butterflies
  • 1/8″ Metallic Woven Ribbon in Orchid Oasis

This card is perfect for a variety of occasions, including birthdays, get well wishes, or just because. It’s a great way to send a little bit of happiness and cheer to someone you care about.

If you’re looking for an adorable and playful card to celebrate the beauty of spring, this turtle card is just the thing. It’s sure to bring a smile to anyone’s face and brighten up their day. Order your supplies today and spread a little bit of joy and happiness!

Until we meet again . . .

Judi's online store

Let’s start stamping! Learning the basics.

Let’s start stamping! I will share how to begin with the basics today.

 I begin with a stamp set to fit the occasion you’re crafting for. Choosing a color pallet that you love or the recipient loves is a great way to personalize the project. Coordinating inks and papers will achieve a proffesional looking project. Need help with this? Check out my Online Store. Finding inks, papers, and embellishments of the same colors that coordinate beautifully is a snap! I love using patterned papers (called Designer Series Paper) on my projects. Be sure to check the coordinating colors listed under the “show more” section of the product page.

The acrylic blocks you choose to use should be close to the size of the stamp you are using. If the block is too small you may miss some of the image. If the block is too large, you may get ink on it and possibly get it on your cardstock. Don’t forget to have the stamp cleaner and shammy handy to clean your stamps as you go.

Let’s start stamping! Tips for Beginners

Once you have your essential tools, you’re ready to start. Here are some tips to keep in mind as you begin:

  1. Practice on Scrap Paper – Before you stamp on your final project, practice on scrap paper to get a feel for the stamp, ink, and pressure needed to create a clear image.
  2. Ink Up Your Stamp – When inking up your stamp, be sure to apply enough ink to cover the entire stamp. You can check to see if you have enough ink by stamping on a piece of scrap paper.
  3. Applying Even Pressure – When you stamp, apply even pressure to the stamp to ensure a clear, crisp image. You DO NOT need to press hard!
  4. Clean Your Stamps – After each use, clean your stamps with a stamp cleaner to keep them in good condition.
  5. Experiment with Colors- Try different color combinations. Each combination will give your project a different look and feel.

We are going to start by stamping by using solid stamps. these types of images are favorites of many because of how easily you can create a card with lots of color. When using solid images, it is important to make sure you ink your stamp well.To do this, “tap” your stamp to the pad. Here is a card using the Lasting Joy stamp set.

Let's start stamping !  #LastingJoystampset

Stamping is a fun and creative hobby that allows you to create beautiful, handmade projects. With the right tools and some practice, you can easily begin your stamping journey. Remember to have fun and experiment with different colors to make your projects unique and personalized.

Until we meet again . . .

Judi's online store

The 2023-2024 SU! Annual Catalog is live

The 2023-2024 SU! Annual Catalog here!

Great news for all crafting enthusiasts! The much-awaited The 2023-2024 SU! Annual Catalog is now live, and it’s filled with exciting new products that are sure to spark your creativity.

The new catalog features a wide range of stamp sets, designer series papers, ribbons, embellishments, tools, and accessories to suit all kinds of crafting projects. Whether you prefer classic and elegant designs or bold and modern ones, you’ll find plenty of options in the new catalog.

View the products online by clicking here or on the photo below. Be sure to have a pen and paper ready to begin your Wish List. Once you have decided what to buy, go to My Online Store to purchase them.

2023-2024 SU! Annual Catalog

The 2023-2024 SU! Annual Catalog release is an exciting time of the year.

One of the highlights of the new catalog is the range of stamp sets available. You’ll find sets that feature everything from intricate floral designs to playful animals and whimsical characters. Plus, there are coordinating dies, punches, and embossing folders to help you create even more intricate and detailed projects.

In addition to the stamp sets, the new catalog features a variety of designer series papers, ribbons, and embellishments. You’ll find everything from soft and subtle designs to bright and bold ones, making it easy to create projects that match your personal style.

The new catalog also includes a selection of new tools and accessories that can help you take your crafting to the next level. From precision cutters and new adhesives to innovative storage solutions, there’s something for every crafter in the new catalog.

So if you’re looking for fresh inspiration and exciting new products, be sure to check out the 2023-2024 SU! Annual Catalog. Browse through the pages, create a wish list, and start planning your next project. The possibilities are endless!

Judi's online store

The New 2023-2025 In-Colors coming soon!

The new 2023-2025 In-Colors are on their way, and they’re inspired by nature’s bounty. Get ready for a burst of fresh and stunning hues! These shades will add a touch of vibrancy and elegance to your floral images.

The New 2023 - 2025 In-Colors

Here are the five gorgeous In Colors that you can look forward to:

  1. Boho Blue – This shade is a perfect balance of blue and gray, and it’s dreamy and tranquil. It’s perfect for creating a serene and calming atmosphere in your images.
  2. Copper Clay – This warm, earthy shade of copper is reminiscent of autumn leaves. It’s perfect for creating a cozy and inviting atmosphere.
  3. Moody Mauve – This dusky, muted shade of mauve is both elegant and dramatic. It’s perfect for creating a moody and romantic atmosphere in your stamped images.
  4. Pebbled Path – This soft, cool gray is a versatile and calming neutral. It’s perfect for creating a serene and modern atmosphere in images.
  5. Wild Wheat – This warm, green-gold shade is reminiscent of a sun-kissed field of wheat. It’s perfect for adding a pop of color and energy to your floral images.

These new In Colors will be available May 2, so keep an eye out for them. Whether you’re a photographer, designer, or hobbyist, these colors are sure to inspire you and take your images to the next level.

New 2023 – 2024 In-Colors are beautiful when used together.

Using four of the five colors, I created this beautiful floral card. I used; Boho Blue, Copper Clay, Moody Mauve, and Wild Wheat. Blueberry Bushel, a returning color, was also used for the tiny flower centers.

The new 2023-2025 In-Colors are a delightful addition to any image. From the dreamy Boho Blue to the cozy Copper Clay, there’s a shade for every mood and occasion. Don’t miss out on these beautiful new colors and take your images to the next level. You can purchase these wonderul colors thru my online store here, beginning May 2nd.

Until we meet again. . .

Judi's online store

Sailing the Deep Blue Sea

Sailing the Deep Blue Sea: A Perfect Theme for Your Next Greeting Card

Sailing the deep blue sea is an adventure that many people dream of experiencing at least once in their lifetime. I am one of those people. I spent weekend, my first 16+ years on a boat but have never been on a sail boat. This is one item on my bucket list. I hear the tranquility, and excitement that come with being out on the open water are unmatched. If you have a friend or loved one who shares this passion for sailing, why not consider sending them a greeting card that celebrates this theme?

A sailing-themed greeting card can be a perfect way to show that you appreciate their passion for sailing. Let them know that you know the joy it brings to them. Whether they are an experienced sailor or a beginner, a sailing-themed is a great way to personalize a card just for them.

Sailing the Deep Blue Sea can sweep you away.

When creating a sailing-themed greeting card, there are many directions you can take. I decided to create an illusion with my card. My idea is to make it appear you are looking through a Monocular. Just imagine you are looking out into the sea and this is what you see.

Sailing the Deep Blue Sea

If you want to take your sailing-themed greeting card to the next level, consider adding a personalized touch. You could include the colors of their sail boat. How about attatching a small seashell or anchor charm to the front of the card? These personal touches can make your card even more special and meaningful.

Items I used for my sailing themed card are; Basic White & Pacific Point cardstocks. I used this bundle:

These can be purchased through My Online Store through May 1, 2023 or while supplies last)

Finally, when selecting a sailing-themed greeting card, consider the occasion. Whether you are sending a birthday card, a congratulations card, or a card just to say hello, there is a sailing-themed option that is perfect for your needs. From whimsical and lighthearted to heartfelt and sincere, there are a variety of styles and designs to choose from.

A sailing-themed greeting card is a perfect way to celebrate the beauty and adventure of sailing. With a thoughtful message and a personalized touch, you can create a card that is both heartfelt and unique. So why not set sail on your next greeting card project and celebrate the joy of sailing with your friend or loved one?

Until we meet again. . .

Judi's online store

An Adorable Birthday Card for a 1st Birthday

An Adorable Birthday Card for a 1st Birthday: Celebrating Milestones in Style.

Your little one’s first birthday is a milestone event, and what better way to celebrate it than with an adorable card? A personalized card is a thoughtful and unique way to show your love and support for the family, and it’s a keepsake that they can treasure for years to come. In this blog post, we’ll explore the importance of a 1st birthday card, what to consider when choosing a card, and how to personalize it to make it extra special.

A 1st birthday is a significant milestone in a child’s life, and it’s a moment that the family will cherish forever. As a friend or family member, it’s essential to acknowledge this special day and show your support for the little one and their family. A personalized card is a perfect way to express your congratulations, share your love, and offer your well-wishes for the future.

Choosing the Right Card

When choosing a 1st birthday card, there are several factors to consider. You want to select a card that reflects the child’s personality, captures the essence of the occasion, and is appropriate for the family’s preferences. Consider the theme of the birthday party, the child’s favorite color or character, and the family’s style. For example, if the family has a love for nature, consider a card with a forest or animal theme.

An Adorable Birthday Card for a special girl in pastels is a great way to personalize it.

Personalizing the Card

A card is even more special when it’s personalized. You can add a unique touch by including a photo of the child, a heartfelt message, or a special quote. I decided to personalize my card with some of the colors she wears. Here is what I used;

  • Best Day stamp set #160798
  • So Saffron card base ( 5 1/2″ x 8 1/2″ scored @ 4 1/4″), scrap for sentiment
  • Petal Pink cardstock (4″ x 5 1/4″)
  • Basic White cardstock (2 @ 4″ x 5 1/4″)
  • Layering Diorama Dies
  • Pearls Jewels
  • StazOn Ink
  • So Saffron Classic Ink
  • Petal Pink Classic INk
  • Pear Pizzaz Classic Ink
  • Dark Flirty Flamingo Stampin’ Blend
  • Dark Daffodil Delight Stampin’ Blend
  • Light Old Olive Stampin’ Blend
  • Blender Pen
  • Stampin’ Dimensionals

An adorable baby card is a perfect way to celebrate a child’s 1st birthday. It’s a thoughtful and unique way to show your love and support for the family and to mark the occasion in style. When choosing a card, consider the child’s personality, the family’s style, and how you can personalize it to make it even more special. So, next time you’re celebrating a 1st birthday, be sure to include an adorable baby card in your gift, and let the family know just how much you care.

Judi's online store

Cute Bunny wishing a Happy Easter

This Cute Bunny is wishing a Happy Easter on this adorable card. The Easter Bunny stamp set is filled with fun, cute images and sentiments perfect for different projects. Keep this set in mind for your Easter, Spring, baby & other projects!

#EasterBunnystampset
Images copyright Stampin’ Up! (Registered) 1990-2023

Featuring different elements to use for various scenes and creative options will have you loving this set. Build your own scene by adding the little birdy on top of a floral sprig, putting the carrot in the bunny’s paws, or placing the butterfly on a bunny’s nose. Use the grass or eggs images repeatedly to create a border for your card fronts. Then choose your favorite coloring technique, color these cute images, and pair with the greeting of your choice! 

A Cute Bunny, eggs and grass is the perfect combo to say Happy Easter!

I used several of the images in this set to create the card I am sharing with you today. What is the one thing I love about this card design? By switching out the eggs for the flower swag, bird, or carrots I would have an adorable baby card!

Here are the products I used:

  • Crumb Cake Classic Ink Pad
  • Highland Heather Classic Ink Pad
  • Soft Sea Foam Classic Ink Pad
  • Smokey Slate Classic Ink Pad
  • Stampin’ Blends; Crumb Cake, Daffodile Delight, Highland Heather, Pale Papaya, Parakeet Party, Polished Pink
  • So Saffron cardstock 8 1/2″ x 5 1/2″
  • Basic White cardstock 2 @ 3 3/4″ x 5″, 1 1/4″ x 4″, 3″ x 4 1/4″
  • Hello Irresistible Designer Series Paper 3 1/2″ x 4 3/4″ & 1 3/4″ x 4 1/4″, scrap
  • Vellum cardstock largest 3 1/2″ x 3 1/2″
  • 2022-2024 Matt Dot embellishments
Cute Bunny wishing a Happy Easter
#EasterBunnystampset

I invite you to watch how I created this card on my Facebook Page Here.

Create your own Cute Bunny card when you Purchase items used in this project through my online store.

Until we meet again. . .

Judi's online store

Saying good-bye to Fifteen Colors

Saying good-bye to Fifteen Colors

Saying good-bye to Fifteen Colors with the end of this years’ annual catalog. Stampin’ Up! Color Refresh is coming! The new colors will be available when the NEW 2023-2024 Annual Catalog goes live on May 2, 2024. I love that our color pallette stays fresh by updating our core colors every three-five years.

The above photo shows you the fifteen colors that are leaving this year. Seeing colors leave makes me sad. This year is no different with several favorites going. Which are your favorites? You will want to be sure to purchase your favorite products that have these colors in them. don’t foget ink refills, Stampin’ Blender Pens, and Stampin’ Write Markers and cardstock. These products are only available while supplies last. Once they are gone, they are gone

Saying good-bye to Fifteen Colors is never easy.

Fifteens colors are leaving, 11 core colors plus 4 In-Colors. Yes, one of the 2021-2023 In-Colors is returning in one of our core families! This means sixteen colors are being added to our color families. There are four NEW colors, five In-Colors, and 6 returning In-Colors. I know you will be happy to see many of your favorite, past, In-Colors come back. I know these new colors are going to give us newopportunities.

By exchanging our old favorites with new colors;

  • is one way to change the look of previous projects.
  • give our favorite color combos an uplift
  • Open our eyes to new color combinations

Purchase your outgoing colors & products on my Online Store Here!

Until we meet again. . .

Judi's online store
Last Chance Products for 4/4/23

View 2022-23 Annual Catalog Last Chance List Here!

View Jan – APr 2023 Mini Catalog Last Chance Here!

Starting Your Papercrafting Journey

Congratulations on starting your papercrafting journey! Now that you have gathered your basic tools and supplies, let’s take your first step into the wonderful world of papercrafting. One of the most popular techniques in papercrafting is stamping. Stamping allows you to easily create beautiful designs on your paper projects. I will guide you through the process of stamping, from choosing the right stamps to learning techniques every Monday. But for now let’s take that first step.

  • Choose your stamps: There are countless stamps available, from simple shapes to intricate designs. The first step with stamping is to choose the stamps you want to work with. Stamps come in solid and outlined images. Consider investing in different types of stamps, such as clear stamps (photopolymer) or cling stamps (red rubber).

An example of solid images

Starting Your Papercrafting Journey with #SimplyFabulousStampSet
Images copyright Stampin’ Up! (Registered)1990-2023

An example of outline images

#CheerfulBasketStampSet
Images copyright Stampin’ Up! (Registered) 1990-2023
  • Gather your supplies: Once you’ve chosen your stamps, you’ll need a few supplies to get started.
    • Ink pads in the colors you want to use.
Brights stamp pads
Brights Cardstock
Stampin' Mist

Stampin’ Shammy this reusable stamp cleaning cloth makes stamp cleaning effortless.

Stampin' Shammy

Starting Your Papercrafting Journey by a little practicing first.

  • Learn the basics: Before you begin stamping, it’s important to learn the basics. I recommend that you practice stamping on scrap paper to get a feel for how much ink you need to use and how much pressure to apply to the stamp.
  • Different papers will also give you different effects. I recommend using, and practicing on, good quality cardstock to get clean & crisp images.
  • Try different projects: Once you’ve mastered the basics, try different projects to see what you enjoy most. Stamping can be used in a variety of papercrafting projects, including card-making, scrapbooking, and even home decor. Experiment with different types of projects to see what you enjoy most.
  • Expand with techniques: As you become more comfortable with stamping, you may want to expand by trying different techniques. You may also want to try different techniques, such as heat embossing or watercoloring

By following these steps, you can begin your papercrafting journey with stamping. With practice and experimentation, you can create beautiful and unique papercrafting projects that showcase your creativity and style. Join me next Monday as we explore one of the easiest ways to start your papercrafting journey.

*Products shown may be purchased through my online store.

Judi's online store

Painted Poppies 2-Step Stamping

Painted Poppies stamp set & 2-Step Stamping is a quick way to create a beautiful card. I love using the images to easliy make a card. Inspired by a field of poppies, this set features beautiful line-art images.

Choose to simply use the images in this set to fill in the larger flower images. Quickly create a card by using the 2-Step Stamping Technique. Choose your favorite coloring tools to color the outline images in to create beautiful works of art when you get that coloring feeling.

Here’s a look at the Painted Poppies stamp set.

Painted Poppies 2-Step card

Using the Painted Labels Dies, I cut the flowers and leaf stem. A few of the dies cut images from the stamp set and the others compliment the stamp set. The larger label die with the swirls is one of my most used from this set of dies.

Painted Lables Dies

I created the background by first stamping the ink splotches in Calypso Coral. Then, I embossed the Basic White cardstock using the Brick & Mortar 3-D Embossing Folder.

The two flowers from Painted Poppies were then stamped.

I stamped the outline using Sweet Sorbet directly onto the cardstock. Next, I inked the shadow image, stamped off, then stamped it inside the outline image. This is one way to do 2-step stamping. Did you notice it isn’t “just right?” I love leaving white space when doing 2-step stamping to create dimension.

Painted Poppies 2-Step Stamping

I used Mint Macaron ink and a Blending Brush to add color to Basic White cardstock. I then cut out the leaf stem die. After putting the card together I decided to add some light splatters. I used Calypso Coral ink and a Water Brush and ink. My card is completed with a few pearls and ribbon. I will add a sentiment to the inside when I send it.

I hope you enjoyed this card using Painted Poppies stamp set and 2-step stamping. View another card using this stamp set here..

Purchase the products used in creating this card through my online store. Just click the links above or on my signature below.

Until we meet again. . .

Judi's online store