Embossing folders are so much fun! It’s the theme for our SBTD Hop

Embossing folders are so much fun and bring texture and interest to the simplest of cards. Did you know Stampin’ Up! currently carries three different types of embossing folders?

  • 1– Standard which are approximately 1/16″ thickness that make crisp,clean impressions
  • 2– 3-D, approximately 1/8″ thickness with same crisp, clean impressions only deeper and more detailed
  • 3– Mini which are like the standard dies only narrower and come in sets of two

Our embossing folders can create a bold statement or a subtle look. Using them can help your imagination soar!

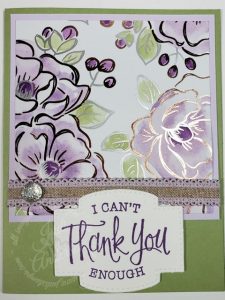
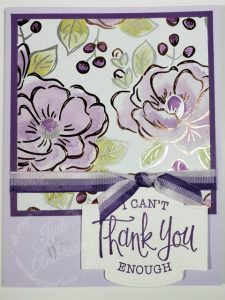
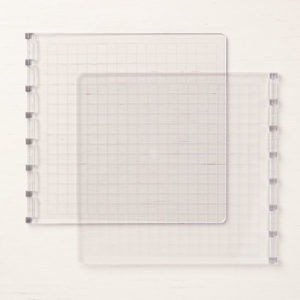
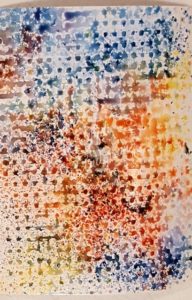
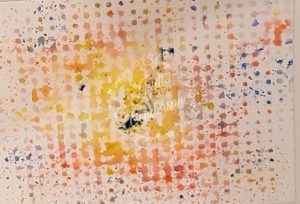
Today I have chosen to use the Greenery (#152716) Embossing Folders on my project to create an impact on my Magenta Madness layer.

Greenery embossing folders
Images © 1990 – 2020 Stampin’ Up! ®
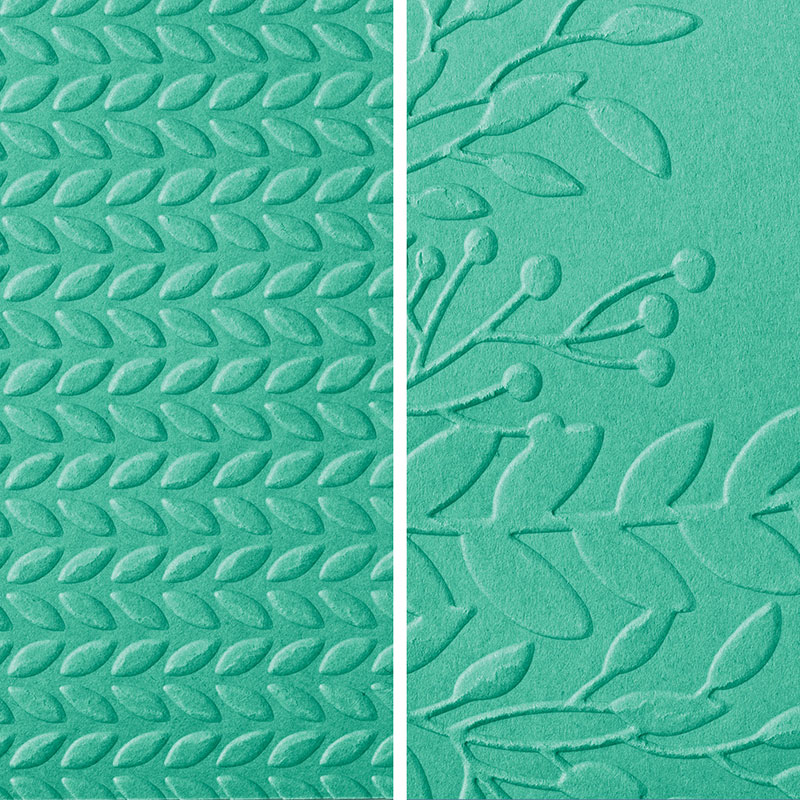
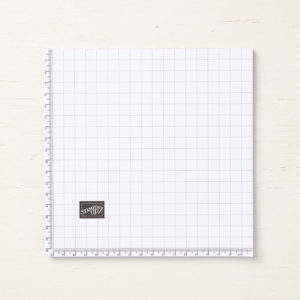
Greenery Embossing Folders #152716

Made narrower to fit through the new Mini Die & Emboss Machine, you can use them with your larger machine. They come in a set of two embossing folders that compliment each other. I wanted a bold geometric- type of a look, the embossing folder n the left was perfect. If your cardstock (like mine) is wider it is easily lined up and you just run it through again.

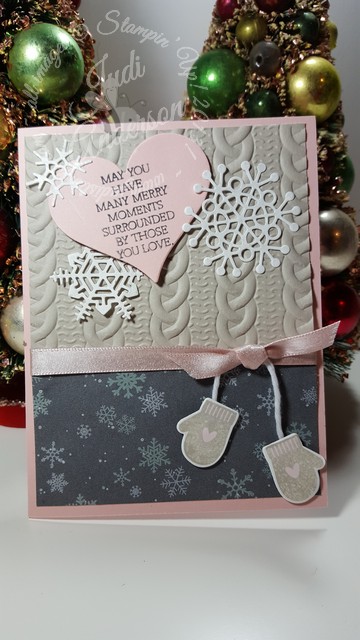
I love the little critters in the Someone Special stamp set (#151643) and thought the raccoon would be perfect for this thank you card. Now this isn’t any ordinary raccoon. . . It’s Pinky! She is a combination of Flirty Flamingo and Magenta Madness Stampin’ Blends.

Someone Special stamp set, Greenery embossing folder, subtle embossing folder
Images © 1990 – 2020 Stampin’ Up! ®

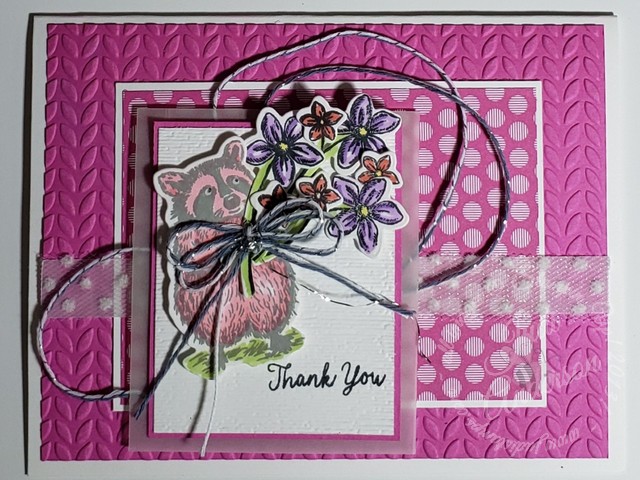
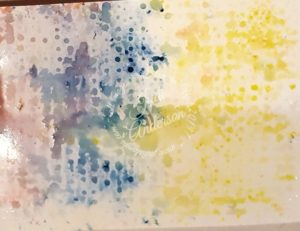
A subtle texture was needed for the mat behind Pinky, I used the Subtle 3-D embossing folder (#151775)

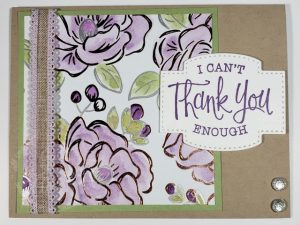
~ perfect! I used some of our Vellum Cardstock behind the strip of Polka Dot Tulle Ribbon (#146912), to highlight it, and behind the focal point mat to add separation from the 2020-2022 In-Color Designer Series Paper. The Misty Moonlight Twine adds a little sparkle. It’s found in the Flowers For Every Season Combo Pack (#153620)

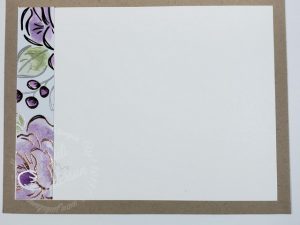
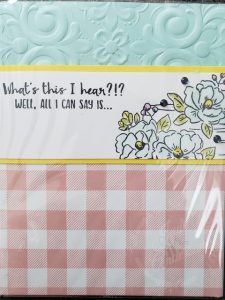
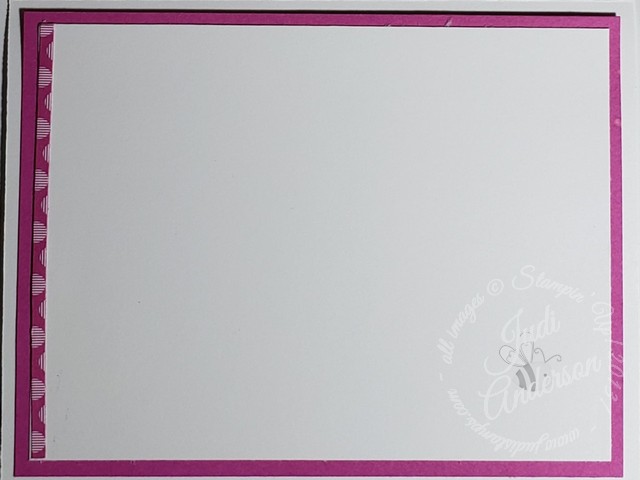
No card is complete without decorating the inside of the card. Using a Whisper White card base allowed me to use a Magenta Madness mat behind the Whisper White. A small strip of the Designer Series Paper Brought this card together.

Someone Special card inside

Be a little creative by experimenting with your folders the next time you sit down to make a card… Embossing folders can be so much fun!

blog hop button
Click here to see what Courtenay is sharing this month
August In the mail craft kit
Images © 1990 – 2020 Stampin’ Up! ®
Shop my Stampin' Up! store today

What you can do to avoid boredom while staying inside

What you can do to avoid boredom might be easier than you think! Are you running out of things to do to keep you and your children busy after 3 weeks of staying in your home? This fun technique will keep you and your children busy for hours. Creating a fun way to do art and learn about colors is quite easy with this technique I am sharing with you today.

Flourishing Phrases and smashed ink refilll technique you can do to avoid boredom
Images © 1990 – 2020 Stampin’ Up! ®
Card with rhinestone jewels

Materials needed for this project are:

  • a vinyl table cloth to protect your table,
  • two – three ink refills
  • Water spritzer with a fine mist
  • Fluid 100 Watercolor Paper
  • window sheets/cello bags/or plastic wrap (cut larger than Watercolor paper pieces)

Let’s get ready!

Cover your table, it’s about to get messy! Cut your Whisper White cardstock into pieces measuring 4″ x 5 1/4″. Let them choose two to three ink refill colors. I am sure they will be experimenting with different color combinations. Surprisingly, half the fun will be learning how two colors will create a third color when they combine together. Guiding your children with their color choices will help with their project not end up being a muddy mess .

Here are the products I used to create the card in this video.

Click here to purchase the products used in this video.

  • Flourishing Phrases Stamp Set #151407
  • Staz On ink pad #101406
  • Pineapple Punch Ink Refill # 147180
  • Calypso Coral Ink Refill #122934
  • Melon Mambo Ink Refill #115662
  • Fluid 100 Watercolor Paper #149612
  • Stampin’ Spritzer #126185

Let them have fun and get messy!

Getting ink on their hands is sure to happen. Don’t worry, it will eventually wash off with a little soap and water. I guarantee your children won’t be patient enough to wait for their creations to dry. Have them create the mats one day. Let them dry overnight. The next day they can use markers or crayons to create a unique drawing or stamp images on the mats.

Now to decide what to do with these works from their heart! They may choose to adhere them to card bases and send off to someone to put a smile on their face. They may choose to add them to a frame to give as a gift. Whatever they decide, your children will be proud of the end result and not even realize they were learning while creating.

Flourishing Phrases with the smashed refill technique you can do to avoid boredom
Images © 1990 – 2020 Stampin’ Up! ®
Using Pearls Jewels

Do you or your children love to paint or water color? Check out this other technique that can help when you hear,”I’m bored!”

Who knew? A technique you use on hand made greeting cards can help you when you are thinking up things to do with your children & what you can do to avoid boredom.

Judi's online store

Techniques can help with boredom!

Techniques can help with boredom of staying indoors. Techniques are fun,relaxing, and often unpredictable. There are no mistakes when creating with techniques because in most cases, each try results in a different look.

I have been playing around with some water coloring techniques this past week. Let me share one with you now.

This picture shows the result of water coloring using an aqua painter with Highland Heather, Gorgeous Grape, and Pear Pizzaz inks. Using the Flowering Foils Specialty Designer Series Paper made doing the technique quick and easy. Members of my HapBEE Stampers Community Page received a free class last week showing how to create this gorgeous look.

Flowering Foils Designer Series Paper
Images © 1990 – 2020 Stampin’ Up! ®

I did a section of the paper when demonstrating the technique in the class. Sharing my tips of water coloring included how to load the ink achieving different depths of color. One tip I will share with you is not to keep layering color on. Let your ink dry, then add more ink if you think it is needed. By letting the ink dry you avoid over-saturation of the paper and you let the water do the work for you. I couldn’t wait to finish the entire sheet when the class finished. This technique can help with boredom and relaxation!

Flowering Foils Designer Series Paper
Images © 1990 – 2020 Stampin’ Up! ®

I cut the paper 9, 4 x 3 1/8″ pieces. Every piece of this 12″x 12″ Designer Series Paper was used. The 3/4″ strips decorated the inside of the cards.

Flowering Foils Designer Series Paper
Images © 1990 – 2020 Stampin’ Up! ®
Flowering Foils Designer Series Paper
Images © 1990 – 2020 Stampin’ Up! ®

I used Pear Pizzazz, Crumb Cake, Purple Posy, and Gorgeous Grape as card bases and mats. Achieve a variety of looks just by changing up which papers you combine on your cards.

Flowering Foils Designer Series Paper
Images © 1990 – 2020 Stampin’ Up! ®
Flowering Foils Designer Series Paper
Images © 1990 – 2020 Stampin’ Up! ®

Don’t you just love this water coloring look? I hope it inspires you to try it and see personally, how techniques can help with boredom.

Until we meet again. . .

Judi's online store

Happy Birthday To You without the cake!

You may not have thought of using the Happy Birthday to You stamp set without the cake image but look at this cute greeting card design. This design uses the flowers without the cake! . At first glance, you may not consider using only the flowers. . .but look at those gorgeous flowers!

Happy Birthday To You 2020 Sale A Bration Set
Images © 1990 – 2020 Stampin’ Up! ®

This card is a great way for those just starting out in the stamping world to stretch their options with the Happy Birthday to You set. As you can see with this card, you can really change the look of the set by taking a strip of Whisper White cardstock and stamping only the section that has the flower images across it. If you look closely, you can see the cake but it seems to disappear and look like a background to the flowers. I used my Watercolor Pencils and Aqua Painter to color the images but you could leave them uncolored if you stamped them in the coordinating ink color.

In creating this card I used the Buffalo Check background stamp and Blushing Bride ink to stamp the bottom portion of the Whisper White card base. I embossed a piece of Pool Party with the Parisian Embossing Folder and adhered it to the top of the card base. Layer a Daffodil Delight piece of cardstock that is 1/4″ wider than the stamped piece, and adhere it to a Whisper White card base between the Pool Party and stamped bottom. Add your stamped piece with a verse in the upper left corner and you are done! How quick was that?

To see another card I shared using this stamp set, click here.

Do you have other large image stamps that you could use this technique with? Just remember, The Happy Birthday To You stamp set is more than a cake.

buy Stampin Up! here!

Stamparatus Accessories & NEW storage bag!

You love our Stamparatus and how it has made your stamping easier and quicker. How would you like more accessories to make it even quicker and easier when creating? We all know how wonderful it is to have 4 surfaces for your stamps but how would you like even more? These are the two that I have found most useful. . . .

A set of 2 acrylic hinged plates for more surfaces to add stamps to (#149693)

New Grid paper (149621) that fits perfectly and has the correct measurements and protects your Stamparatus and foam pad from ink.

A tool as beloved and important as the Stamparatus deserves its own special treatment. And what better way to treat your most versatile stamping companion than by giving it its own special carrying and storage solution. Introducing the Craft & Carry Stamparatus Bag! It will be available for order beginning December 5th. (#149695)

If you have put off ordering your Stamparatus, why not ask for it and the storage bag for Christmas? Just give everyone my information and I will place the order for them, including a special gift tag for gift giving! (#151961)

Online Extravaganza is coming this week! Deals start November 23 (Black Friday) through November 28.

Watch for more details tomorrow. . . . . .

buy Stampin Up! here!

An interesting article from Business Insider

I jumped on my computer this morning and this article from Business Insider caught my eye and I thought it sounded interesting so I decided to click on the link. I want you to know, I don’t do this very often as I try to be focused when doing my computer work. I am so glad I did because it brought to mind things that we do here in the USA that isn’t done elsewhere in the world. I got to thinking,” How did these things come to happen if they aren’t done anywhere else?”

I have never done this on my blog before but I thought you may enjoy to ponder on a few of these things today……

Here are a few of the items that got me thinking:

#1: Throwing a Baby Shower: they aren’t done elsewhere and are considered rude.

Does your family or friends throw them?

#2: Chatting with strangers and making small talk. Really?

I don’t think I could pass a stranger and not say hi. Or how about standing in line someplace and not striking up a conversation?

#3: Drinking huge cups of coffee while walking around.

I’m not a coffee drinker, but why is this strange?

If you’d like to read on the 24 things that we do that the world views as strange click on this link:

https://www.businessinsider.com/things-normal-in-the-us-but-considered-weird-2018-8.

I hope you don’t mind me sharing these things that aren’t considered normal and I know you come here to be inspired so I thought I would share one of the projects from my No-Line stamping watercolor class that I held on Friday evening. We had SO MUCH fun!

This is the bird image from the “Better With You” stamp set. It was the last image that students painted and I believe their favorite.

I started them with a smaller, cowboy boots image, then the flower image from the “Better With You” stamp set, and we ended with this bird image.

Each students image was unique. I loved watching them a they discovered what worked best for them in water coloring the images.

If you’d like to see a few of the other images visit my Facebook Page or Instagram.

DO you think the world views learning how to watercolor using stamps is strange?

Enjoy your weekend!

buy Stampin Up! here!

More backgrounds with Brushos®

As promised, I am bringing you some more backgrounds with the Brushos® technique I shared in our SBTD Blog Hop on Saturday which you can check them out here.

WARNING: When trying this technique you may find yourself acting like a child experiencing finger painting for the first time! The giddiness (is that a word) & fun is addicting!!

These samples are from my students in my Brushos® class. They were told to use any color combination they wanted, and to sprinkle the Brushos®onto the Glossy Cardstock and spritz with water. They could then use the shelf liner that I provided in any way they wished to create their own background. All had fun and were amazed at the different looks each achieved by sing the same products! I enjoyed watching the fun, laughter, oooohh’s and aaaah’s coming from them. The excitement and fun was so addicting as each revealed their creation!

Here’s a look at them:

This was Cindy’s creation, she used all the colors, sprinkling the Brushos® a little bit heavier and then lightly spritzed with the water at a small angle. She waited for the water to dry a little bit and then laid the shelf liner on the top, dabbed,lightly,with a paper towel to absorb extra water and then lifted the shelf liner straight up. You don’t want to dab up too much water because you will be pulling up some of the crystals which lessens the intensity of the color.

Annalise used a lighter hand at sprinkling her Brushos®, spritzed with a very light hand straight over the top of her cardstock. She then laid the shelf liner directly over the wet cardstock and lifted straight up. Her result was more definition of the pattern from the shelf liner.

The next is Chris’s design. Chris decided to sprinkle her Brushos® with more of a rainbow effect rather than mixing the colors (red, blue, yellow) by sprinkling the colors in sections rather than over each other. She also spritzed a little heavier with water, and laid the shelf liner onto the water immediately allowing the water to spread more than Annalise’s. She also dabbed paper towel over the shelf liner a little to help absorb the water giving the color a lighter look.I love how the colors meld into each other creating a soft transition.

Debi achieved a totally different with hers. She decided not to dab hers with the shelf liner and instead of spritzing the crystals with long strokes she did small bursts of water, lightly over the top. I think it gave it a look of granite, don’t you?

Each person got to decide on their card base color, depending on what color they wanted to pull out of the background they created. I then showed them my sample ( the card from the hop plus a few more) and they chose from a few different stamp sets. *This is one of the perks of taking classes in my HapBEE Stamping Studio!

Want to see what they created?

Debbi’s had a shine on it so I took a single picture of hers.

It was hard getting good pictures because of the glare the Glossy Cardstock gives when taking pictures. I will be holding another class with Brushos® and other products so if you are interested in learning how to use this amazing product, contact me.

To purchase your Brushos® and other products used for these amazing cards be sure to head over to my online store by clicking the link in my signature.

So are you amazed with the different looks you can get by using the same products? Glossy cardstock, water and Brushos® Crystal Colour!

buy Stampin Up! here!HOSTESS CODE: 7ZHTE4J4

Brushos for backgrounds, the S.B.T.D. February Blog Hop

Brushos ®   are making a debut in our Stampin’ Up! Occasions Catalog and make creating backgrounds so much fun! I knew I had to share a fun background with you for our S.B.T.D. Blog Hop theme this month.

First of all, what are Brushos® ?

They are concentrated watercolor ink crystals that burst with color when you add water. They come in a package that includes 5 containers, 1 each of 5 colors: Brilliant Red, Gamboge (orange), Moss Green, Prussian Blue, Yellow . Each container contains  0.5 oz. (14 g) of colored crystals.

Now that you know what Brushos® are, let’s see what I have created for you!

I love the look that was achieved by using the Yellow, Gambroge, Brilliant Red Brushos® with Glossy White Cardstock and shelf paper to achieve the look. I sprinkled the Brushos® onto the glossy cardstock and then spritzed them with water using our Stampin’ Spritzers. I let the colors meld a little and then laid the shelf liner on top and let it set on there for about a minute. I loved the texture that was achieved. Here’s a closer look at the background:

Next I embossed the images using Black Embossing Powder. The bird was embossed onto Whisper White Cardstock and then colored with an Aqua Painter and Berry Burst ink. I used Stampin’ Dimansionals to adhere the bird to the card and then layered the Glossy White onto Basic Black and then onto a Berry Burst card base.

We played with backgrounds using this same technique in my Brushos® class tonight. You will want to be sure to come back on Monday when I will share what my students achieved with their take on this background using Brushos®!

See what Susan has in store for you here: 

I invite you to check out the projects from this month’s hoppers by clicking their links below.

Karie Beglau     

Judi Anderson  YOU ARE HERE!

Susan Simpson

Tricia Butts 

Lyndsay LaRae Carara  

Courtenay Heuston

Tashana Lundy 

Carly Middleton    

Sharleen Luciano     

Vicky Thompson 

Anastasia Radloff 

buy Stampin Up! here!


Smitten Mittens all warm and cozy

Who doesn’t love feeling all warm and cozy in this cold season weather? Mittens keep your fingers so warm during the season’s cold so what better stamp set to reach for than Smitten Mittens? I learned long ago that hues of pink help warm your complexion so I chose Powder Pink to hoping it would help give that warm and fuzzy feeling to this card.

Using Sahara Sand and the Cable Knit embossing folder was a good decision ( I am loving this color combination!!) and the Shimmery Satin Blush Blossom ribbon gives it a soft feeling. The tiny mittens and snowflakes are the perfect embellishments for this card. Now as I look at this card while writing this post it reminds me of my daughter when she was little and had a cable knit blankie with satin ribbon binding.

The Smitten Mittens Bundle will not be available after January 2nd. Be sure to check out the newly added items to the Clearance Rack too! Be sure to check out other projects using the Smitten Mittens Bundle HERE.

click image to check out out the deals available while quantities last!

I don’t know about you, but when I finished assembling this card I feel that is is just like a nice warm,soft blanket you could get all snuggly warm and all cozy with.

buy Stampin Up! here!

Smitten Mittens for this month’s “From the Heart” SBTD Blog Hop

I’ve chosen to use the Smitten Mittens Bundle for this month’s SBTD Blog Hop theme, “From the Heart. I love creating, sharing, and teaching how to make cards, projects and gift from the heart so I am loving the theme!

As we go into the holidays I am reminded of my younger days when we would make gifts for friends and family. The fun we had creating and the excitement of giving and receiving those gifts will always hold a place in my heart. I have taught my children, and now my grandchildren, that the most treasured gifts are those you hand make and put your heart into. I chose the Smitten Mittens Bundle because the warmth mittens give you is like the warmth you get when hand made gifts are given and received.


This first project is a simple gift tag cut from the Christmas Around the World Design

er Series Paper (DSP)(144629) This Basic Gray, Soft Sky, & Whisper White design has a “fuzzy” look to it. I wanted to keep the warmth feeling so I used Very Vanilla cardstock for the cuff and snowflake and sponged around the mitten using Basic Gray ink. I folded a piece of Very Vanilla cardstock in 1/2 and then cut a mitten from it by making sure the top of the mitten was above the fold. I adhered the DSP to this which created a nice note tag.


A gift tag needs packaging so I created this coordinating gift box. The base is Soft Sky cardstock and the top is Basic Gray with the images stamped in Whisper White. I tied some 3/8″ Classic Weave Soft Sky Ribbon around the box.

I then decided that the mitten would make an adorable treat box. I cut 2 mittens from the same snowflake DSP. I then cut a piece of Basic Gray cardstock 2″ x 8 1/2″ and scored 1/2″ along each long side. Making “v” cuts up to the score lines allow the strip to bend around the curves of the mitten. This is what it looked like

I used Fast Fuse to adhere the strip to the front and back mittens to create the treat box.

The next wasn’t planned, I just lucked out! The strip was longer than what I needed, gee, this extra makes a great lid! 

I did end up taking my Basic Gray Stampin’ Write Marker and colored the back of the mitten thumbs because the back side had a print on a white background.

My mind was spinning with ideas as I was creating the projects for the SBTD Blog Hop. I have a card idea that I will be sharing on Monday so you will want to be sure to come back!

I am sure you will want to see everyone’s projects, click below to see what Susan has for you this month. 

I hope you enjoyed my projects using the Smitten Mitten Bundle and hope that you too, give some hand-made gifts from your heart this holiday season.

  1. Rachel Pine               
  2. Karie Beglau               
  3. Judi Anderson         (you are here)     
  4. Susan Simpson             
  5. Tricia Butts  
  6. Lyndsay LaRae Carara                 
  7. Courtenay Heuston
  8. Tashana Lundy
  9. Carly Middleton     
  10. Sharleen Luciano            
  11. Anastasia Radloff  

Don’t forget to reserve your Stamparatus here!    ( be sure to sign in to your online account!) Reservation period ends December 30th.

Thank you for taking a look at my blog today, I hope you are enjoying our SBTD Blog Hop. If you are in the US and are looking for a Stampin’ Up! Demonstrator, I would love to be yours! Our 2018 Occassions and Sale A Bration Catalogs will soon be released, if you are not currently working with a demonstrator and would like a copy please let me know and I will send them to you.


 Until we meet again. . .

buy Stampin Up! here!


Stamparatus, the tool you’ve been waiting for!

Stamparatus, positioning tool

I am happy to let you know that I am one of 2000 Stampin’ Up! demonstrators that helped to design the Stamparatus, the tool you’ve been waiting for! As part of the LDL Team, we are sworn not to share anything we work on or hear about. Believe me, it was hard not to be able to tell you about the Stamparatus these past 4 years. Yes, it took 4 years to design & test this amazing positioning tool. We wanted to get it right and to give you the best on the market. I. like you have watched and wanted to get a positioning tool but am so happy I held out, you will ABSOLUTELY LOVE it!! I am loving the unique “hinge stamping” technique you can accomplish on it. Watch the video below to see how you can position 4 different stamps at one time!!!!

Now that you’ve watched the video, leave me a comment below to let me know what you think.

Here is the information on how you can reserve yours so you can be one of the first to use the Stamparatus.

With the launch of this tool, we’re trying something different: testing a new reservation system. It acts like a true preorder: you reserve your spot and we guarantee shipment as soon as the product arrives in our warehouse. Demonstrators and customers will place reservations and receive their product at the same time. This system will allow us to get the product to market as soon as possible while avoiding backorders and efficiently managing inventory.

  • Reservation quantities are while supplies last.
  • Limit is 1 tool per customer per reservation window.
  • Customers may participate in multiple reservation windows (order 1 per window).
  • In order to reserve your Stamparatus, you are required to provide your credit card information.
  • Credit cards will not be charged until the Stamparatus ships from our facility. When you close your order, be sure to verify that your credit card and shipping information is correct.
  • Reservation Windows Available to Ship
    November 16–30, 2017 Approx. February 1, 2018
    December 5–30, 2017 Approx. March 19, 2018
    January 15–30, 2018 Approx. April 15, 2018

I will be posting details on how to reserve your on November 15th, the day before the reservation period begins! (It will not work until the 16th)

Be sure to leave a comment below and let me know if you are as excited as I am!

buy Stampin Up! here!


Going Global Sneak Peek Project!

I thought I would share a Sneak Peek project using the Going Global Stamp Set with you today. Many of you are aware that you may begin ordering from our new 2016 Occasions Catalog tomorrow AND you can earn a FREE Sale A Bration item with each $50 you purchase! Sadly, this means that the End of Year Sale ends today. It is also the last day you can order product from our 2015 Holiday Catalog, I will miss many of those products. In fact, I stocked up on several of the consumables to begin creating some fun holiday goodies for next year.

Today marks the beginning of  new season of paper crafting for me. I look forward to our Occasions Catalog and spring ( well, spring won’t be here for a little while). I love creating projects for birthday’s during the month of January as well as some Valentine goodies. You would think that with all the cards I create, I would send birthday cards. I want to be honest here, my intentions are there, but I seem to forget to send them!! Yep, I have an entire box of birthday cards just waiting to be sent! This changes this year! I will get a system in place, during January, and send birthday cards all year. I didn’t put a birthday greeting inside this card yet, but I will when I put it into my January slot. I will be doing a more feminine version using a different color pallet but the design will be the same. My mission for today is to go through my Birthday Book and see how many masculine and how many feminine cards I need for this month. I will then create them, this week, and share the pile of cards with you on Friday.

Here is a video showing you how you can create your birthday cards for the month of January too! (Don’t forget, you can order these items beginning tomorrow, January 5,2016)

I will be sharing my monthly design with you right here, each month to help keep me on track!! I will be sharing my card for February next week to give you time to order the supplies and create your cards by the first of February. Are you up for the challenge? Let me know by leaving a comment below.

This is what I used for this card:

STAMPS:

Going Global Stamp Set (W-140745) (C-140748)

INKS:

Mossy Meadow (133645)

Delightful Dijon (138327)

Lost Lagoon (133644)

Memento Jet Black

PAPER:

Very Vanilla (101650)

Tip Top Taupe (138336)

Going Places Designer Series Paper Pack (140581)

Foil Sheets- Gold (132622)

ACCESSORIES:

Fast Fuse (129026)

Multipurpose Liquid Glue (110755)

Stampin’ Dimensionals (104430)

3/8” Satin Stitched Ribbon – Basic Black (138430)

Banner Triple Punch (138292)

Confetti Stars Border Punch (135861)

Label Bracket Punch (132153)

World Traveler Textured Impressions Folder (138289)


Til we meet again,

buy Stampin Up! here!


HapBEE Stampers in Ink Stamping & Crafting Getaway

Our next HapBEE Stampers in Ink Stamping & Crafting Getaway is coming on February 26 & 27, 2016. If you love having a fun time while crafting with others, learning techniques, tips and ideas using some of the recently released products, plus so much more, we invite you to join us! Early Bird Registration begins today, 11/29/15. By registering during the Early Bird Registration period you will save $15.00 off the event fee. Not only saving money, you will receive Exclusive, V.I.P. status!

This exclusive status is given to the first 20 who register.

With this status you will receive:

  • a free exclusive class
  • a VIP pin
  • a pillow gift for those staying overnight
  • and more!

For more information on how you can join us, check out all the details here.

Til we meet again,

buy Stampin Up! here!


Did you click on it? Questions about Periscope Answered.

I shared about my Periscope Button yesterday, did you click on it? I know several of you did!! If not, you will want to be sure to click on it at 1:30 each weekday to watch something new.

I have had some questions

about using Periscope, while I am in no means an expert I thought I would try to share a few simple items with you.

  • To get Periscope on your phone: go to play store, type in periscope, download FREE App, register by using your phone or Twitter account ( twitter is easiest I have found)
  • When watching on your phone;
  • To comment, click on the “say something” in the lower left corner and type in the box that pops up.
  • To let me know you like what I am sharing, tap in the lower right hand corner to give me love hearts.
  • To comment to someone else who comments just tap on their comment box, click reply when the next box pops up, type your reply and send.
  • If watching on your computer:
  • you can not comment or give hearts on the scope BUT
  • You can comment through Twitter

Why do I do these scopes? I have been asked over and over again to do live  workshops and shares online. I have tried Google Hang Outs but most had troubles figuring it out and I was spending more time explaining on how to get on than actually doing live events. Also, they were limited to the first 10 who joined so several of you were left out. I tried doing Facetime, but again too many obstacles and hoops to jump through. Periscope seems to be a good fit, easy to use, easy to get on, several of you cn get on. AND BEST OF ALL- you and I can talk with each other!! WOOO!!HOOO!!

SO why not give it a try and join me at 1:30 today?? Just click on the Periscope (judistamps) bar on the left at the end of all my social media buttons. It is blue when  I am not live and turn red when I am live. Remember if you click on it when it is blue it will bring you to my last scope within the past 24 hours.

As always, all materials shown can be purchased through my ONLINE STORE 24/7 !!

Til we meet again,

buy Stampin Up! here!


DIY Video on Creating a Spooky Sky

How did you like my Spooky Halloween card yesterday where I showed off the stamping on your embossing folder technique? As promised, I am sharing a video I made to show you how I did the spooky sky. I know once you try this technique you are going to fall in love with it!  I will share a few more cards I created using the technique tomorrow. This will give you the chance to play and create to see what you can come up with.

And what did you think about my big announcement about my Periscope Button? Don’t forget to come back here at 11:30 Central time to give it a try!

Remember, You can purchase all materials I used in this video through MY ONLINE STORE HERE.

Til we meet again,

buy Stampin Up! here!