ICS Bolg Hop, Thinking of you, Painted Poppies & Honey Bee

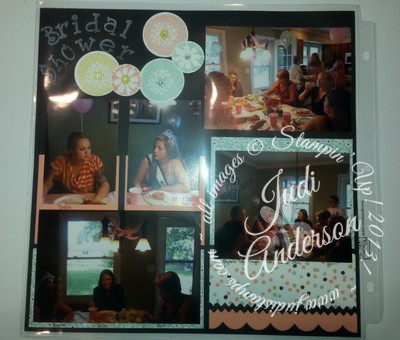
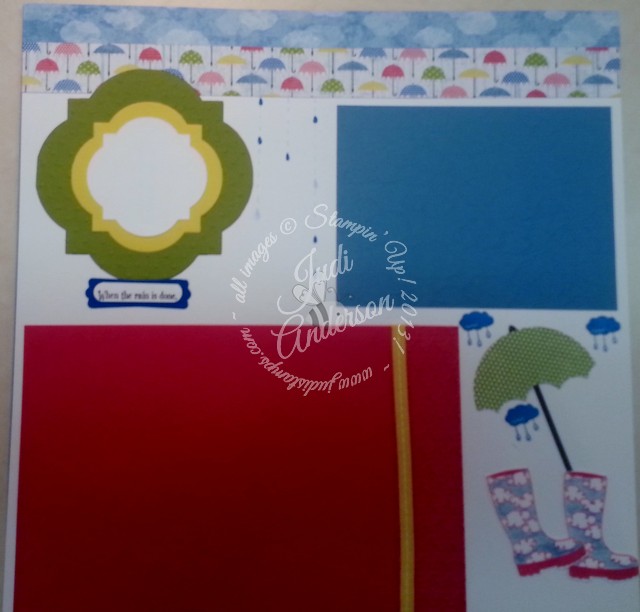
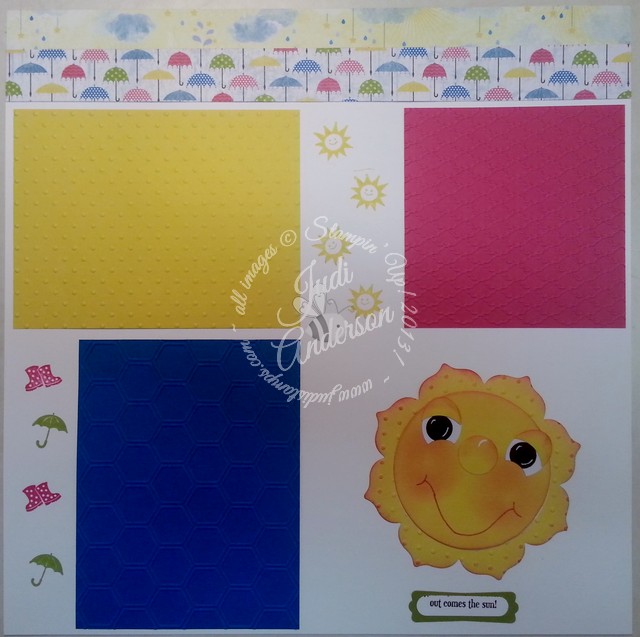
The ICS Blog Hop is bringing you Thinking of You projects this month. I am using the Peaceful Poppies Suite (153938) for this this memory page. The colors in the Peaceful Poppies Designer Series Paper (DSP) (151324) is fitting for just about any picture you put onto this page. I have a few pictures of my grandchildren playing last spring that will be perfect!

Painted Poppies Suite

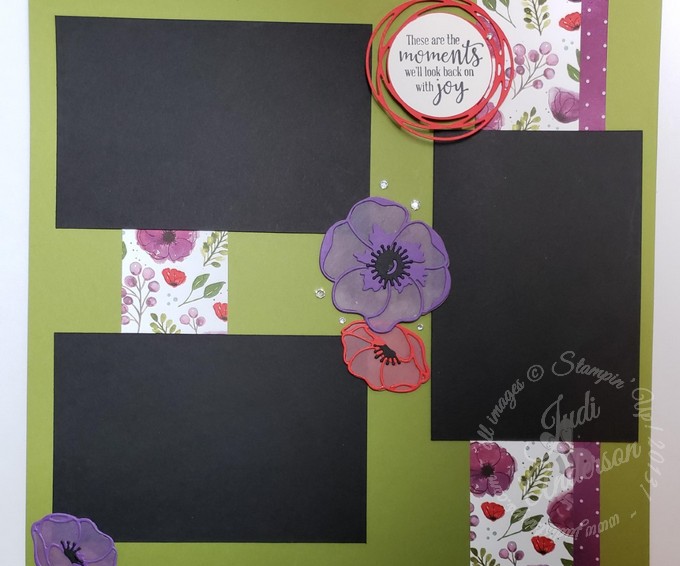
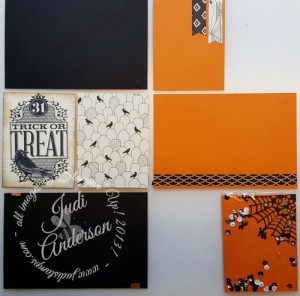
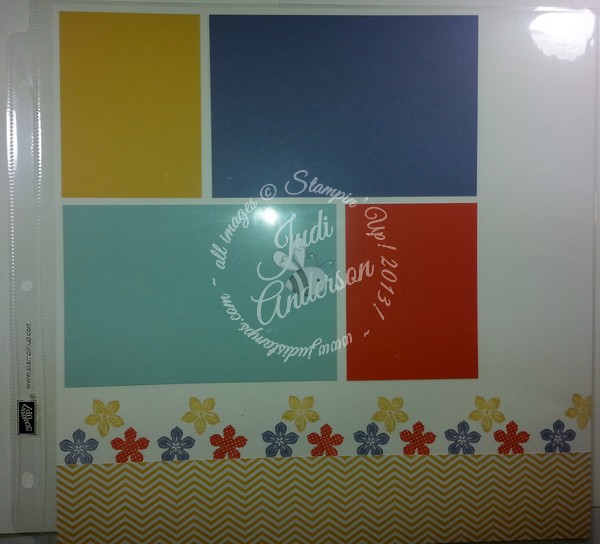
I used Old Olive as my page base then cut 2″ strips of the desired DSP pattern I wanted to use. To save on the DSP I cut the 2 1/2″ piece from where the black mat was going to cover.

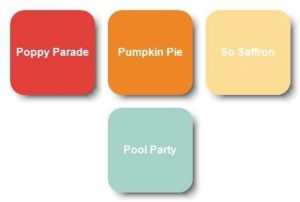
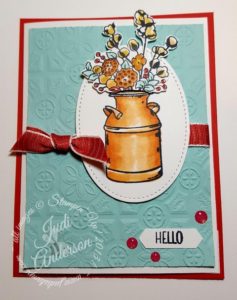
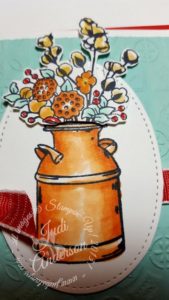
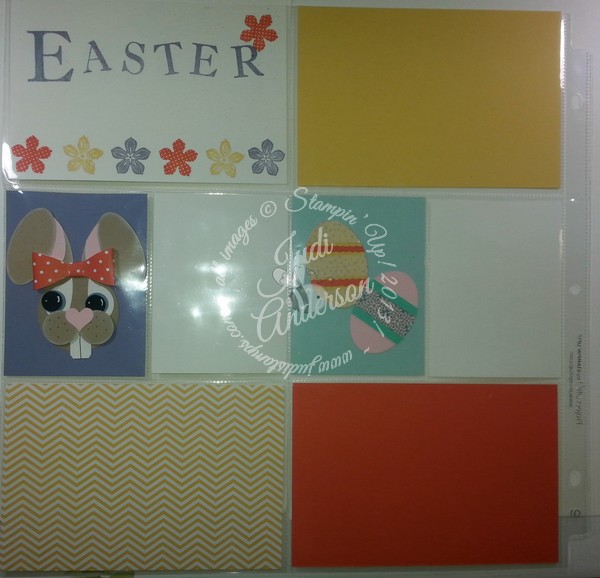
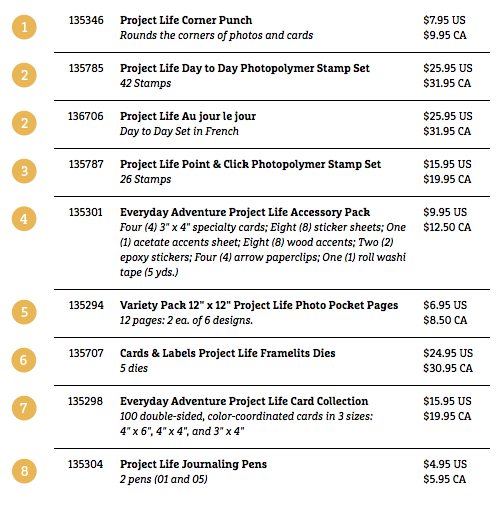
The flowers are the Poppy Moments Dies (151594) which can be bundled with the Peaceful Moments stamp set (151595) (Bundle#-153824). The flower bases are vellum that I colored on the back with Gorgeous Grape & Poppy Parade ink using our sponge brayers. I cut the detailed,outline die from the coordinating cardstock.

The swirly die that the title is layered onto is from the Painted Labels Die (151605) which can be bundled with the Painted Poppies stamp set(151599) (Bundle#-153827). The verse is found in the Peaceful Moments stamp set. Don’t pass this stamp set up if you scrapbook, there are a few verses perfect for memory pages!

You may be thinking, “But Judi. I thought this was supposed to be a thinking of you project.” In my mind it is because when we sit down and flip through the pages we can’t help but “thinking of each other” and the moments we spent together.

Let’s see what June is sharing with us this month.

buy Stampin Up! here!

Colour Challenge for Stampers By The Dozen October Hop

I love trying new color combinations and the color challenge for this month’s Stampers By The Dozen is a new combination for me. The colors we are to use are; Poppy Parade, Pumpkin Pie, So Saffron, and Pool Party. While this isn’t a combination of colors that I have thought of, I love them together! In fact, I love it SO MUCH, I will be sharing a few other projects with it this week!

I chose the Country Home stamp set,and the Tin Tile Dynamic Impressions Embossing Folder for my challenge card. I used a combination of our Stampin’ Write Markers and Stampin’ Blends to color the images.

Images © 1990 – 2018 Stampin’ Up! ®

In this close-up of the floral image you can see that I used, So Saffron  and Poppy Parade Stampin’ Write Markers to color the cotton and berry images. I used Pumpkin Pie and Pool Party, light and dark Stampin’ Blends to color the leaves and remaining floral images, and the milk can. And do you see those glitter dot embellishments? They are our the Glitter Enamel Dots (146934)! I love how the Melon Mambo dots take on the Poppy Parade color on this card.

Images © 1990 – 2018 Stampin’ Up! ®

Is it a combination you would have chosen on your own? Leave a comment and let me know. Personally, I have a tendency of choosing 3 colors, but these four colors work!

Let’s see what Susan has done with the color challenge!

24 Hour Sale coming next week!:

I don’t want to spoil the surprise just yet, but an exciting 24-hour sale is coming your way next week! I’ll share more details with you before the sale starts, so be sure to check back here and on my Facebook Page for details when I release them.

If you live in the USA and currently don’t have a Stampin’ Up! demonstrator that you work with, I would LOVE to be YOURS! I spoil my customers and would love to spoil you! Orders can be placed easily through my On Line store 24/7

Join the Fun

When you decide to join my HapBEE Stampers in Ink Team & the Stampin’ Up! family you pick your choice of $125 in current product and pay just $99! Contact me today for more information or get started right away on my website by clicking HERE!

buy Stampin Up! here!

Project Life Halloween Page & Save 15% off stamps!

Scrapping Friends created this Halloween Page this month and I know they will be excited to learn they can get the stamp sets used to create it at 15% off this week! Each month, Scrapping Friends get together to create 2 layouts and 3 Birthday cards and I get to choose the themes! I ask them what they would like in the future and then I design the pages for them to make. Sometimes they copy me exactly but other times their creative minds run! ( I like it when that happens!). They all have young children so Birthday’s, Holiday’s and Sports layouts are always welcomed. This month I brought them 2 different Halloween layouts to make, in each they created 1 traditional 12×12 page & 1 Project Life by Stampin’ Up! page ( they love Project Life). Here is the Project Life page.

Project Life Halloween They loved combining the different elements to coordinate with their first page. We used the Happy Haunting Designer Series Paper, the Witches’ Night Stamp set, Happy Hauntings Washi Tape, Spider Web Doilies, Metallic Sequins in creating the page.

Spider Web shaker pocketWe used a small cello bag to create this Spider Web Shaker Pocket to fit into one of the 3 x 4 pockets. Don’t you just love it? Adds lots of bling to the layout!

Witches' Night stamp set imageHappy Huntings Designer Series Paper


Don’t you just love, love,love how this pattern from the Happy Hauntings Designer Series Paper coordinates with the Witches’ Night stamp set (#139708)? Look closely. . .  do you see that those crows are sitting on tombstones!

I actually created the coordinating page to this one on Periscope last week, did you see it? You will want to be sure to catch my scopes because I share other exclusive, fun projects on my scopes.  Be sure to go to my ONLINE STORE to purchase your stamps because. . . .

Did you hear the news?? You can purchase stamp sets at 15 % off this week!! Here are the details:

Header_15-Stamps_Demo_10.19.2015_NA

Details:

  • Dates: October 19-23, 2015
  • Host stamp sets, rotary stamps, and supply list stamp sets are not eligible for the 15 percent promotional discount on stamps.
  • Bundles are not eligible for this promotional discount, but they will retain their current 15 percent Bundle & Save discount. The stamp set from the bundle may still be purchased ala carte with the 15 percent promotional discount.
  • Stamps purchased using a 50 percent Stampin’ Rewards discount will not be available for this 15 percent promotional discount. Stamps purchased using Stampin’ Rewards discounts will still be 50 percent off retail value of the stamp set.
  • All order types qualify for this promotion.
  • There is no limit to how many discounted stamp sets can be placed on an order.
  • There is no minimum purchase required for this promotion.
  • Order Deadlines:
    • Phone: October 23, 2015 by 6:50 PM (MT).  CALL ME- 630-853-1908 to place your order
    • Online THROUGH MY STORE: October 23, 2015 by 11:55 PM (MT).  Use Hostess Code 99NBFXKD


I just can’t believe it-Stampin’ Up! has all stamps on sale for 15 percent off for just a few days. This rarely happens, so check it out and get your stamps ordered today! Everyone that uses the HOSTESS CODE    99NBFXKD  will be receiving a special surprise from me in their mailbox!!

Don’t forget about the host promotion happening this month, too. You can combine orders (or simply order $300 on your own) to achieve extra Stampin’ Rewards AND deals on stamp sets!  PLEASE don’t use the hostess code if you choose this option!!

Til we meet again,

buy Stampin Up! here!


Wallet Album

I’ve been sharing our HapBEE Stamping & Crafting Getaway this past weekend on My Facebook page, Instagram and here. I can’t begin to tell you how grateful I am for all those who attended & all the nice things they said about their experience. In fact, they had so much fun over 2/3’s have already taken advantage of the preregistration we are running through June 25th       ( this Thursday). They were able to choose 4 classes from an assortment of 8 which included card making, techniques, & scrapbook related.

One of the classes was a wallet album that they created partly together and then finished up by personalizing it with the elements they received. The focus of this class was the Big Shot Die-Cutting Machine to create elements such as pockets, tags and the closure. We heard many ooo’s and ahhh’s as they were amazed at how the framelits, thinlits and embossing folders were transformed for their photo wallet.

I created a photo wallet for my class swap at convention last year and knew it would be a winner. We had a problem, the stamp set I used ( Stiple Blossoms) retired with the 2014-2015 Annual Catalog. That’s when we decided to recreate it with Big Shot elements.

Here is a picture of the photo wallet I created.

Photo Wallet using Stipple BlossomsCan you see it with all that clutter?? This is all I have of this photo wallet because I traded my sample with someone who really wanted it.

If you are attending the Scrapbook Expo in Schaumburg IL. in August I will have the sample from the Getaway for you to see. I will also have kits with all the supplies and instructions. I will share it in early September and I may have a few kits available to purchase after the Expo.

This is such  fun album to give to family and friends because it is so simple to carry with you to show off those too darn cute pictures of your family and pets.

buy Stampin Up! here!

Memory Monday

Memory Monday brings us pictures from the bridal shower my daughter-in-law & daughter did for my future daughter-in-law. They had to put this shower together in two weeks due to some unfortunate circumstances. I was amazed at the wonderful job they did in such little time. Everyone had a great time and the bride (and groom) received some wonderful gifts. I am a bit behind in getting these pictures into a book( the shower was held 1 1/2 years ago!), but I am getting them in and that is what is important. These pages are the first two of a four page layout. I am waiting on some pictures from others before I can finish the last two.

I used some products from the Stampin’ Up! 2014 Sale-A-Bration offerings for the pages. All four pages use the same colors and products. I also used a combination of Project Life by Stampin’ Up! and traditional 12×12 layouts. I am finding that by combining both I am able to finish my pages more quickly.

Bridal Shower, SAB 2014This first page was done on a traditional 12×12 page.

bridal shower sab 2014This second page was using a Project Life by Stampin’ Up! pocket page.

Here are both pages side by side.

Bridal Shower, SAB 2014bridal shower sab 2014I am catching up on my pages one layout at a time! To help make it a bit easier to do my pages I have put them into the divided pages, in my album. If you are behind, try following these baby steps and you just may not feel so overwhelmed when looking at that stack of pictures waiting to be put into albums.

  1. print 50 pictures
  2. put them together how you wish to put them into your album
  3. place them into divided Project Life by Stampin’ Up! pages
  4. plan how you want to do your layout, you can use a 12×12 full page if you want
  5. put together your 2-page layout
  6. when you have finished putting your 50 pictures onto pages start at step 1.

I hope this helps- please share what you have done & if this method helps you conquer your stacks of pictures!


Looking for a fun few days of stamping fun? Attend our New Annual Catalog Stamping & Scrapping Crafting Getaway! Click here for details.


Til we meet again,

buy Stampin Up! here!

Memory Monday

Today’s Memory Monday Page layout is a two page spread that I made for Easter. I loved creating this using one of our Project Life by Stampin’ Up! divided page protectors. This particular page has 4, 4″ x 6″ pockets and 4, 3″ x 4″ pockets.  Do you remember the bunny fry boxes I showed you how to make a few weeks ago?

1bunnyI made a bunny for one of the 3″x4″ pockets.

I used Wisteria Wonder for a mat, created the bunny using crumb cake carstock and the bow was created with our bow builder punch and the 2013-2015 In-Color Designer paper Stack.

1eggsFor one of the other pockets I made 2 eggs using our Oval Framelits, cardstock and washi tape. The other two pockets were filled with cardstock. I will either add pictures, journaling or more embellishments once I decide the pictures that will go onto this layout.

I stamped the title and flowers for one of the 4″x6″ pockets, the others have cardstock and Designer Series Paper inserted until it is time to finish the pages- here is the first page.

1easterpage

The second page is a single 12 x 12 page with color blocking using the same papers as the first page. I have left a space along the right edge to put the year and add a few more embellishments. I stamped the same flowers along the top edge of the Designer Series Paper to create a fun border.

1easterpage2

FREE SHIPPING ON ALL ORDERS APRIL 6-10 through my online store!


Join me at my Getaway on June 19-20. Click for information.

Til we meet again,

buy Stampin Up! here!


You Plus Me Memory Page Layout

You are going to love this on-trend memory page layout using the “You Plus Me” stamp set & our “Sweet Taffy” Designer Series Paper. You will find this layout quick and easy to create and it will hold from as little as two, and up to 12 pictures~ My kind of layout !. . . .

Enjoy this video on how to create it:

Shop Now!

Be sure to subscribe to my You Tube Channel  and don’t miss any of my videos!

Til we meet again,

buy Stampin Up! here!

Celebrate Today memory page

Today’s Monday’s Memory page layout uses our current Celebrate Today stamp set (p-137138) and will sure to fit several different occasions. I held back from adding a title because I am not sure if I will be using this for a picninc, birthday,block party or balloon fest theme (just to name a few that will fit). The Designer Series Paper that I used is retired but I found a few scraps that I wanted to use up. I am already planning on using our Sweet taffy ( 133693) and Flowerpot (133698) in another 2 layouts with the Celebrate Today stamp set.

Celebrate Today Balloons memory pageThe second page utilizes our retired divided page protectors ( I have a few left). I will be using our current Project Life by Stampin’ Up! variety pack (135294).

I will be putting the title onto this yellow balloon once I decide which pictures will be gracing these pages. I know I have alot of picture that will go onto these pages no matter the theme I decide on and that is one of the reasons I decided to use the divided page.

Celebrate Today balloons memory page 2 2I did keep a few more pieces of the Designer Series Paper used in case I decide to fill a few more of the inserrts as a backing for a photo or two.

Til we meet again,

buy Stampin Up! here!


Bootiful Occasions Memory page layout

Monday’s will be for Memories starting today! I will be sharing memory pages every Monday as I want to share ideas for your memory pages with what’s on trend and also using some of our retired products. Before we go any further I want to let you know that I am also doing this because I have to get on task doing my own memory books.  I am sure you are like me, you have a stash of Stampin’ Up! stamp sets, papers, and embellishments that you bought but have not used yet. And let’s not mention those boxes and boxes of pictures!!

Well, it’s time to get those papers, embellishments, and pictures out of the cabinets,boxes and shelves and use them!! Let’s incorporate those items with current  products, trends and ideas. I will show you how you can use the “old school” scrapbooking with the Stampin’ Up! Project Life system to get those memory books done. Some of the pages will have 1 page that is “old school” and 1 page that uses Stampin’ Up! Project Life protectors and products. I use the drop & crop method of scrapbooking so we will be creating pages then finding the photos to put on them after the page is completed. (I find this is so much quicker!!)

You can expect some of the layouts to have titles and some without. I believe in leaving room for as many pictures as you have to put on them so you will find that you can enlarge a photo to highlight it or crop many to fill the pages.

I will not only bring you photos of pages but will be bringing you videos and future LIVE EVENTS!

Let’s begin this journey together!

Our first layout combines some current product with retired product.

Bootiful Occasions memory page 1

The label under the title block says,”When the rain is done. . .”

I can’t wait to dig all those pictures of my children playing in the rain puddles! The Windows Frames Framelit Collection (129021) and Bootiful Occasions stamp set (w-131967 c-126597) and the solid cardstock are all still available through my online store.

The Designer Series paper and smaller stamps are retired but can be replaced with: our Sweet Taffy Designer Series Paper (133693) & images from our Think Happy stamp set (w-133967 c-133970)

Page 2 was so much fun to create!! The label under the sun says,” Out comes the sun!” Those wet, muddy little people with a rainbow are sure to find there way onto this page…

Bootiful Occassions memory page 2I had so much fun creating this sunny guy!

He was created with our Floral Frames Collection Framelits (127012) & our Circles Collection Framelits (130911), circle punches, small oval punch and a little sponging.

I bet you just want to squeeeeezze those cheeks!!!!!

Til we meet again,

buy Stampin Up! here!


Frightful Wreath stamp set, a Halloween memory page

The Frightful Wreath stamp set is perfect for this Halloween memory page layout I created using the Motley Monsters Designer Series Paper.Unlike our children, who always decided on their costumes 2 days before Halloween, I like to have my scrapbook page ready for the pictures. Our Motley Monsters Designer Series Paper inspired my layout for this years’ layout.

Our children are now grown but with two grand-daughters, the excitement of one of my favorite holidays for the children is back. I have always loved decorating, creating fun costumes for our children, see other children & dress up myself. This page was super easy to create taking my cues from the designer series paper. Because of the great images on this paper I just did some simple embellishments and picture mats.

Motley Monsters Halloween memory page

Til we meet again,

buy Stampin Up! here!

Little Trucks scrapbook pages

My Scrappin’ Friends monthly class love a variety of pages. I pulled out a few retired products for this layout- the Little Trucks stamp set & the Kaleidoscope Designer Series paper. They will do 2 2-page layouts each month, one being a simpler layout and one that takes a little more time to do. Who attends these classes? Young moms with toddlerrs and elementary aged children that have little time to scrapbook right now. They love the “crop & drop” method of scrapbooking where we make the lyouts then they go home to find pictures to put on. We also incorporate Project Life by Stampin’ Up! layouts into what we make. This is one of the layouts we made in our September Class.

little trucks boy scrapbook page  little trucks scrapbook page


They used the banner punch for the flags and our Stampin’ Write Markers that coordinated with the Kaleidoscope Designer Series Paper.


They will decide on the title for this layout once they find their pictures. Once they know they want to add the title they tell me, I bring a few alphabet stamp sets for them to add it.

If this sound like something you would love to do just contact me at: judi@judistamps.com and I will send you the details.

 Til we meet again,

buy Stampin Up! here!

Project Life is here!

Beginning today, May 1, you may pre-order Exclusive Stampin’ Up! Project Life products!

BH_StampinUpAnnounce_041514_01

Get ready for a scrapbooking revolution with Project Life! It helps busy people (so basically all of us) document life using photos and journaling in a quick, simple, and fabulous way. We’ve partnered with Becky Higgins, creator of Project Life, to offer a complete line of elite products.

blogimage2_projectlife_april1514_all

tableI will be sharing my Project Life project here. Be sure to subscribe so you don’t miss what I share!

Tile we meet again,

buy Stampin Up! here!

Polka-Dot Pieces stamp set

I can tell I am beginning to feel. I can sit up without being dizzy, I’m walking without feeling like I’m on a rocking boat & I spent more time creating this past week. I still can’t hear out of my right ear but I have been told it should be better soon. Maybe I shouldn’t tell dear hubby when it’s better so if I want to tune him out I can just blame it on my hearing loss!!

I enjoy creating my memory books for my children & they love receiving these books that all they have to do is pop in the pictures and do a little journaling. This layout will be put in the book for my son, daughter-in-law and my granddaughter. This particular book will be given to them as a family on Samantha’s first birthday in June. It contains 1 page for each month, a page for each of her “first” holidays and then a few 2-page layouts. I went to 3 different stamp sets; Happy Watercolor (w-133188,c-133191), Perfect Pennants (w-133227,c-133230) & Polka-Dot Pieces (w-129705,c-129708) for the theme of this layout. I know there will be a picture or two of the three of them that they will want to put onto these pages. I will be doing a few grandparents & aunt & uncle pages too.

Happy Watercolor stamp set

The colors of this layout will work with almost any outfits that they may be wearing in the pictures so I know we will find many that can go onto this layout. I  wanted to put embellishments on the pages that would co-ordinate with the polka dot pattern from the Birthday Basics Designer Series Paper (130145) without getting too busy. Don’t you agree that the Polka-Dots Pieces stamp set is just right?

Polka Dot Pieces detail


I used our Tiny Wave Stampin’ Trimmer

Rotary Cutting Blade (129409) for this detailed

edge of the strips. Using this blade made it quick to add this detail.


Polka - Dot Pieces stamp set


These 2 pages will be one of the two layouts that my scrapbook clubs will be creating this month. They will be able to choose from the Polka-Dot Pieces or the Blast Off stamp sets, everything else will remain the same. If you are in the area and would like to catch up on your memory book pages why not join us? Visit My Calendar of Events for details.


The stamp sets I used in this layout:

Happy Watercolor

Perfect Pennants

Polka-Dot Pieces

Til we meet again,

buy Stampin Up! here!


Click here to view the  Celebrate the Everyday Catalog.

Click here to view the Sale-A-Bration Catalog

Click here to view the Annual Catalog

You may purchase any of your stamping, scrap booking and paper crafting products through my online store.


Hello, Sailor

If you’ve been around here lately you’ll know I’ve been sharing some ideas using the Hello,Sailor stamp set. Once I started creating the ideas just came pouring out so I just kept on making more. To keep with the theme of the “Big Reveal” today I made a gift tag.  I’ll be honest, this gift tag will most likely find it’s way onto a scrapbook page. I am always looking for elements for pages for the time our family spends on the water boating. I will hold out because I may have a package that this will be perfect for.

Hello, Sailor gift tag

I love how the Hardwood Background stamp pulled in the natural feel I was going for. The circle is my idea of a porthole and although the Designer Series Paper pattern is is Summer Starfruit it still has the feel of waves (blue waves would have been expected!)

You can’t tell from this picture but the whale is in our Encore Gold ink and has a shimmer to it.

I love how the end result of this tag, which is a good thing. As I was putting it together it just wasn’t fitting together as I imagined in my mind. I just kept going and in the end it is close to what I was thinking of.

Here are the supplies:

Stamps: Hello, Sailor (w-133275 , c- 133278 )

Hardwood ( w-133032 , c-133035 )

Inks: Baked Brown Sugar (131296 ), Midnight Muse (126860 ) , Cherry Cobbler (126966 ) , Gold Encore (132141 ), Silver Encore (132142)

Paper: Crumb Cake (120953 ) , Midnight Muse (126843 ), Cherry Cobbler (119685 ) , Birthday Basics Designer Series Paper (130145 ), Whisper White (100730 )

Misc: Midnight Muse 3/8″ Stiched Satin  Ribbon (126684 ), Early Espresso Bakers Twine ( 123124 ) , Silver 1/8″ Mini Brads (122941 ) , Circles Collection  Framelits (130911 ) , Deco Labels Collection  Framelits (130102 ) , Oval Accent BigZ  Clear Die (127005 ), Big Shot (113439 ),Stampin’ Dimensionals (104430 )

Deco Label Framelits

Circles Collection Framelits

Oval Accents BigZ Clear Die

Hardwood Stamp

Hello Sailor stamp set


Til we meet again,

buy Stampin Up! here!